주요 콘텐츠로 건너뛰기

Acer Aspire R11 R3-131T-C1Z5 Hinges Replacement

필요한 것

  1. Acer Aspire R11 R3-131T-C1Z5 Hinges Replacement, Battery: 1 단계, 이미지 1/2 Acer Aspire R11 R3-131T-C1Z5 Hinges Replacement, Battery: 1 단계, 이미지 2/2
    • Flip the laptop on to its front, so that the back is facing up

    • Unscrew the twelve 19.05 mm PH#0 screws.

  2. Acer Aspire R11 R3-131T-C1Z5 Hinges Replacement: 2 단계, 이미지 1/2 Acer Aspire R11 R3-131T-C1Z5 Hinges Replacement: 2 단계, 이미지 2/2
    • At the left front corner of the laptop, under the intel sticker, press the sharp end of a metal spudger between the keyboard and the back cover to pry it apart.

  3. Acer Aspire R11 R3-131T-C1Z5 Hinges Replacement: 3 단계, 이미지 1/1
    이 단계에 사용된 도구:
    Anti-Static Wrist Strap
    $7.95
    구매
    • Connect the clip of an anti-static wrist strap to any piece of metal on the computer.

    • It is important to ground yourself to avoid static.

  4. Acer Aspire R11 R3-131T-C1Z5 Hinges Replacement: 4 단계, 이미지 1/2 Acer Aspire R11 R3-131T-C1Z5 Hinges Replacement: 4 단계, 이미지 2/2
    • Locate the large black rectangle at the bottom . This is your battery.

    • If you see that your battery is oozing or bulging, step away from the device.

    • Remove the black electric tape that is on the rainbow colored cable at the top of the battery.

    • Gently pull on the cable to disconnect.

  5. Acer Aspire R11 R3-131T-C1Z5 Hinges Replacement: 5 단계, 이미지 1/3 Acer Aspire R11 R3-131T-C1Z5 Hinges Replacement: 5 단계, 이미지 2/3 Acer Aspire R11 R3-131T-C1Z5 Hinges Replacement: 5 단계, 이미지 3/3
    • Remove the two 12.7 mm PH#0 screws. One of these screws is located on the top of the left side of the battery and the other is located in the top of the right side of the battery.

    • Remove the battery

  6. Acer Aspire R11 R3-131T-C1Z5 Hinges Replacement, Hinges: 6 단계, 이미지 1/2 Acer Aspire R11 R3-131T-C1Z5 Hinges Replacement, Hinges: 6 단계, 이미지 2/2
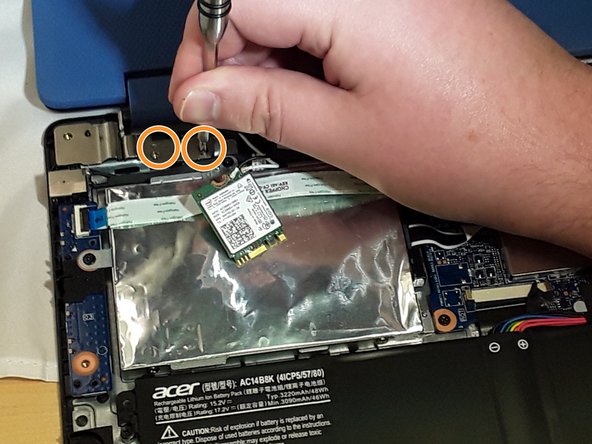
    • Located at the top are two silver plates that connect to the laptop screen. These are your hinges.

    • Remove the two 12.7 mm PH#0 screws on each hinge.

  7. Acer Aspire R11 R3-131T-C1Z5 Hinges Replacement: 7 단계, 이미지 1/1
    • Unscrew the four screws with a Phillips screwdriver.

  8. Acer Aspire R11 R3-131T-C1Z5 Hinges Replacement: 8 단계, 이미지 1/1
    • On the right side, locate the piece of clear tape connected to the cooling system (also called a heat sink).

    • Remove the clear tape from the cooling system.

    • Disconnect the cable.

    • Disconnect the wire located above the Hard Drive from the screen display.

  9. Acer Aspire R11 R3-131T-C1Z5 Hinges Replacement: 9 단계, 이미지 1/1
    • Insert the tip of the metal spudger at the seam to pry the screen display from the cover.

  10. Acer Aspire R11 R3-131T-C1Z5 Hinges Replacement: 10 단계, 이미지 1/1
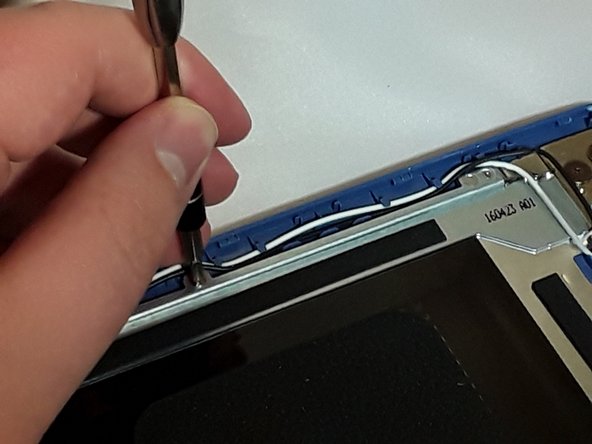
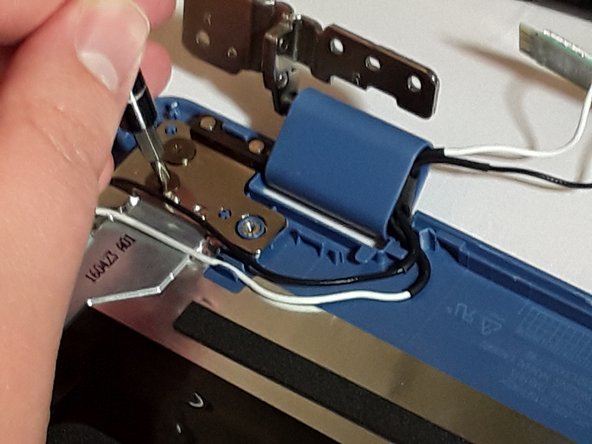
    • After the front and back of the screen are separated, look for any wires the may prevent complete separation. There are 2 wires located by the hinges.

    • Disconnect each wire and remove the tape if necessary. All screen wires tucked into the plastic part of the hinges can be exposed by pulling on them.

  11. Acer Aspire R11 R3-131T-C1Z5 Hinges Replacement: 11 단계, 이미지 1/1
    • Locate the metal hinge on each side of the blue half of the screen.

  12. Acer Aspire R11 R3-131T-C1Z5 Hinges Replacement: 12 단계, 이미지 1/3 Acer Aspire R11 R3-131T-C1Z5 Hinges Replacement: 12 단계, 이미지 2/3 Acer Aspire R11 R3-131T-C1Z5 Hinges Replacement: 12 단계, 이미지 3/3
    • Remove the five 12.7 mm PH#0 screws.

  13. Acer Aspire R11 R3-131T-C1Z5 Hinges Replacement: 13 단계, 이미지 1/1
    • Pull off the blue plastic located at the top of the hinge.

결론

To reassemble your device, follow these instructions in reverse order.

다른 한 분이 해당 안내서를 완성하였습니다.

Davyd Goff

회원 가입일: 09/27/17

464 평판

안내서 4개 작성하였습니다

댓글 2개

where would i get the new hindge?

koury warren - 답글

can’t do it i don’t what to brake the screen and buy a new one

Joel Lambert - 답글

댓글 쓰기

조회 통계:

24 시간 전: 0

7일 전: 0

30일 전: 3

전체 시간: 1,673