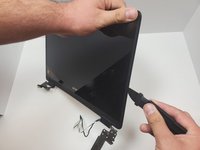
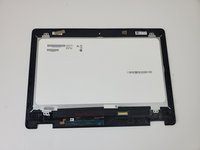
주요 콘텐츠로 건너뛰기

Acer Aspire R5-471T-52EE Screen Replacement

필요한 것

  1. Acer Aspire R5-471T-52EE Screen Replacement, Back Cover: 1 단계, 이미지 1/2 Acer Aspire R5-471T-52EE Screen Replacement, Back Cover: 1 단계, 이미지 2/2
    • Unplug the laptop and turn it off.

    • Remove the twelve 3mm screws using the Phillips #1 screwdriver.

  2. Acer Aspire R5-471T-52EE Screen Replacement: 2 단계, 이미지 1/1
    • With the hinges of the laptop pointing away from you, gently begin to pull on the portion between the two hinges towards yourself until you feel the cover pop off.

    • Remove the back cover from the device.

  3. Acer Aspire R5-471T-52EE Screen Replacement, Screen: 3 단계, 이미지 1/1
    • Disconnect the three wires from the motherboard that connect to the screen.

    • Be very gentle when removing these wires as the connections with the motherboard are delicate.

  4. Acer Aspire R5-471T-52EE Screen Replacement: 4 단계, 이미지 1/1
    • Remove the eight 3mm screws on the hinges using the Phillips #1 screwdriver.

    • Now that the hinges have been unfastened, carefully separate the screen and screen casing from the other half of the computer.

  5. Acer Aspire R5-471T-52EE Screen Replacement: 5 단계, 이미지 1/2 Acer Aspire R5-471T-52EE Screen Replacement: 5 단계, 이미지 2/2
    • Using a spudger or an opening pick, pop open the case holding the screen. Follow the line where the two pieces of the case meet all around the screen.

    • Remove the display assembly from the device.

결론

To install the screen and reassemble your device, follow these instructions in reverse order.

Arda Cetken

회원 가입일: 01/16/20

639 평판

안내서 6개 작성하였습니다

댓글 0개

댓글 쓰기

조회 통계:

24 시간 전: 0

7일 전: 0

30일 전: 6

전체 시간: 346