소개
The fan in your Acer Aspire R5-571T-57Z0 is what is used to prevent the laptop from overheating. There are many components within the Acer Aspire R5-571T-57Z0 that require lots of energy to operate and, as a result, generate lots of heat. The fan’s job is to prevent the laptop from getting hot enough to cause damage.
If your laptop feels hotter than normal, is emitting a burning scent, or suddenly shuts down, your fan may be damaged and require replacement. Before continuing with this guide and replacing your fan, make sure that the inside of your laptop is clean. If dust gets piled up inside the laptop, the heat generated may get trapped and result in the same symptoms previously mentioned. Our guide will show you how to access the inside of your computer to examine whether or not it needs to be cleaned. Consult our troubleshooting guide for more information.
This guide will show you how to replace the fan in your Acer Aspire R5-571T-57Z0. Before starting this guide, make sure to power off your computer and disconnect it from any external devices. Once these steps are taken, replacing your fan will be a simple process.
필요한 것
-
-
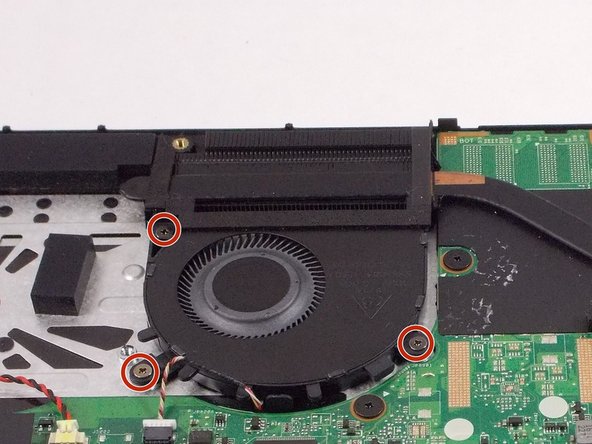
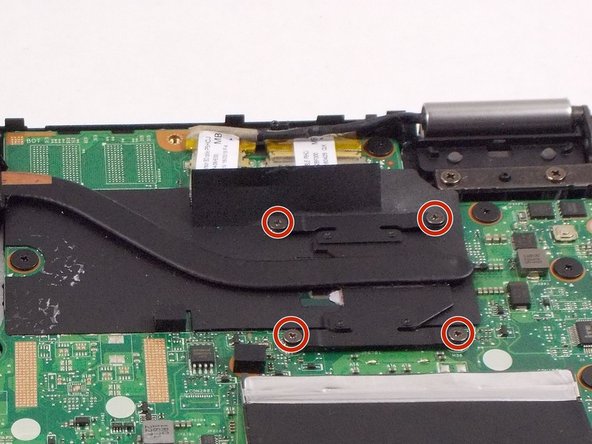
Remove twelve 4.0 mm screws from the back of the laptop using a Phillips #00 screwdriver.
-
-
-
-
Remove the three 4.0 mm screws from the battery using a Phillips #00 screwdriver.
-
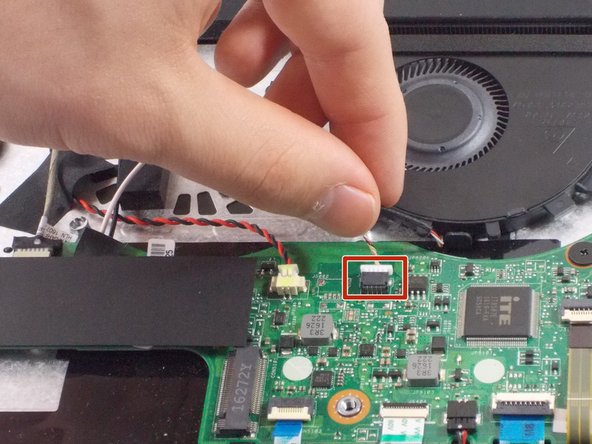
Unplug the cable connected to the RAM.
-
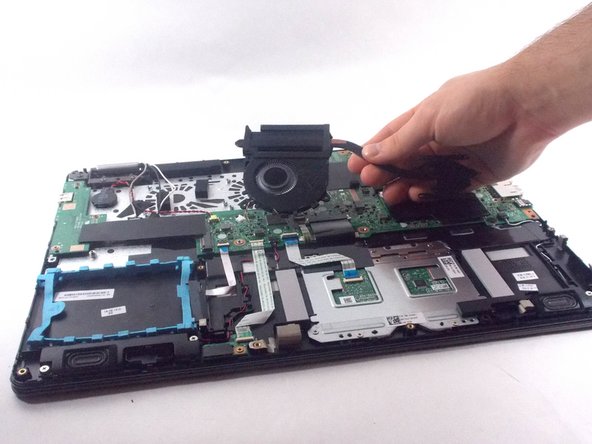
Carefully remove the battery.
-


To reassemble your device, follow these instructions in reverse order.
To reassemble your device, follow these instructions in reverse order.

팀

UMass Dartmouth, Team 1-2, Botvin Spring 2022 UMass Dartmouth, Team 1-2, Botvin Spring 2022 회원
UMASSD-BOTVIN-S22S1G2
3 회원들
안내서 5개 작성하였습니다