주요 콘텐츠로 건너뛰기

Acer Aspire S3-391-6046 Keyboard Replacement

필요한 것

  1. Acer Aspire S3-391-6046 Keyboard Replacement, Back Cover: 1 단계, 이미지 1/1
    • Place laptop upside down.

  2. Acer Aspire S3-391-6046 Keyboard Replacement: 2 단계, 이미지 1/2 Acer Aspire S3-391-6046 Keyboard Replacement: 2 단계, 이미지 2/2
    • Remove the twelve 5mm screws with a Phillips #1 screwdriver.

  3. Acer Aspire S3-391-6046 Keyboard Replacement: 3 단계, 이미지 1/1
    • Lift cover upwards away from you.

  4. Acer Aspire S3-391-6046 Keyboard Replacement, Keyboard: 4 단계, 이미지 1/3 Acer Aspire S3-391-6046 Keyboard Replacement, Keyboard: 4 단계, 이미지 2/3 Acer Aspire S3-391-6046 Keyboard Replacement, Keyboard: 4 단계, 이미지 3/3
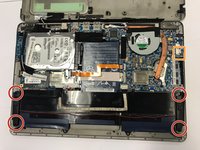
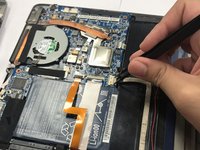
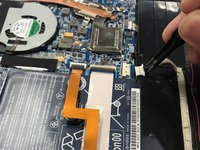
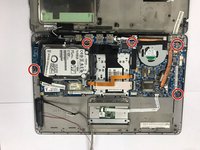
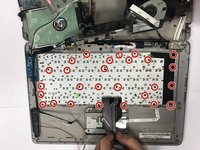
    • Remove the four Phillips #0 screws that are connected to the left and right speakers.

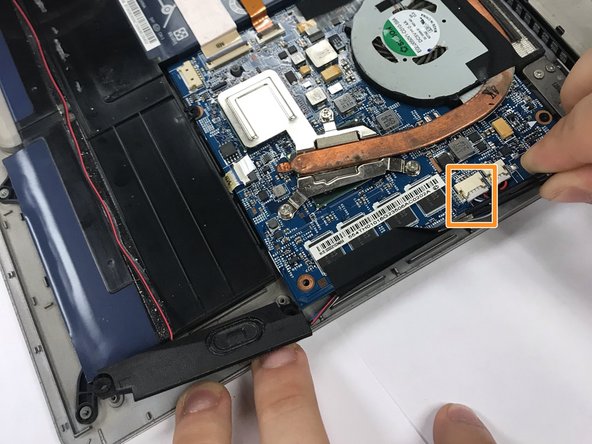
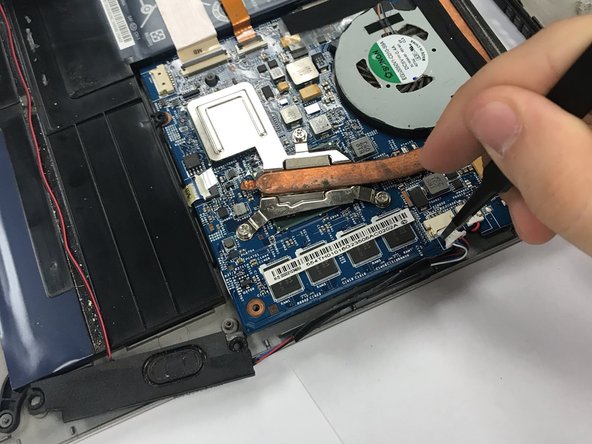
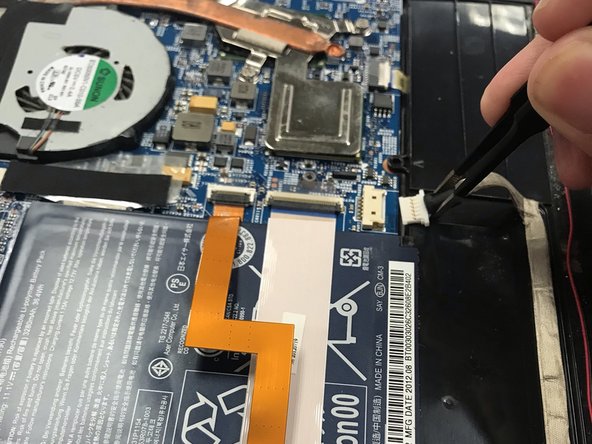
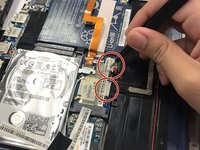
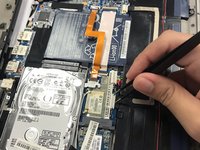
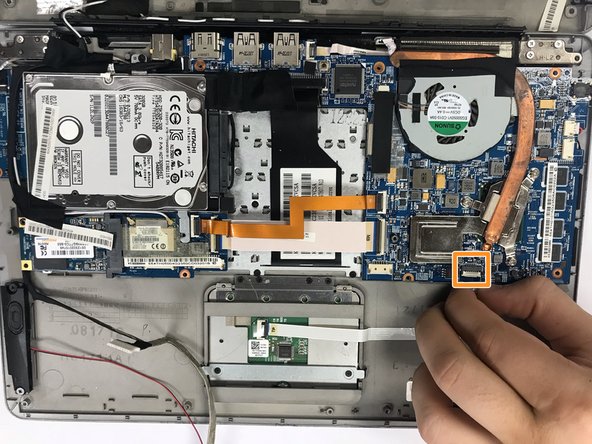
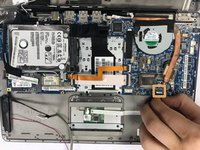
    • Carefully disconnect the wires that connect the speaker to the rest of the computer.

  5. Acer Aspire S3-391-6046 Keyboard Replacement: 5 단계, 이미지 1/1
    • Remove two Phillips #0 screws that are beside the ends of the gray wire.

  6. Acer Aspire S3-391-6046 Keyboard Replacement: 6 단계, 이미지 1/3 Acer Aspire S3-391-6046 Keyboard Replacement: 6 단계, 이미지 2/3 Acer Aspire S3-391-6046 Keyboard Replacement: 6 단계, 이미지 3/3
    • Remove the gray wire slowly with tweezers.

    • Carefully peel wire off.

  7. Acer Aspire S3-391-6046 Keyboard Replacement: 7 단계, 이미지 1/2 Acer Aspire S3-391-6046 Keyboard Replacement: 7 단계, 이미지 2/2
    • Slowly remove the two wires that are to the left of the battery with tweezers in an upward pulling motion.

  8. Acer Aspire S3-391-6046 Keyboard Replacement: 8 단계, 이미지 1/2 Acer Aspire S3-391-6046 Keyboard Replacement: 8 단계, 이미지 2/2
    • Completely remove the battery out of its position.

  9. Acer Aspire S3-391-6046 Keyboard Replacement: 9 단계, 이미지 1/2 Acer Aspire S3-391-6046 Keyboard Replacement: 9 단계, 이미지 2/2
    • Remove the five Phillips #0 screws that are on the border of the laptop.

    • Disconnect the white wire that is below the fan.

  10. Acer Aspire S3-391-6046 Keyboard Replacement: 10 단계, 이미지 1/2 Acer Aspire S3-391-6046 Keyboard Replacement: 10 단계, 이미지 2/2
    • Flip all of the circuits upwards.

    • Remove all Phillips #0 screws.

    • Remove the keyboard.

결론

To reassemble your device, follow these instructions in reverse order.

Brian Jimenez

회원 가입일: 09/18/18

145 평판

안내서 1개 작성함

University of North Texas, Team S3-G3, Raign Fall 2018 University of North Texas, Team S3-G3, Raign Fall 2018 회원

UNT-RAIGN-F18S3G3

4 회원들

안내서 6개 작성하였습니다

댓글 0개

댓글 쓰기

조회 통계:

24 시간 전: 1

7일 전: 5

30일 전: 6

전체 시간: 826