이 안내서에는 최근 변경 사항이 더 있습니다. 최신 비검증 버전으로 전환하십시오.
소개
Esta guía le enseña cómo reemplazar el disco duro en un Acer Aspire M5-581T-6807 Ultrabook.
-
-
Retire los 12 tornillos que aseguran el respaldo de la palma.
-
Levante lentamente el reposamuñecas hacia arriba en la parte delantera y deténgase cuando sienta que la holgura del cable se acaba.
-
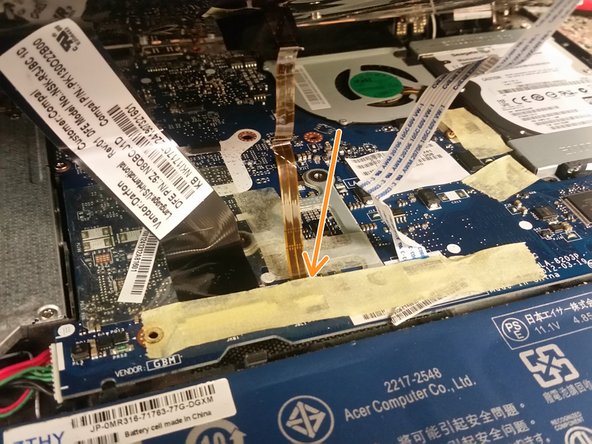
Retire la cinta que cubre los conectores.
-
-
-
-
Desbloquear los tres conectores y quitar los cables.
-
Continúe levantando el reposamuñecas hacia arriba en la parte delantera, hasta el punto de que se bisagra sobre la pantalla del portátil, para no tirar del cable restante en el reposamuñecas. No necesitas desconectar este.
Be careful of the smaller middle cable connector. In my case the top moveable white retianer of this small cable was not attached to motherboard portion and I had a very hard time getting it back in the right way round. Perhaps take a picture before detaching it and use a long thin tweezer to help inserting this little tab again once the cable is inserted.
As well, retain the tape. In my opinion is is vet important stability of all three cables to put it back after. Make sure the cables are in as deep as the can go and attach the tape as you work from left to right (broad cable first) - this adds stability as you work.
Also, when you have reatattched these afterwards, boot up the computer before snapping it all together and inserting all the back screws. Test the keyboard and trackpad to ensure the cables are in properly.
-
-
-
Retire los cuatro tornillos cortos que aseguran el carrito de disco duro a la base.
-
Retire los tornillos que sujetan el carrito al disco duro. ¡ Estás acabado!
-


Para volver a montar el dispositivo, siga estas instrucciones en orden inverso.
Para volver a montar el dispositivo, siga estas instrucciones en orden inverso.
다른 5명이 해당 안내서를 완성하였습니다.
다음 번역가들에게 특별히 감사 드립니다:
100%
Christopher Melo-Pelaez님은 저희가 세상을 수리하는데 동참하신 분입니다! 기여하시겠습니까?
번역 시작하기 ›
