주요 콘텐츠로 건너뛰기

Acer Aspire V3-551-8469 Hard Drive Replacement

필요한 것

  1. Acer Aspire V3-551-8469 Hard Drive Replacement, Hard Drive: 1 단계, 이미지 1/2 Acer Aspire V3-551-8469 Hard Drive Replacement, Hard Drive: 1 단계, 이미지 2/2
    • To release the battery, slide the orange tab to the right with a spudger.

    • The battery is now released and can be picked up and set to the side.

  2. Acer Aspire V3-551-8469 Hard Drive Replacement: 2 단계, 이미지 1/2 Acer Aspire V3-551-8469 Hard Drive Replacement: 2 단계, 이미지 2/2
    • Remove the two 5.3 mm Phillips #0 screws.

  3. Acer Aspire V3-551-8469 Hard Drive Replacement: 3 단계, 이미지 1/2 Acer Aspire V3-551-8469 Hard Drive Replacement: 3 단계, 이미지 2/2
    • Pull off the back panel.

  4. Acer Aspire V3-551-8469 Hard Drive Replacement: 4 단계, 이미지 1/1
    • Pull the plastic tab on top of the hard drive.

  5. Acer Aspire V3-551-8469 Hard Drive Replacement: 5 단계, 이미지 1/2 Acer Aspire V3-551-8469 Hard Drive Replacement: 5 단계, 이미지 2/2
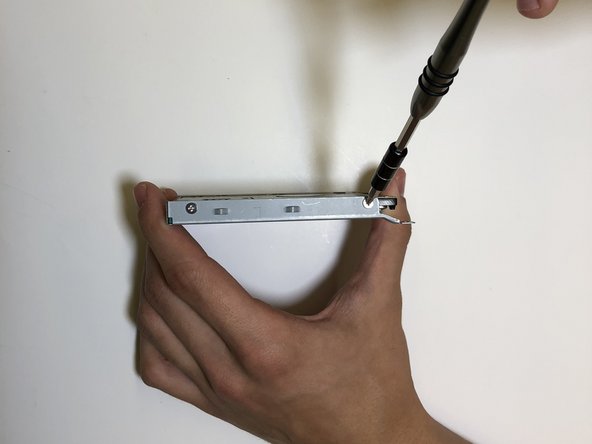
    • Remove the four 5.3 mm screws that secure the hard drive in the frame.

결론

After replacing the old hard drive, reassemble your device by following these instructions in reverse order.

다른 2명이 해당 안내서를 완성하였습니다.

Maritsa Garcia

회원 가입일: 10/22/18

800 평판

안내서 5개 작성하였습니다

Baylor, Team S1-G4, Williams Fall 2018 Baylor, Team S1-G4, Williams Fall 2018 회원

BU-WILLIAMS-F18S1G4

3 회원들

안내서 5개 작성하였습니다

댓글 0개

댓글 쓰기

조회 통계:

24 시간 전: 0

7일 전: 2

30일 전: 7

전체 시간: 564