소개
This guide provides in-depth instructions on how to remove the cover on the Acer Aspire V5-131-2629
Does your computer have a cracked or broken back plate? Do you need to get inside of your computer to replace internal components? This guide details the steps needed to remove the back cover on the Acer Aspire V5 laptop. To reassemble the back cover, just retrace the steps taken to remove the back cover.
Unfortunately, the Acer website has taken down information regarding this device. However, a basic, rather informal summary of the details and specs can be found at the following link:
++Acer Aspire V5-131-2629 prices and specs++
A general disassembly tutorial of the device can be found:
++How to Disassemble the Acer Aspire V5 131++
필요한 것
-
-
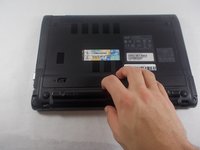
Carefully turn your Acer Aspire V5-131-2629 upside down, so that the battery cell is visible and nearest to you.
-
-


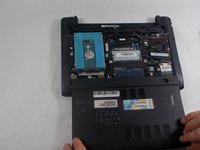
To reassemble your device, follow these instructions in reverse order.
To reassemble your device, follow these instructions in reverse order.
다른 한 분이 해당 안내서를 완성하였습니다.
팀

UMass Dartmouth, Team S1-G3, O'Connell Fall 2019 UMass Dartmouth, Team S1-G3, O'Connell Fall 2019 회원
UMASSD-O'CONNELL-F19S1G3
3 회원들
안내서 12개를 작성함