주요 콘텐츠로 건너뛰기

Acer Aspire V5-131-2629 Screen Replacement

필요한 것

  1. Acer Aspire V5-131-2629 Screen Replacement, Battery: 1 단계, 이미지 1/1
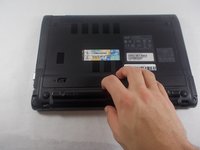
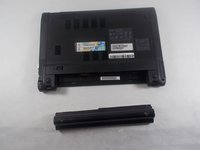
    • Carefully turn your Acer Aspire V5-131-2629 upside down, so that the battery cell is visible and nearest to you.

  2. Acer Aspire V5-131-2629 Screen Replacement: 2 단계, 이미지 1/1
    • Identify the small, oval slide switch on the left hand side of the laptop, directly above the battery.

  3. Acer Aspire V5-131-2629 Screen Replacement: 3 단계, 이미지 1/1
    • Insert an opening tool into the hole on the right side of the oval switch. Use the opening tool to slide the switch to the right.

  4. Acer Aspire V5-131-2629 Screen Replacement: 4 단계, 이미지 1/2 Acer Aspire V5-131-2629 Screen Replacement: 4 단계, 이미지 2/2
    • With the switch engaged to the right, firmly pull the battery out and towards yourself, parallel to your work surface.

  5. Acer Aspire V5-131-2629 Screen Replacement, Cover: 5 단계, 이미지 1/1
    • Remove the single Phillips #0 screw from the cover on the underside of the laptop.

  6. Acer Aspire V5-131-2629 Screen Replacement: 6 단계, 이미지 1/2 Acer Aspire V5-131-2629 Screen Replacement: 6 단계, 이미지 2/2
    • Remove the cover by sliding it outwards and remove it from the device.

  7. Acer Aspire V5-131-2629 Screen Replacement, Screen: 7 단계, 이미지 1/2 Acer Aspire V5-131-2629 Screen Replacement, Screen: 7 단계, 이미지 2/2
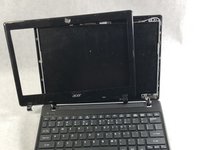
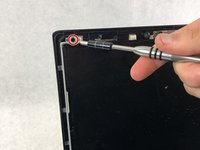
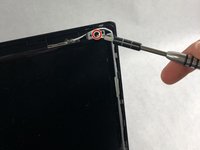
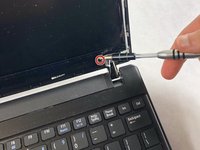
    • Remove the screen bezel by lifting up the inside rim of the bezel and popping the edge out in steady upwards and outwards motions.

    • Complete this motion around the entire circumference of the bezel.

  8. Acer Aspire V5-131-2629 Screen Replacement: 8 단계, 이미지 1/3 Acer Aspire V5-131-2629 Screen Replacement: 8 단계, 이미지 2/3 Acer Aspire V5-131-2629 Screen Replacement: 8 단계, 이미지 3/3
    • Remove the four Phillips screws from each of the mounting tabs in the corners of the screen.

  9. Acer Aspire V5-131-2629 Screen Replacement: 9 단계, 이미지 1/1
    • Peel back the adhesive tape that runs the length of the bottom of the screen.

    • Be careful not to damage the cables which run between the tape and the screen.

  10. Acer Aspire V5-131-2629 Screen Replacement: 10 단계, 이미지 1/1
    • Using the mounting tabs at the top corners of the screen, gently lift the screen up and out and lay it flat on the keyboard.

  11. Acer Aspire V5-131-2629 Screen Replacement: 11 단계, 이미지 1/1
    • Remove the adhesive tape covering the gold-colored connector on the top left corner of the screen.

결론

To reassemble your device, follow these instructions in reverse order.

Aaron Almeida

회원 가입일: 10/25/19

551 평판

안내서 4개 작성하였습니다

UMass Dartmouth, Team S1-G3, O'Connell Fall 2019 UMass Dartmouth, Team S1-G3, O'Connell Fall 2019 회원

UMASSD-O'CONNELL-F19S1G3

3 회원들

안내서 12개 작성하였습니다

댓글 0개

댓글 쓰기

조회 통계:

24 시간 전: 0

7일 전: 1

30일 전: 9

전체 시간: 532