주요 콘텐츠로 건너뛰기

Acer Aspire V5-571 HDD SATA Cable Replacement

필요한 것

동영상 개요

  1. Acer Aspire V5-571 HDD SATA Cable Replacement, Keyboard: 1 단계, 이미지 1/3 Acer Aspire V5-571 HDD SATA Cable Replacement, Keyboard: 1 단계, 이미지 2/3 Acer Aspire V5-571 HDD SATA Cable Replacement, Keyboard: 1 단계, 이미지 3/3
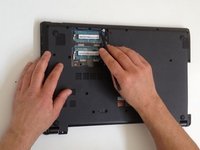
    • Turn off the laptop and remove the battery.

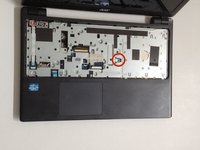
    • Remove two screws securing the Keyboard.

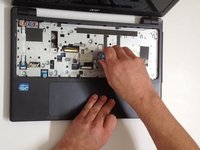
    • The Keyboard is held by two locking clips, under the battery. Use the sharp tip of a plastic tool to release the keyboard.

  2. Acer Aspire V5-571 HDD SATA Cable Replacement: 2 단계, 이미지 1/3 Acer Aspire V5-571 HDD SATA Cable Replacement: 2 단계, 이미지 2/3 Acer Aspire V5-571 HDD SATA Cable Replacement: 2 단계, 이미지 3/3
  3. Acer Aspire V5-571 HDD SATA Cable Replacement, Optical Drive: 3 단계, 이미지 1/3 Acer Aspire V5-571 HDD SATA Cable Replacement, Optical Drive: 3 단계, 이미지 2/3 Acer Aspire V5-571 HDD SATA Cable Replacement, Optical Drive: 3 단계, 이미지 3/3
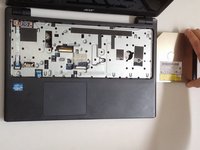
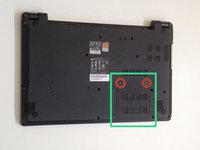
    • Remove the screw securing the Optical drive and gently press the drive to show slightly as at the second pic.

    • Slide the drive to the left and remove it.

  4. Acer Aspire V5-571 HDD SATA Cable Replacement, Upper  Cover: 4 단계, 이미지 1/3 Acer Aspire V5-571 HDD SATA Cable Replacement, Upper  Cover: 4 단계, 이미지 2/3 Acer Aspire V5-571 HDD SATA Cable Replacement, Upper  Cover: 4 단계, 이미지 3/3
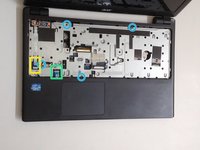
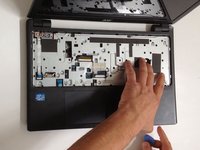
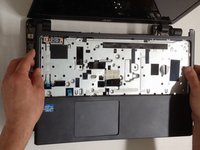
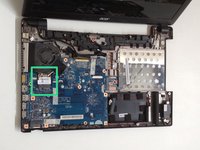
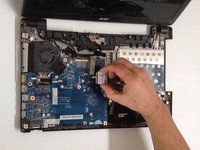
    • Remove 4x phillips screws and disconnect:

    • Power On button flex cable

    • Touch pad flex cable

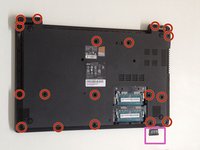
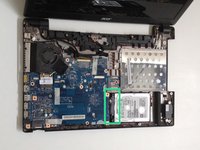
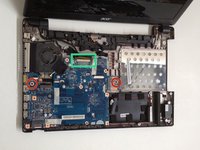
    • Remove 18x Phillips screws from the bottom cover.

    • Remove any memory SD Card from the Card reader.

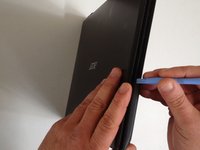
    • Start opening with a plastic opening tool.
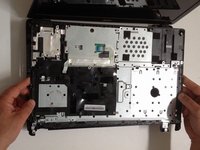
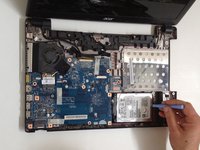
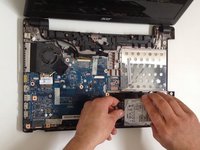
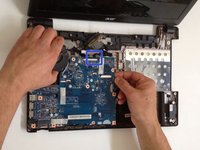
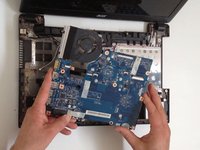
  5. Acer Aspire V5-571 HDD SATA Cable Replacement: 5 단계, 이미지 1/3 Acer Aspire V5-571 HDD SATA Cable Replacement: 5 단계, 이미지 2/3 Acer Aspire V5-571 HDD SATA Cable Replacement: 5 단계, 이미지 3/3
    • Carefully separate the upper cover and remove it.

  6. Acer Aspire V5-571 HDD SATA Cable Replacement, HDD (Hard Disk Drive): 6 단계, 이미지 1/3 Acer Aspire V5-571 HDD SATA Cable Replacement, HDD (Hard Disk Drive): 6 단계, 이미지 2/3 Acer Aspire V5-571 HDD SATA Cable Replacement, HDD (Hard Disk Drive): 6 단계, 이미지 3/3
  7. Acer Aspire V5-571 HDD SATA Cable Replacement, Wi-Fi Half Mini PCIe card: 7 단계, 이미지 1/2 Acer Aspire V5-571 HDD SATA Cable Replacement, Wi-Fi Half Mini PCIe card: 7 단계, 이미지 2/2
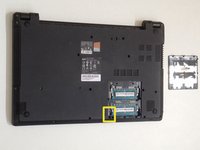
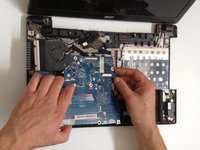
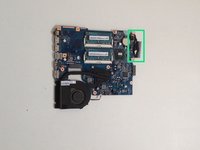
    • Remove one Phillips screw, securing th WLan card and disconnect the two coaxial antenna cables.

    • Remove the Wi-Fi card.

  8. Acer Aspire V5-571 HDD SATA Cable Replacement, Mother Board: 8 단계, 이미지 1/3 Acer Aspire V5-571 HDD SATA Cable Replacement, Mother Board: 8 단계, 이미지 2/3 Acer Aspire V5-571 HDD SATA Cable Replacement, Mother Board: 8 단계, 이미지 3/3
    • Remove the Memory Cover.

    • Disconnect the Loudspeaker cable connector.

  9. Acer Aspire V5-571 HDD SATA Cable Replacement: 9 단계, 이미지 1/3 Acer Aspire V5-571 HDD SATA Cable Replacement: 9 단계, 이미지 2/3 Acer Aspire V5-571 HDD SATA Cable Replacement: 9 단계, 이미지 3/3
    • Remove two Phillips screw from the Mother board and from the Optical drive SATA adapter.

    • Disconnect the LCD Display flex cable.

    • Disconnect the DC Jack cable.

    • Carefully remove the Optical drive SATA adapter.

    • We will disconnect the battery cable when we pick up the board.

  10. Acer Aspire V5-571 HDD SATA Cable Replacement: 10 단계, 이미지 1/3 Acer Aspire V5-571 HDD SATA Cable Replacement: 10 단계, 이미지 2/3 Acer Aspire V5-571 HDD SATA Cable Replacement: 10 단계, 이미지 3/3
    • Carefully pick up the Mother board and disconnect the Battery cable.

  11. Acer Aspire V5-571 HDD SATA Cable Replacement, HDD SATA Cable: 11 단계, 이미지 1/2 Acer Aspire V5-571 HDD SATA Cable Replacement, HDD SATA Cable: 11 단계, 이미지 2/2
    • 13 pin SATA HDD Cable Adapter.

    • .

    • .

    • .

    • .

    • .

    • Did you do it successfully?

결론

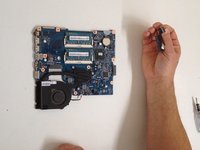
To reassemble your device, follow these instructions in reverse order.

ZFix

회원 가입일: 12/09/13

191,341 평판

안내서 330개 작성하였습니다

Master Techs Master Techs 회원

Community

322 회원들

안내서 2,541개 작성하였습니다

댓글 0개

댓글 쓰기

조회 통계:

24 시간 전: 1

7일 전: 4

30일 전: 26

전체 시간: 4,685