소개
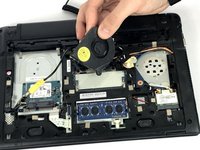
In this replacement guide, you will learn how to safely remove and install a cooling fan.
필요한 것
-
-
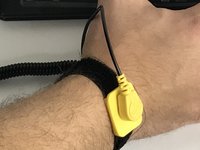
이 단계에 사용된 도구:Anti-Static Wrist Strap$7.95
-
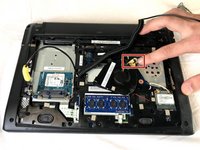
Now take your anti-static wrist strap and place it tightly on your wrist.
-
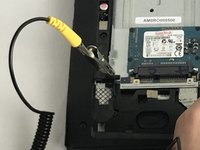
Attach the alligator clamp of the wrist strap to something that will ground yourself to avoid possible electric zaps.
-


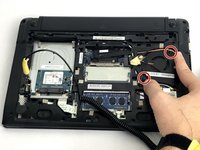


To reassemble your device, follow these instructions in reverse order.
To reassemble your device, follow these instructions in reverse order.
다른 한 분이 해당 안내서를 완성하였습니다.
팀

USF Tampa, Team S1-G6, Nance Fall 2017 USF Tampa, Team S1-G6, Nance Fall 2017 회원
USFT-NANCE-F17S1G6
4 회원들
안내서 10개를 작성함