주요 콘텐츠로 건너뛰기

Acer Chromebook C720-2827 Keyboard Replacement

필요한 것

  1. Acer Chromebook C720-2827 Keyboard Replacement, Back Panel Assembly: 1 단계, 이미지 1/2 Acer Chromebook C720-2827 Keyboard Replacement, Back Panel Assembly: 1 단계, 이미지 2/2
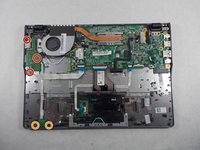
    • Remove the thirteen 6.0mm screws on the back panel using your Phillips #1 screwdriver.

  2. Acer Chromebook C720-2827 Keyboard Replacement: 2 단계, 이미지 1/2 Acer Chromebook C720-2827 Keyboard Replacement: 2 단계, 이미지 2/2
    • Pry the back panel open with the plastic opening tool.

  3. Acer Chromebook C720-2827 Keyboard Replacement, Battery: 3 단계, 이미지 1/1
    • Remove the two 6.0mm screws securing the battery with your Phillips #1 screwdriver.

  4. Acer Chromebook C720-2827 Keyboard Replacement: 4 단계, 이미지 1/2 Acer Chromebook C720-2827 Keyboard Replacement: 4 단계, 이미지 2/2
    • Carefully pull out the battery wire connected to the battery port.

  5. Acer Chromebook C720-2827 Keyboard Replacement: 5 단계, 이미지 1/1
    • Slowly lift the battery to remove it from the Chromebook.

  6. Acer Chromebook C720-2827 Keyboard Replacement, Solid State Drive: 6 단계, 이미지 1/2 Acer Chromebook C720-2827 Keyboard Replacement, Solid State Drive: 6 단계, 이미지 2/2
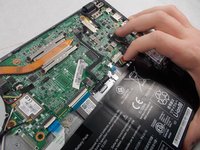
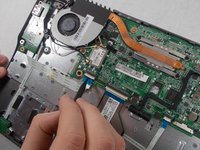
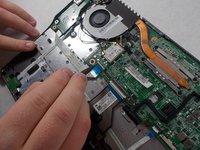
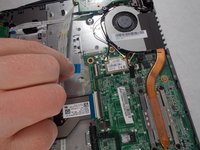
    • Remove the single 3.0mm screw securing the solid state drive using a Phillips #1 screwdriver.

  7. Acer Chromebook C720-2827 Keyboard Replacement: 7 단계, 이미지 1/2 Acer Chromebook C720-2827 Keyboard Replacement: 7 단계, 이미지 2/2
    • Carefully pull out the solid state drive using two fingers.

  8. Acer Chromebook C720-2827 Keyboard Replacement, Speakers: 8 단계, 이미지 1/2 Acer Chromebook C720-2827 Keyboard Replacement, Speakers: 8 단계, 이미지 2/2
    • Unplug the speaker wire from the motherboard.

  9. Acer Chromebook C720-2827 Keyboard Replacement: 9 단계, 이미지 1/2 Acer Chromebook C720-2827 Keyboard Replacement: 9 단계, 이미지 2/2
    • Carefully pull out the speakers from each side of the Chromebook.

  10. Acer Chromebook C720-2827 Keyboard Replacement, USB Port/SD Card Reader: 10 단계, 이미지 1/3 Acer Chromebook C720-2827 Keyboard Replacement, USB Port/SD Card Reader: 10 단계, 이미지 2/3 Acer Chromebook C720-2827 Keyboard Replacement, USB Port/SD Card Reader: 10 단계, 이미지 3/3
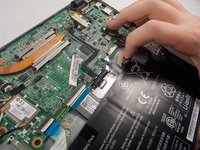
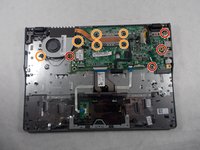
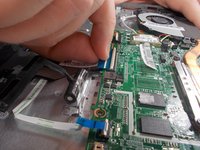
    • Remove the three 6.0mm screws using the Phillips #1 screwdriver.

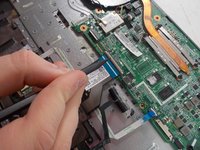
    • Remove the two 3.0mm screws using the Phillips #1 screwdriver.

  11. Acer Chromebook C720-2827 Keyboard Replacement: 11 단계, 이미지 1/2 Acer Chromebook C720-2827 Keyboard Replacement: 11 단계, 이미지 2/2
    • Position the spudger under the switch that connects the ribbon cable to the motherboard.

    • Flick the spudger up to flip the switch up.

  12. Acer Chromebook C720-2827 Keyboard Replacement: 12 단계, 이미지 1/2 Acer Chromebook C720-2827 Keyboard Replacement: 12 단계, 이미지 2/2
    • Pull the blue tab on the ribbon cable to remove it.

  13. Acer Chromebook C720-2827 Keyboard Replacement: 13 단계, 이미지 1/2 Acer Chromebook C720-2827 Keyboard Replacement: 13 단계, 이미지 2/2
    • Grab the edges of each piece of circuitry that is included with the SD Card Reader and USB Port.

    • Pull each piece of circuitry out of the Chromebook and remove it from the device.

  14. Acer Chromebook C720-2827 Keyboard Replacement: 14 단계, 이미지 1/2 Acer Chromebook C720-2827 Keyboard Replacement: 14 단계, 이미지 2/2
    • Position the spudger under the switch.

    • Flick the spudger up to flip the switch up.

  15. Acer Chromebook C720-2827 Keyboard Replacement: 15 단계, 이미지 1/2 Acer Chromebook C720-2827 Keyboard Replacement: 15 단계, 이미지 2/2
    • Pull on the blue tab of the ribbon cable to remove the ribbon cable.

    • Repeat the previous step and this step with the other ribbon cable that is attached to the SD Card Reader/USB Port.

  16. Acer Chromebook C720-2827 Keyboard Replacement, Motherboard: 16 단계, 이미지 1/2 Acer Chromebook C720-2827 Keyboard Replacement, Motherboard: 16 단계, 이미지 2/2
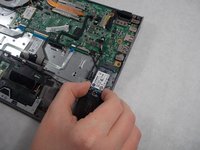
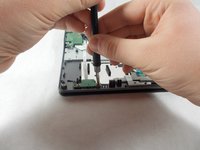
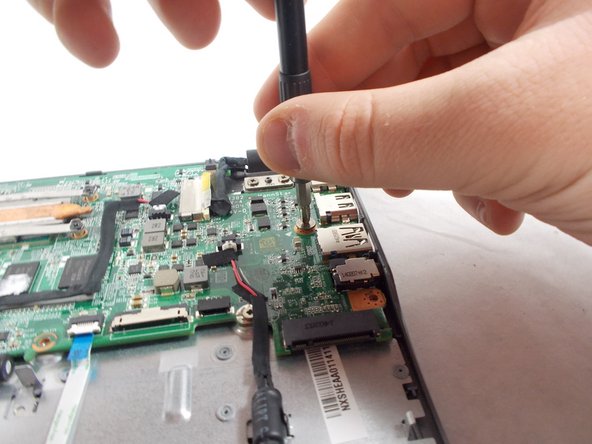
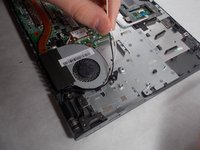
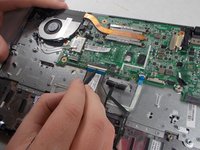
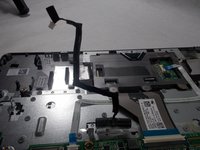
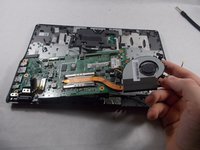
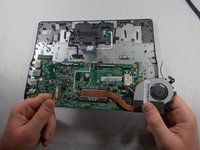
    • Using the Phillips #1 screwdriver, remove the four 3.0mm screws.

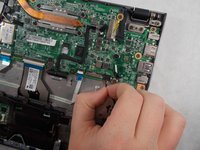
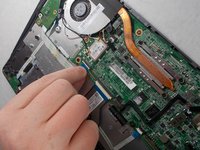
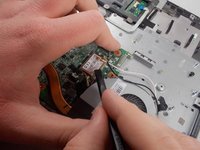
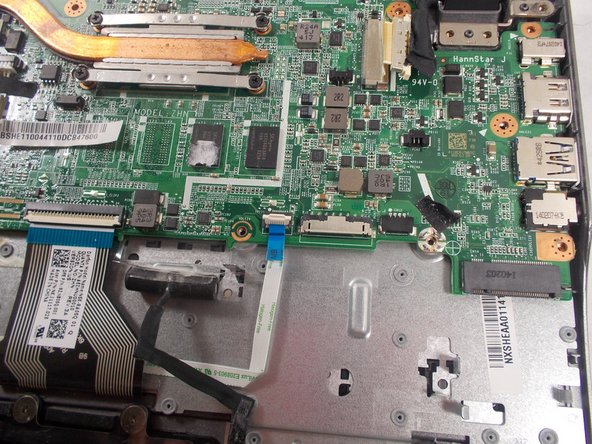
    • Loosen the six 3.0mm CPU screws using the Phillips #1 screwdriver.

    • The six 3.0mm CPU screws do not come out of the motherboard.

  17. Acer Chromebook C720-2827 Keyboard Replacement: 17 단계, 이미지 1/2 Acer Chromebook C720-2827 Keyboard Replacement: 17 단계, 이미지 2/2
    • Grab the wire for the two pin connector.

    • Pull the wire to disconnect it from the motherboard.

  18. Acer Chromebook C720-2827 Keyboard Replacement: 18 단계, 이미지 1/2 Acer Chromebook C720-2827 Keyboard Replacement: 18 단계, 이미지 2/2
    • Place the back of the spudger under the black wire that connects the wireless card to the motherboard.

    • Flick the spudger up to disconnect the cable from the motherboard.

  19. Acer Chromebook C720-2827 Keyboard Replacement: 19 단계, 이미지 1/2 Acer Chromebook C720-2827 Keyboard Replacement: 19 단계, 이미지 2/2
    • Place the back of the spudger under the white coaxial antenna wire that connects the wireless card to the motherboard.

    • Flick the spudger up to disconnect the cable from the motherboard.

  20. Acer Chromebook C720-2827 Keyboard Replacement: 20 단계, 이미지 1/2 Acer Chromebook C720-2827 Keyboard Replacement: 20 단계, 이미지 2/2
    • Take both wires and unravel them from the CPU fan.

  21. Acer Chromebook C720-2827 Keyboard Replacement: 21 단계, 이미지 1/2 Acer Chromebook C720-2827 Keyboard Replacement: 21 단계, 이미지 2/2
    • Firmly grasp the red, yellow, and white cords with two fingers.

    • Pull the cords to unplug it.

  22. Acer Chromebook C720-2827 Keyboard Replacement: 22 단계, 이미지 1/2 Acer Chromebook C720-2827 Keyboard Replacement: 22 단계, 이미지 2/2
    • Position the spudger under the switch of the big ribbon cable.

    • Flick the spudger up to flip the switch up.

  23. Acer Chromebook C720-2827 Keyboard Replacement: 23 단계, 이미지 1/2 Acer Chromebook C720-2827 Keyboard Replacement: 23 단계, 이미지 2/2
    • Grab the blue tab of the ribbon cable.

    • Pull on the blue tab to disconnect the ribbon cable.

  24. Acer Chromebook C720-2827 Keyboard Replacement: 24 단계, 이미지 1/3 Acer Chromebook C720-2827 Keyboard Replacement: 24 단계, 이미지 2/3 Acer Chromebook C720-2827 Keyboard Replacement: 24 단계, 이미지 3/3
    • Grab the red and black cable near the display cables, this is the cable to the other two pin connector.

    • Pull on the wire to disconnect it from the motherboard.

    • Flip the wire and the connector up to move it out of the way.

  25. Acer Chromebook C720-2827 Keyboard Replacement: 25 단계, 이미지 1/2 Acer Chromebook C720-2827 Keyboard Replacement: 25 단계, 이미지 2/2
    • Position the spudger under the switch for the smaller ribbon cable.

    • Flick the spudger up to flip the smaller switch up.

  26. Acer Chromebook C720-2827 Keyboard Replacement: 26 단계, 이미지 1/2 Acer Chromebook C720-2827 Keyboard Replacement: 26 단계, 이미지 2/2
    • Grab the blue tab on the ribbon cable.

    • Pull on the tab to disconnect the ribbon cable from the motherboard.

  27. Acer Chromebook C720-2827 Keyboard Replacement: 27 단계, 이미지 1/2 Acer Chromebook C720-2827 Keyboard Replacement: 27 단계, 이미지 2/2
    • Position the back of the spudger at the edge of the tape that holds the display cable in.

    • Peel the tape back so it is out of the way.

  28. Acer Chromebook C720-2827 Keyboard Replacement: 28 단계, 이미지 1/2 Acer Chromebook C720-2827 Keyboard Replacement: 28 단계, 이미지 2/2
    • Position the back of the spudger on the display cable.

    • Push the display cable out using the back of the spudger.

  29. Acer Chromebook C720-2827 Keyboard Replacement: 29 단계, 이미지 1/2 Acer Chromebook C720-2827 Keyboard Replacement: 29 단계, 이미지 2/2
    • Lift up the CPU fan to ensure that no wires are tangled. If the black and white wires are tangles please repeat step 5.

    • Lift up the other end of the motherboard to completely remove the motherboard.

  30. Acer Chromebook C720-2827 Keyboard Replacement, Keyboard: 30 단계, 이미지 1/2 Acer Chromebook C720-2827 Keyboard Replacement, Keyboard: 30 단계, 이미지 2/2
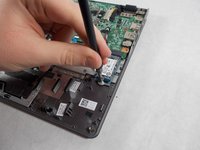
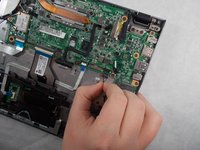
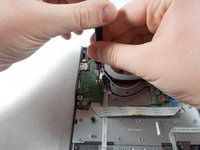
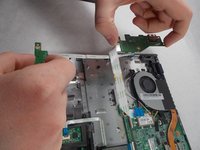
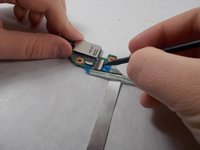
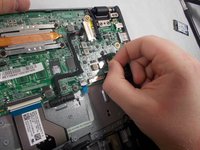
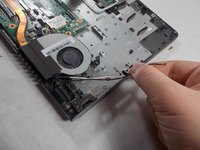
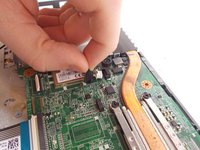
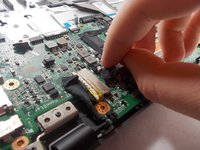
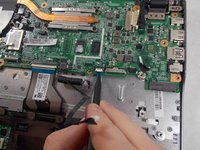
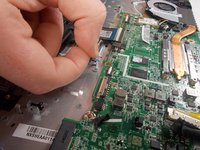
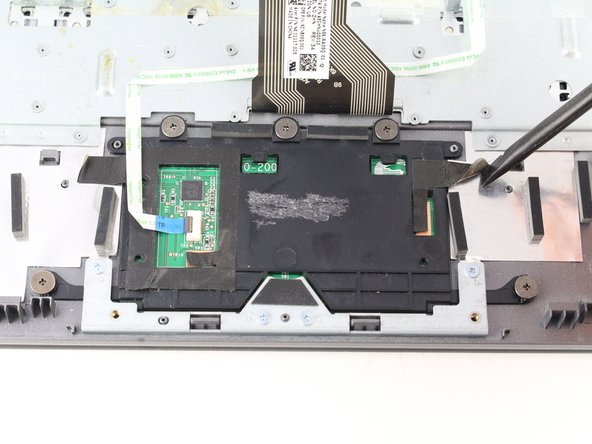
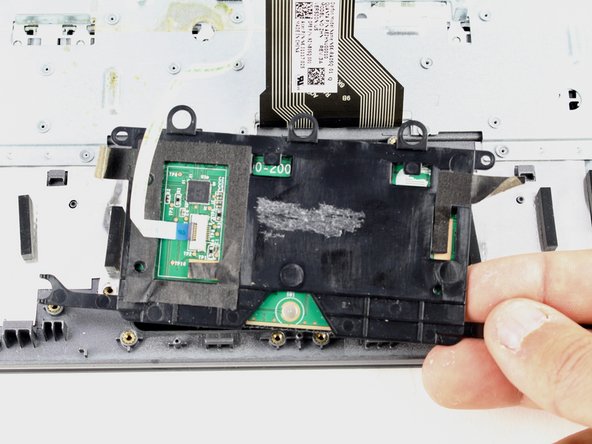
    • Remove the two 3.7 mm screws with a Phillips #1 screwdriver.

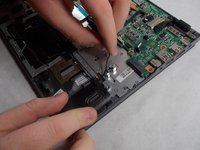
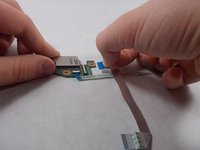
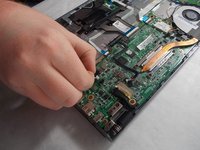
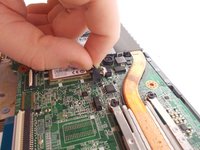
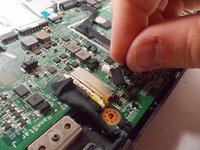
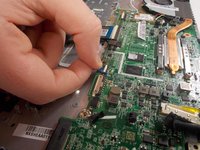
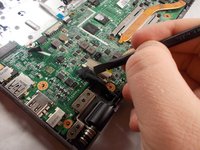
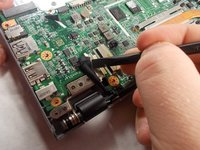
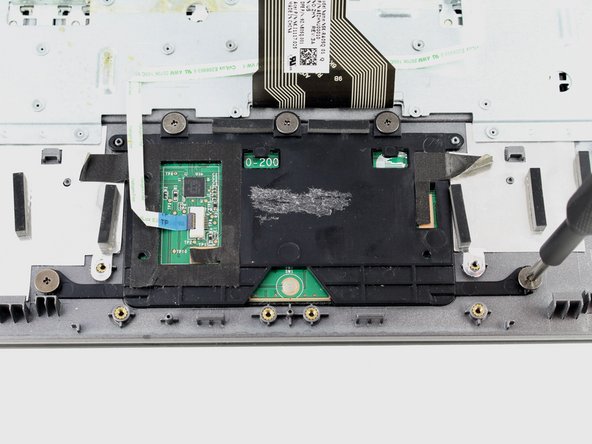
    • Remove another two 5.7mm screws with a Phillips #1 screwdriver.

  31. Acer Chromebook C720-2827 Keyboard Replacement: 31 단계, 이미지 1/1
    • Open the laptop and separate the display from the keyboard.

  32. Acer Chromebook C720-2827 Keyboard Replacement: 32 단계, 이미지 1/2 Acer Chromebook C720-2827 Keyboard Replacement: 32 단계, 이미지 2/2
    • Lift up the tape on either side of the trackpad.

  33. Acer Chromebook C720-2827 Keyboard Replacement: 33 단계, 이미지 1/3 Acer Chromebook C720-2827 Keyboard Replacement: 33 단계, 이미지 2/3 Acer Chromebook C720-2827 Keyboard Replacement: 33 단계, 이미지 3/3
    • Remove four silver 2.9 mm screws with your Phillips #1 screwdriver.

    • Lift the metal bracket from the case.

  34. Acer Chromebook C720-2827 Keyboard Replacement: 34 단계, 이미지 1/3 Acer Chromebook C720-2827 Keyboard Replacement: 34 단계, 이미지 2/3 Acer Chromebook C720-2827 Keyboard Replacement: 34 단계, 이미지 3/3
    • Remove five grey 2.5 mm screws with the Phillips #1 screwdriver.

    • Lift the trackpad from the case.

  35. Acer Chromebook C720-2827 Keyboard Replacement: 35 단계, 이미지 1/2 Acer Chromebook C720-2827 Keyboard Replacement: 35 단계, 이미지 2/2
    • What remains is the keyboard assembly to be replaced.

결론

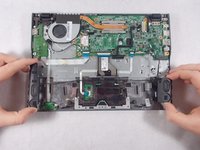
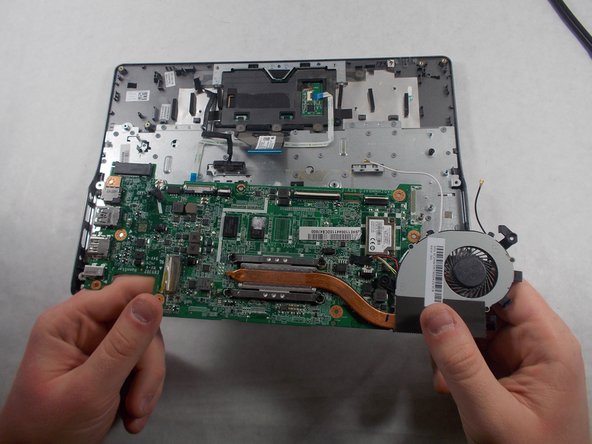
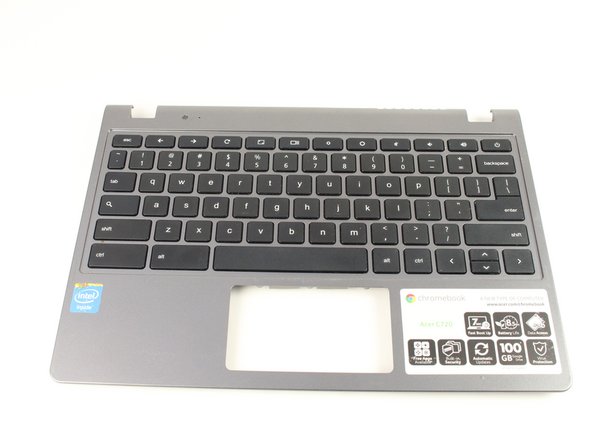
To reassemble your device, follow these instructions in reverse order. Be sure to reassemble onto your new keyboard!

Austin Blakely

회원 가입일: 03/11/19

19,470 평판

안내서 53개 작성하였습니다

iFixit iFixit 회원

Staff

135 회원들

안내서 16,722개 작성하였습니다

댓글 0개

댓글 쓰기

조회 통계:

24 시간 전: 0

7일 전: 0

30일 전: 2

전체 시간: 356