주요 콘텐츠로 건너뛰기

Acer Chromebook C740 Motherboard Replacement

필요한 것

  1. Acer Chromebook C740 Motherboard Replacement, Back Panel: 1 단계, 이미지 1/1
    • Power down the Chromebook and disconnect the power adapter.

  2. Acer Chromebook C740 Motherboard Replacement: 2 단계, 이미지 1/2 Acer Chromebook C740 Motherboard Replacement: 2 단계, 이미지 2/2
    • Place the chromebook bottom side up on a flat surface.

    • Remove the thirteen 7 mm screws with a Phillips #0 screwdriver.

  3. Acer Chromebook C740 Motherboard Replacement: 3 단계, 이미지 1/3 Acer Chromebook C740 Motherboard Replacement: 3 단계, 이미지 2/3 Acer Chromebook C740 Motherboard Replacement: 3 단계, 이미지 3/3
    • Insert the plastic opening tool into the slit near the hinges and pry upwards to lift the back panel.

    • Applying pressure may be necessary. A click indicates the panel is ready to come off.

  4. Acer Chromebook C740 Motherboard Replacement, Motherboard: 4 단계, 이미지 1/3 Acer Chromebook C740 Motherboard Replacement, Motherboard: 4 단계, 이미지 2/3 Acer Chromebook C740 Motherboard Replacement, Motherboard: 4 단계, 이미지 3/3
    • Flip up the clip holding down the white cable using the spudger.

    • Pull the cable outwards towards the battery.

  5. Acer Chromebook C740 Motherboard Replacement: 5 단계, 이미지 1/3 Acer Chromebook C740 Motherboard Replacement: 5 단계, 이미지 2/3 Acer Chromebook C740 Motherboard Replacement: 5 단계, 이미지 3/3
    • Flip up the clip holding down the white cable using the flat end of the spudger.

    • Pull the cable outwards towards the battery.

  6. Acer Chromebook C740 Motherboard Replacement: 6 단계, 이미지 1/3 Acer Chromebook C740 Motherboard Replacement: 6 단계, 이미지 2/3 Acer Chromebook C740 Motherboard Replacement: 6 단계, 이미지 3/3
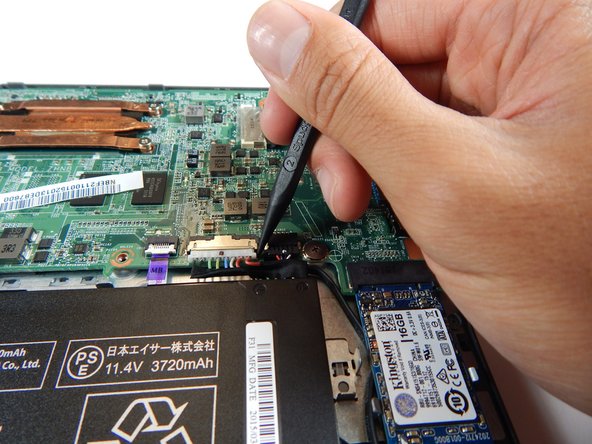
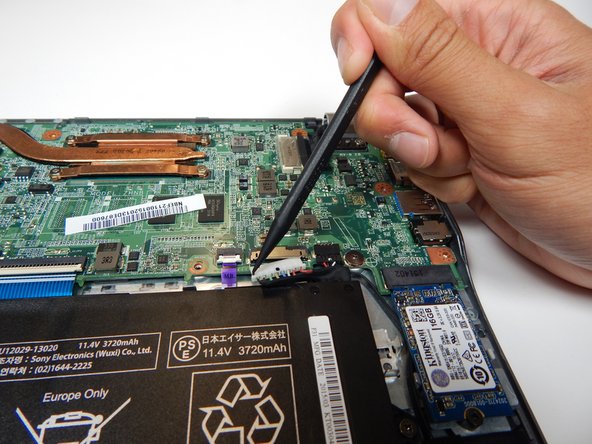
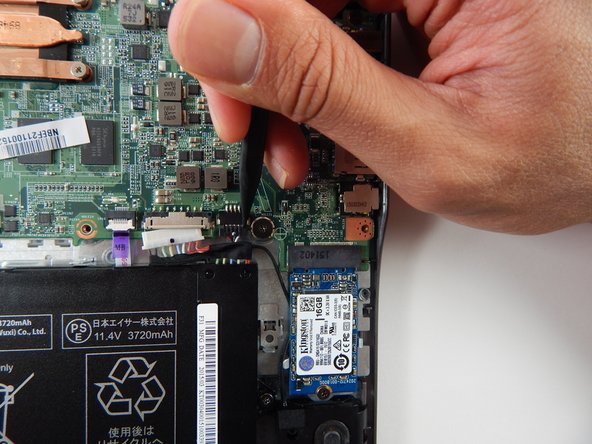
    • Flip up the white clip holding down the connector labelled "MB" using the flat end of the spudger.

    • Remove the connector by pulling out towards the battery.

  7. Acer Chromebook C740 Motherboard Replacement: 7 단계, 이미지 1/3 Acer Chromebook C740 Motherboard Replacement: 7 단계, 이미지 2/3 Acer Chromebook C740 Motherboard Replacement: 7 단계, 이미지 3/3
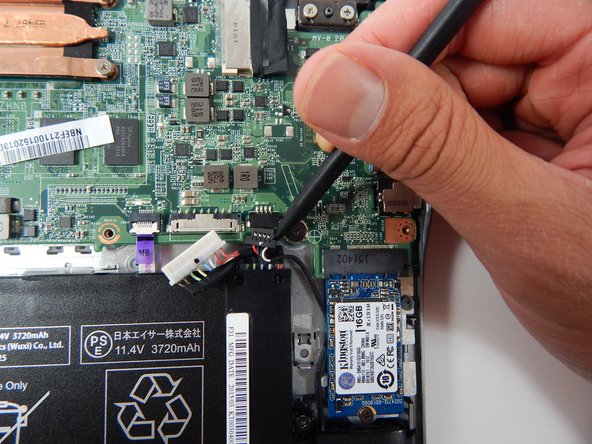
    • Unplug the white 8-wire battery connector from the motherboard by using a spudger to push the two L-shaped indentations towards the battery.

    • The connector is a tight fit. This process requires going back-and-forth between the two indentations and plenty of patience.

  8. Acer Chromebook C740 Motherboard Replacement: 8 단계, 이미지 1/3 Acer Chromebook C740 Motherboard Replacement: 8 단계, 이미지 2/3 Acer Chromebook C740 Motherboard Replacement: 8 단계, 이미지 3/3
    • Unplug the black connector attached to the motherboard at the top right of the battery by using a spudger to push the two L-shaped indentations towards the battery.

  9. Acer Chromebook C740 Motherboard Replacement: 9 단계, 이미지 1/3 Acer Chromebook C740 Motherboard Replacement: 9 단계, 이미지 2/3 Acer Chromebook C740 Motherboard Replacement: 9 단계, 이미지 3/3
    • Peel back the tape covering the white connector at the top-right of the motherboard.

    • Remove the connector from its fitting by pulling outwards.

  10. Acer Chromebook C740 Motherboard Replacement: 10 단계, 이미지 1/3 Acer Chromebook C740 Motherboard Replacement: 10 단계, 이미지 2/3 Acer Chromebook C740 Motherboard Replacement: 10 단계, 이미지 3/3
    • Unplug the white connector attached to the right of the fan with the spudger by applying force towards the battery on the two L-shaped indentations.

  11. Acer Chromebook C740 Motherboard Replacement: 11 단계, 이미지 1/3 Acer Chromebook C740 Motherboard Replacement: 11 단계, 이미지 2/3 Acer Chromebook C740 Motherboard Replacement: 11 단계, 이미지 3/3
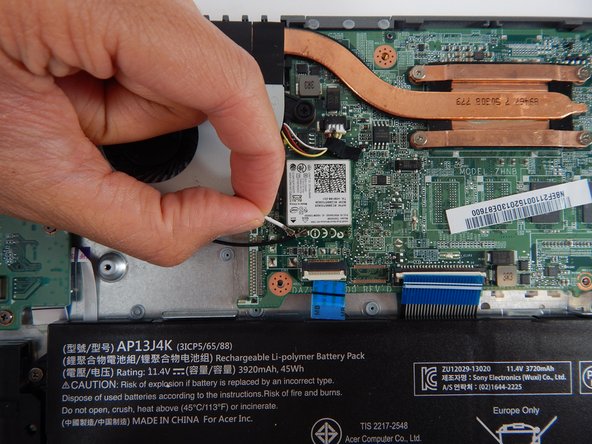
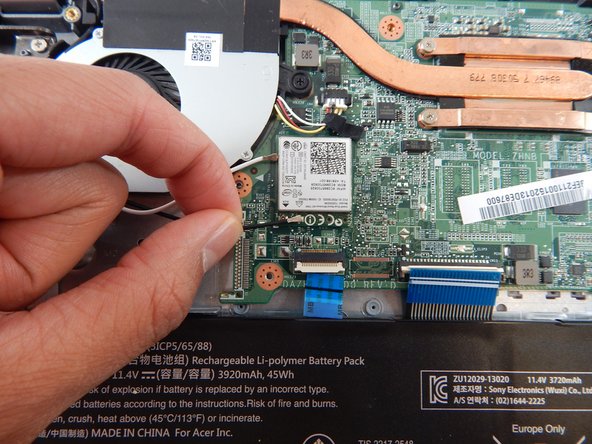
    • Disconnect the two white and black wires by holding close to the metal snap-on caps and pulling upwards.

  12. Acer Chromebook C740 Motherboard Replacement: 12 단계, 이미지 1/2 Acer Chromebook C740 Motherboard Replacement: 12 단계, 이미지 2/2
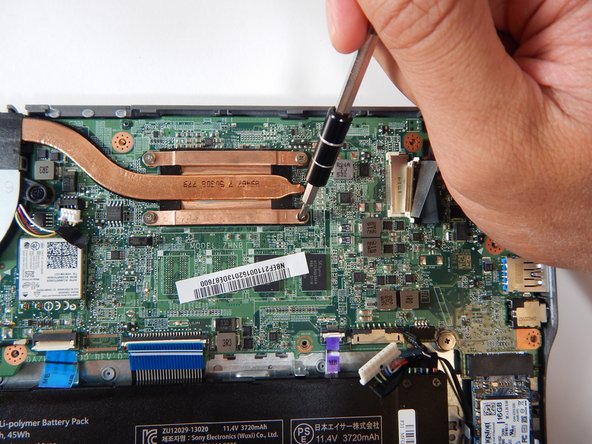
    • Remove the four 3.7 mm screws with a Phillips #0 screwdriver.

  13. Acer Chromebook C740 Motherboard Replacement: 13 단계, 이미지 1/3 Acer Chromebook C740 Motherboard Replacement: 13 단계, 이미지 2/3 Acer Chromebook C740 Motherboard Replacement: 13 단계, 이미지 3/3
    • Loosen the two black screws with a Phillips #0 screwdriver.

    • These screws cannot be removed. However, simply loosening them allows the heatsink fan to lift away from the motherboard.

    • Lift the heatsink fan and rotate it away from the mother board to set down outside the laptop.

  14. Acer Chromebook C740 Motherboard Replacement: 14 단계, 이미지 1/3 Acer Chromebook C740 Motherboard Replacement: 14 단계, 이미지 2/3 Acer Chromebook C740 Motherboard Replacement: 14 단계, 이미지 3/3
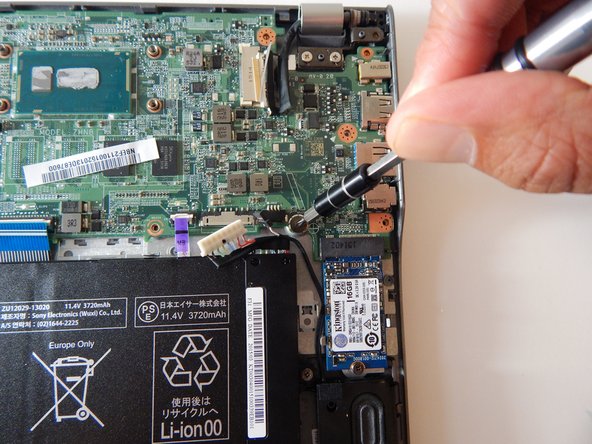
    • Remove the 3.63 mm screw in the top right near the hinge with a Phillips #0 screwdriver.

    • Remove the 3.75 mm screw near the top right corner of the battery with a Phillips #0 screwdriver.

  15. Acer Chromebook C740 Motherboard Replacement: 15 단계, 이미지 1/2 Acer Chromebook C740 Motherboard Replacement: 15 단계, 이미지 2/2
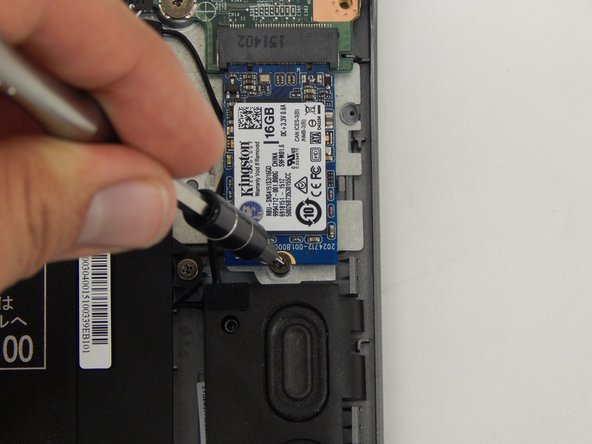
    • Remove the 3.75 mm screw with a Phillips #0 screwdriver.

  16. Acer Chromebook C740 Motherboard Replacement: 16 단계, 이미지 1/1
    • Unplug the solid state drive.

  17. Acer Chromebook C740 Motherboard Replacement: 17 단계, 이미지 1/1
    • Carefully lift the motherboard away from the laptop with two hands.

결론

To reassemble your device, follow these instructions in reverse order.

다른 4명이 해당 안내서를 완성하였습니다.

William Yu

회원 가입일: 04/26/17

283 평판

안내서 1개 작성함

Cal Poly, Team S22-G2, Livingston Spring 2017 Cal Poly, Team S22-G2, Livingston Spring 2017 회원

CPSU-LIVINGSTON-S17S22G2

4 회원들

안내서 12개 작성하였습니다

댓글 0개

댓글 쓰기

조회 통계:

24 시간 전: 0

7일 전: 3

30일 전: 20

전체 시간: 3,123