주요 콘텐츠로 건너뛰기

Acer Chromebook C740 Trackpad Replacement

필요한 것

  1. Acer Chromebook C740 Trackpad Replacement, Back Panel: 1 단계, 이미지 1/1
    • Power down the Chromebook and disconnect the power adapter.

  2. Acer Chromebook C740 Trackpad Replacement: 2 단계, 이미지 1/2 Acer Chromebook C740 Trackpad Replacement: 2 단계, 이미지 2/2
    • Place the chromebook bottom side up on a flat surface.

    • Remove the thirteen 7 mm screws with a Phillips #0 screwdriver.

  3. Acer Chromebook C740 Trackpad Replacement: 3 단계, 이미지 1/3 Acer Chromebook C740 Trackpad Replacement: 3 단계, 이미지 2/3 Acer Chromebook C740 Trackpad Replacement: 3 단계, 이미지 3/3
    • Insert the plastic opening tool into the slit near the hinges and pry upwards to lift the back panel.

    • Applying pressure may be necessary. A click indicates the panel is ready to come off.

  4. Acer Chromebook C740 Trackpad Replacement, Battery: 4 단계, 이미지 1/3 Acer Chromebook C740 Trackpad Replacement, Battery: 4 단계, 이미지 2/3 Acer Chromebook C740 Trackpad Replacement, Battery: 4 단계, 이미지 3/3
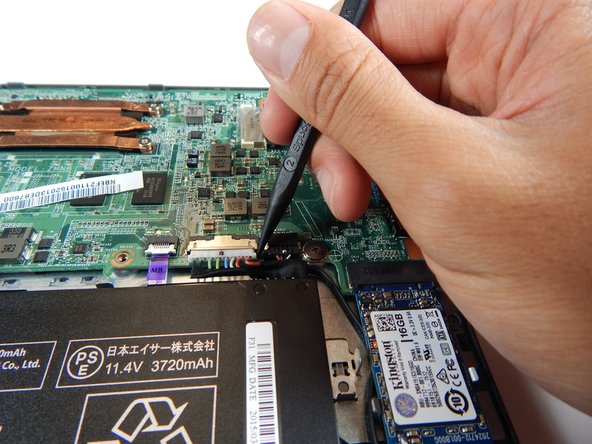
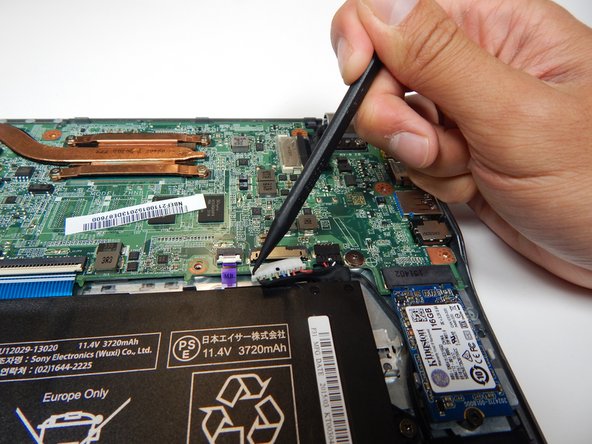
    • Unplug the white 8-wire battery connector from the motherboard by using a spudger to push the two L-shaped indentations towards the battery.

    • The connector is a tight fit. This process requires going back-and-forth between the two indentations and plenty of patience.

  5. Acer Chromebook C740 Trackpad Replacement: 5 단계, 이미지 1/2 Acer Chromebook C740 Trackpad Replacement: 5 단계, 이미지 2/2
    • Remove the the two 3.7 mm screws with a Phillips #0 screwdriver.

  6. Acer Chromebook C740 Trackpad Replacement: 6 단계, 이미지 1/1
    • Lift the battery from the frame.

  7. Acer Chromebook C740 Trackpad Replacement, Trackpad: 7 단계, 이미지 1/3 Acer Chromebook C740 Trackpad Replacement, Trackpad: 7 단계, 이미지 2/3 Acer Chromebook C740 Trackpad Replacement, Trackpad: 7 단계, 이미지 3/3
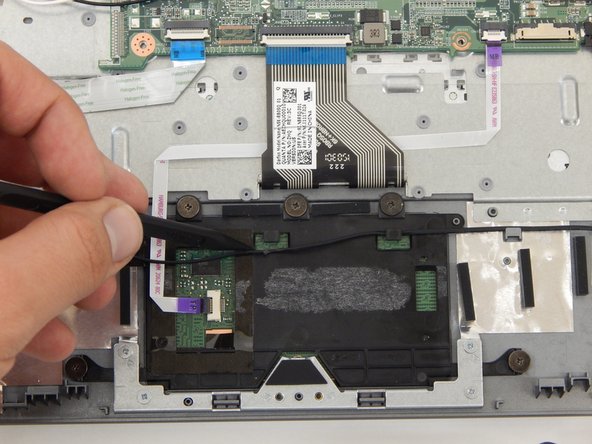
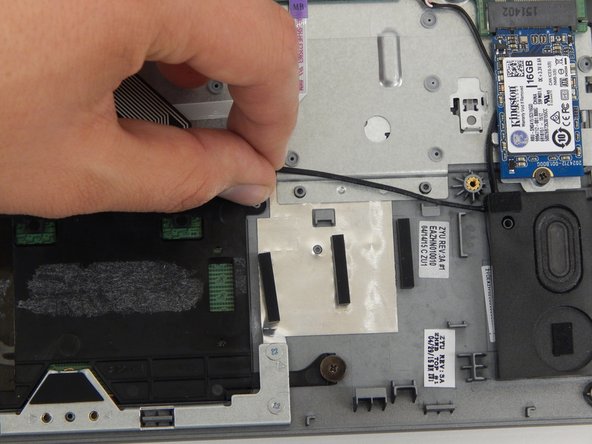
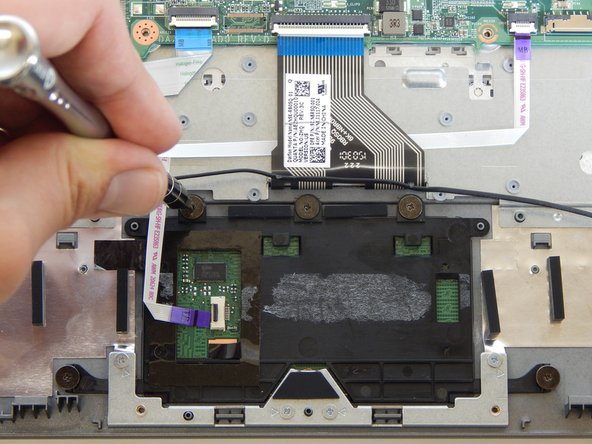
    • Pull the black wire out from under the the black center clips and up from the gray outer clips with a spudger.

  8. Acer Chromebook C740 Trackpad Replacement: 8 단계, 이미지 1/2 Acer Chromebook C740 Trackpad Replacement: 8 단계, 이미지 2/2
    • Use a spudger to lift the black clip on the small purple ribbon cable connector to the left of the touchpad.

    • Pull the ribbon cable out from the connector.

  9. Acer Chromebook C740 Trackpad Replacement: 9 단계, 이미지 1/2 Acer Chromebook C740 Trackpad Replacement: 9 단계, 이미지 2/2
    • Remove the five 2.5 mm screws with a Phillips #0 screwdriver.

  10. Acer Chromebook C740 Trackpad Replacement: 10 단계, 이미지 1/2 Acer Chromebook C740 Trackpad Replacement: 10 단계, 이미지 2/2
    • Remove the four 2.8 mm screws with a Phillips #00 screwdriver.

  11. Acer Chromebook C740 Trackpad Replacement: 11 단계, 이미지 1/2 Acer Chromebook C740 Trackpad Replacement: 11 단계, 이미지 2/2
    • Wiggle off the silver bracket with your fingers.

  12. Acer Chromebook C740 Trackpad Replacement: 12 단계, 이미지 1/2 Acer Chromebook C740 Trackpad Replacement: 12 단계, 이미지 2/2
    • Remove the black tape on the left side of the touchpad.

  13. Acer Chromebook C740 Trackpad Replacement: 13 단계, 이미지 1/2 Acer Chromebook C740 Trackpad Replacement: 13 단계, 이미지 2/2
    • Lift off the black plastic cover with the plastic opening tool.

결론

To reassemble your device, follow these instructions in reverse order.

다른 6명이 해당 안내서를 완성하였습니다.

Flor De La Rosa

회원 가입일: 04/25/17

875 평판

안내서 4개 작성하였습니다

Cal Poly, Team S22-G2, Livingston Spring 2017 Cal Poly, Team S22-G2, Livingston Spring 2017 회원

CPSU-LIVINGSTON-S17S22G2

4 회원들

안내서 12개 작성하였습니다

댓글 0개

댓글 쓰기

조회 통계:

24 시간 전: 0

7일 전: 5

30일 전: 11

전체 시간: 2,529