소개
This guide will take you through the steps of how to remove the plastic backing from the Chromebook. Keep in mind, there are two different types of screws that keep the backing in place; make sure to keep these two types separate when they are taken out. Note: This guide is not a replacement guide. Instead, this step is necessary for replacing other components of the Chromebook.
필요한 것
-
-
Position the laptop upside down with the hinges on the side furthest away from you.
-
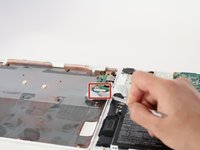
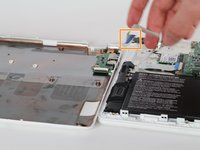
Remove the eight 8mm screws with a phillips #1 screwdriver,
-
Remove the four 4.5mm screws with a phillips #1 screwdriver,
-
-


To reassemble your device, follow these instructions in reverse order.
To reassemble your device, follow these instructions in reverse order.
팀

Cal Poly, Team 22-7, Maness Winter 2017 Cal Poly, Team 22-7, Maness Winter 2017 회원
CPSU-MANESS-W17S22G7
4 회원들
안내서 12개를 작성함
댓글 한 개
When I removed the screws from the bottom (Step 1), the 8 screws closest to the hinge were 7mm, and the front 4 were 5mm. Hope this helps someone in the future.