주요 콘텐츠로 건너뛰기

Acer Chromebook CB5-312T-K 8Z9 Speaker Replacement

필요한 것

  1. Acer Chromebook CB5-312T-K 8Z9 Speaker Replacement, Acer Chromebook CB5-312T-K 8Z9 Back Cover: 1 단계, 이미지 1/2 Acer Chromebook CB5-312T-K 8Z9 Speaker Replacement, Acer Chromebook CB5-312T-K 8Z9 Back Cover: 1 단계, 이미지 2/2
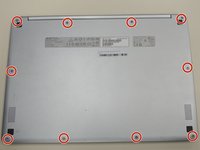
    • First begin by flipping the laptop on its back and having the back cover face you directly.

    • Then unscrew the ten Phillips head screws that hold down the back cover using a Phillips #0 Screw Driver.  

  2. Acer Chromebook CB5-312T-K 8Z9 Speaker Replacement: 2 단계, 이미지 1/1
    • Using a plastic spudger, open the back cover and remove it from the laptop.

  3. Acer Chromebook CB5-312T-K 8Z9 Speaker Replacement, Battery: 3 단계, 이미지 1/3 Acer Chromebook CB5-312T-K 8Z9 Speaker Replacement, Battery: 3 단계, 이미지 2/3 Acer Chromebook CB5-312T-K 8Z9 Speaker Replacement, Battery: 3 단계, 이미지 3/3
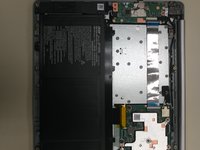
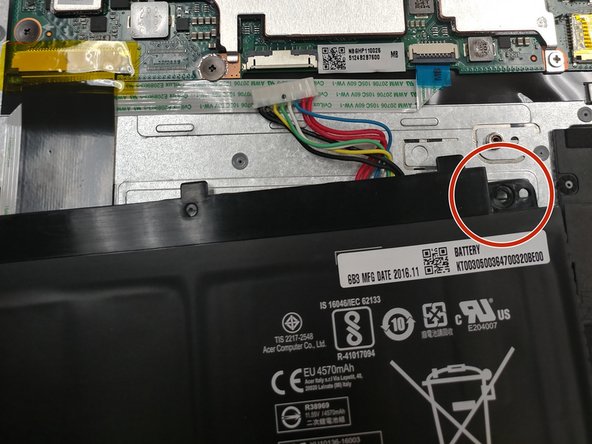
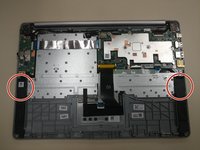
    • look for the battery in the bottom half of the computer

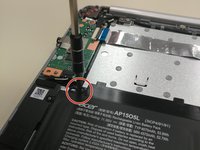
    • Once you have found the battery, look for the screws that secure the battery, in the upper left and right corners.

  4. Acer Chromebook CB5-312T-K 8Z9 Speaker Replacement: 4 단계, 이미지 1/3 Acer Chromebook CB5-312T-K 8Z9 Speaker Replacement: 4 단계, 이미지 2/3 Acer Chromebook CB5-312T-K 8Z9 Speaker Replacement: 4 단계, 이미지 3/3
    • Begin by unscrewing the two Phillips head screws that hold down the battery using a J1 sized screwdriver.

    • Finally remove the battery from the laptop.

  5. Acer Chromebook CB5-312T-K 8Z9 Speaker Replacement, Speaker: 5 단계, 이미지 1/3 Acer Chromebook CB5-312T-K 8Z9 Speaker Replacement, Speaker: 5 단계, 이미지 2/3 Acer Chromebook CB5-312T-K 8Z9 Speaker Replacement, Speaker: 5 단계, 이미지 3/3
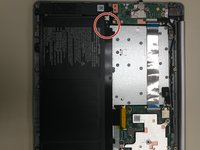
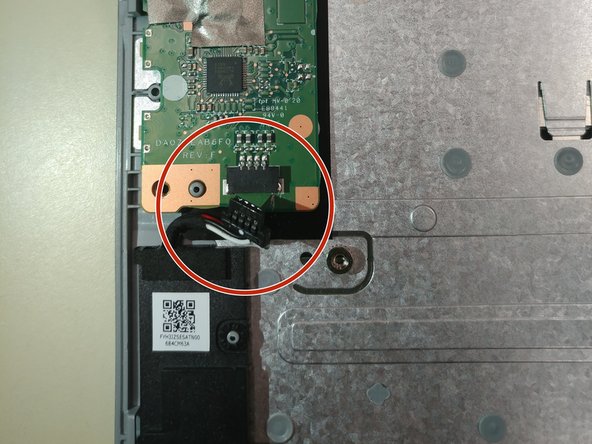
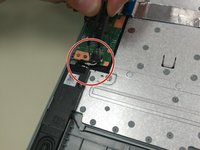
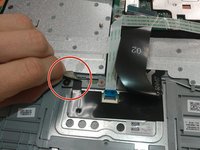
    • Begin by locating the speakers.

    • Once you have found where the speakers are, direct your attention to the speaker to the left of the mouse pad.

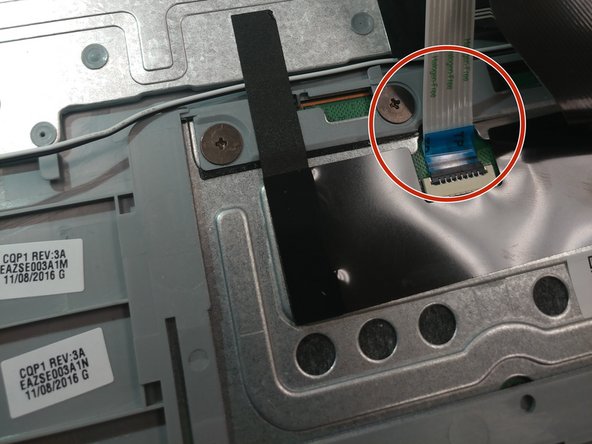
    • Grab your tweezers and begin disconnecting the wire that connects the speakers to the circuit board on the upper left corner.

  6. Acer Chromebook CB5-312T-K 8Z9 Speaker Replacement: 6 단계, 이미지 1/3 Acer Chromebook CB5-312T-K 8Z9 Speaker Replacement: 6 단계, 이미지 2/3 Acer Chromebook CB5-312T-K 8Z9 Speaker Replacement: 6 단계, 이미지 3/3
    • Locate where the mouse pad would be, this should be relatively easy as it will be right in between the two speakers.

    • Start peeling off the black tape that is covering the speaker wires.

    • Fold back the cables that are on top of the wires for easy removal of the speakers.

  7. Acer Chromebook CB5-312T-K 8Z9 Speaker Replacement: 7 단계, 이미지 1/3 Acer Chromebook CB5-312T-K 8Z9 Speaker Replacement: 7 단계, 이미지 2/3 Acer Chromebook CB5-312T-K 8Z9 Speaker Replacement: 7 단계, 이미지 3/3
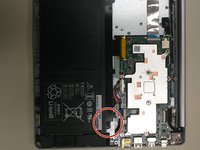
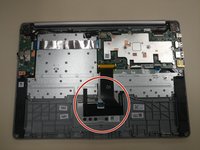
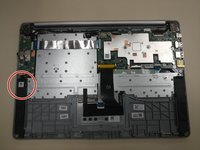
    • Direct your attention back to the speaker that you were first working with in step 5.

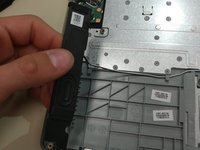
    • Start by pulling up on the speaker, it should simply come right out.

    • Repeat this for the right speaker.

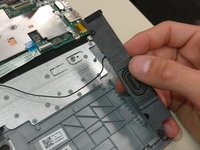
    • Once the two speakers are removed, unhook the wires from any clips that may be holding it to the computer.

결론

To reassemble your device, follow these instructions in reverse order.

Kyle

회원 가입일: 09/25/17

125 평판

안내서 1개 작성함

University of North Texas, Team S1-G4, Thompson Fall 2017 University of North Texas, Team S1-G4, Thompson Fall 2017 회원

UNT-THOMPSON-F17S1G4

4 회원들

안내서 10개 작성하였습니다

댓글 0개

댓글 쓰기

조회 통계:

24 시간 전: 0

7일 전: 0

30일 전: 3

전체 시간: 444