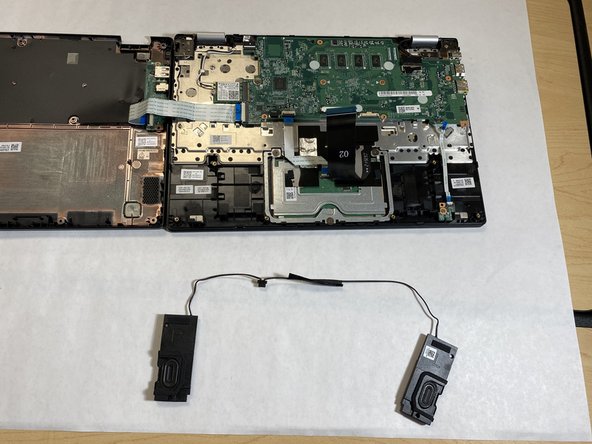
주요 콘텐츠로 건너뛰기

Acer Chromebook R11 C738T-C44Z Speakers Replacement

필요한 것

  1. Acer Chromebook R11 C738T-C44Z Speakers Replacement, Back Cover: 1 단계, 이미지 1/3 Acer Chromebook R11 C738T-C44Z Speakers Replacement, Back Cover: 1 단계, 이미지 2/3 Acer Chromebook R11 C738T-C44Z Speakers Replacement, Back Cover: 1 단계, 이미지 3/3
    • Lay the laptop with the back side up.

    • Use a Phillips #1 screwdriver to remove eleven 3 mm screws.

    • Use the opening tool to pry the back cover off gently by placing it in the seam and working your way around the perimeter.

  2. Acer Chromebook R11 C738T-C44Z Speakers Replacement, Battery: 2 단계, 이미지 1/2 Acer Chromebook R11 C738T-C44Z Speakers Replacement, Battery: 2 단계, 이미지 2/2
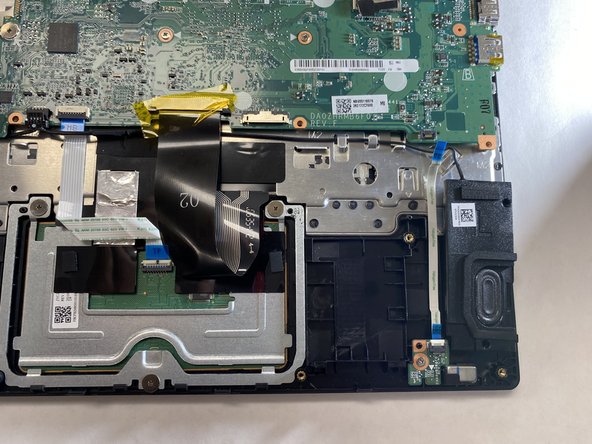
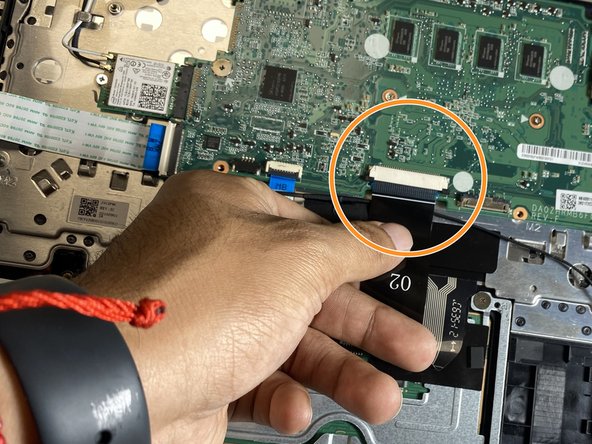
    • Unplug the battery connector from the motherboard. (The motherboard is a group of wires in rainbow colors)

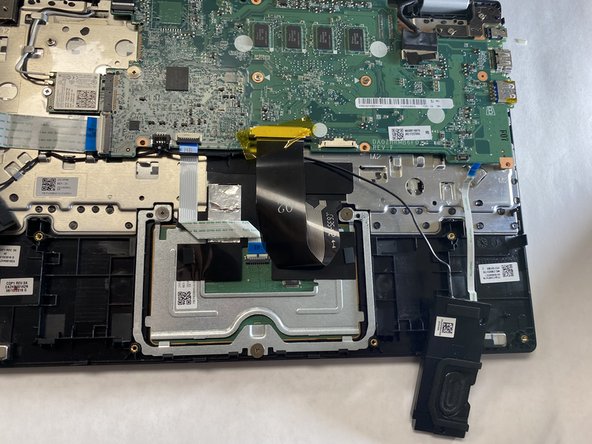
    • Use a Phillips #1 screwdriver to remove the two 3 mm screws, (one on each side of the battery), that secure it in place.

  3. Acer Chromebook R11 C738T-C44Z Speakers Replacement: 3 단계, 이미지 1/1
    • Remove battery from its holder by pulling it upwards from the device

    • Attempt to remove it as gently as possible to avoid damaging the Motherboard

  4. Acer Chromebook R11 C738T-C44Z Speakers Replacement: 4 단계, 이미지 1/1
    • Install the new battery and again use a Phillips #1 screwdriver to remove the two 3 mm screws

  5. Acer Chromebook R11 C738T-C44Z Speakers Replacement, Speakers: 5 단계, 이미지 1/2 Acer Chromebook R11 C738T-C44Z Speakers Replacement, Speakers: 5 단계, 이미지 2/2
    • Gently remove the LED Board Ribbon connected to the mother board.

  6. Acer Chromebook R11 C738T-C44Z Speakers Replacement: 6 단계, 이미지 1/3 Acer Chromebook R11 C738T-C44Z Speakers Replacement: 6 단계, 이미지 2/3 Acer Chromebook R11 C738T-C44Z Speakers Replacement: 6 단계, 이미지 3/3
    • Gently pry up speaker up using a spudger or opening tool to remove it.

    • It has an adhesive, so you might have to use some force.

    • Screwdrivers should not be used as prying tools and could cause damage to delicate components.

    • Repeat the same process for the other speaker.

  7. Acer Chromebook R11 C738T-C44Z Speakers Replacement: 7 단계, 이미지 1/3 Acer Chromebook R11 C738T-C44Z Speakers Replacement: 7 단계, 이미지 2/3 Acer Chromebook R11 C738T-C44Z Speakers Replacement: 7 단계, 이미지 3/3
    • Use the opening tool to unplug the speaker cable from the motherboard.

    • Disconnect the keyboard ribbon cable from the motherboard.

  8. Acer Chromebook R11 C738T-C44Z Speakers Replacement: 8 단계, 이미지 1/1
    • Using the opening tool to unlock and disconnect the touchpad cable.

  9. Acer Chromebook R11 C738T-C44Z Speakers Replacement: 9 단계, 이미지 1/3 Acer Chromebook R11 C738T-C44Z Speakers Replacement: 9 단계, 이미지 2/3 Acer Chromebook R11 C738T-C44Z Speakers Replacement: 9 단계, 이미지 3/3
    • Gently lift the speakers up and remove the cable from the system.

결론

To reassemble your device, follow these instructions in reverse order.

다른 한 분이 해당 안내서를 완성하였습니다.

Connie Hernandez

회원 가입일: 09/01/21

517 평판

안내서 4개 작성하였습니다

Gateway, Team 1-4, Saknee Fall 2021 Gateway, Team 1-4, Saknee Fall 2021 회원

GCC-SAKNEE-F21S1G4

4 회원들

안내서 6개 작성하였습니다

댓글 0개

댓글 쓰기

조회 통계:

24 시간 전: 0

7일 전: 1

30일 전: 4

전체 시간: 100