주요 콘텐츠로 건너뛰기

Acer Chromebook R11 Speakers Replacement

필요한 것

  1. Acer Chromebook R11 Speakers Replacement, Battery: 1 단계, 이미지 1/1
    • The back cover of the R11 is held into place using 11 screws.

    • To remove, use a screwdriver appropriate for a JIS 1 screw.

  2. Acer Chromebook R11 Speakers Replacement: 2 단계, 이미지 1/1
    • Battery is located in the bottom half of the computer.

    • Unscrew the two screws holding the battery in place. There is one on each side of the battery.

    • To remove, use a screwdriver appropriate for a JIS 1 screw.

  3. Acer Chromebook R11 Speakers Replacement: 3 단계, 이미지 1/1
    • Slide out the ribbon that is connecting the battery to the motherboard.

    • There are 7 wires leading to it, and each is a different color of the rainbow.

    • Disconnect the keyboard ribbon located at bottom center of motherboard.

  4. Acer Chromebook R11 Speakers Replacement: 4 단계, 이미지 1/1
    • Remove the battery by pulling upwards.

  5. Acer Chromebook R11 Speakers Replacement, Speakers: 5 단계, 이미지 1/2 Acer Chromebook R11 Speakers Replacement, Speakers: 5 단계, 이미지 2/2
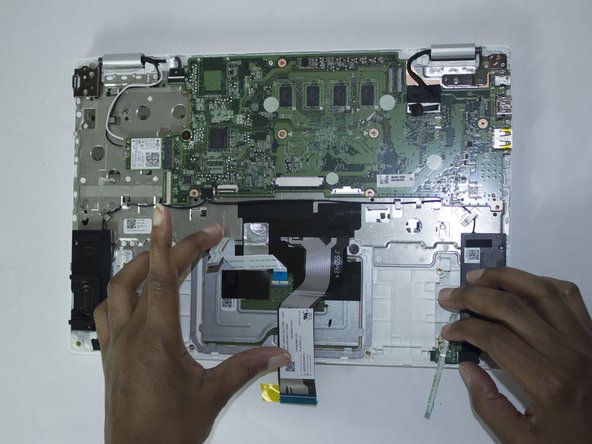
    • Slide out black ribbons connecting speakers to motherboard

    • Connected on lower left-hand side of motherboard

    • When removing wires, remove gently with respect to metal clips along wires that are holding them in place.

    • Slide out white ribbon connecting keyboard to motherboard

  6. Acer Chromebook R11 Speakers Replacement: 6 단계, 이미지 1/1
    • Gently pull speakers upwards

    • Adhesive is below it

결론

To reassemble your device, follow these instructions in reverse order.

다른 한 분이 해당 안내서를 완성하였습니다.

Victoria May

회원 가입일: 02/16/17

119 평판

안내서 1개 작성함

USF Tampa, Team 1-2, Kass Spring 2017 USF Tampa, Team 1-2, Kass Spring 2017 회원

USFT-KASS-S17S1G2

4 회원들

안내서 6개 작성하였습니다

댓글 0개

댓글 쓰기

조회 통계:

24 시간 전: 0

7일 전: 0

30일 전: 2

전체 시간: 482