소개
Don't know the first thing about working on a Ferrari? No, not that kind! All we're going to do today is switch the hard drive in the Acer Ferrari 4000 laptop, which is far easier and way more functional than trying to install a hard drive in a vehicle!
필요한 것
-
-
The Ferrari 4000 ships with a PATA hard drive, which you will have the full knowledge to replace time and time again once you're done.
-
It's so easy, even a caveman can do it.
-
-
-
Let's get started by removing these two Phillips #0 screws holding down the hard drive bay cover on the bottom of the computer near the 3 USB ports.
-
Lift the bay cover to expose the drive cover
-
-
-
-
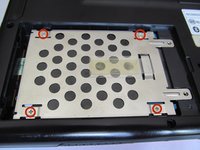
The only thing separating you from the hard drive glory is a drive cover that looks oddly like a sports car grille...
-
Remove the 4 Phillips #0 screws.
-
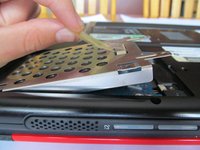
Pull the tab to free the grille from the drive.
-
-
-
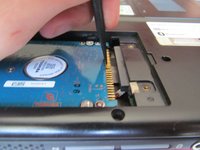
Pull back with a spudger (or your fingernails) where the drive plugs in to the computer.
-
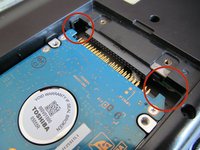
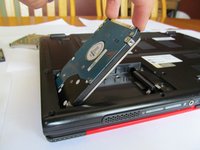
Put your fingers where the red circles are and swing the drive up. Once it's up an adequate amount, grab it by its sides and pull it out of the computer.
-
-
-
You're done with the removal! Follow these instructions in reverse to install the new drive.
-


To reassemble your device, follow these instructions in reverse order.
To reassemble your device, follow these instructions in reverse order.
다른 5명이 해당 안내서를 완성하였습니다.

팀
