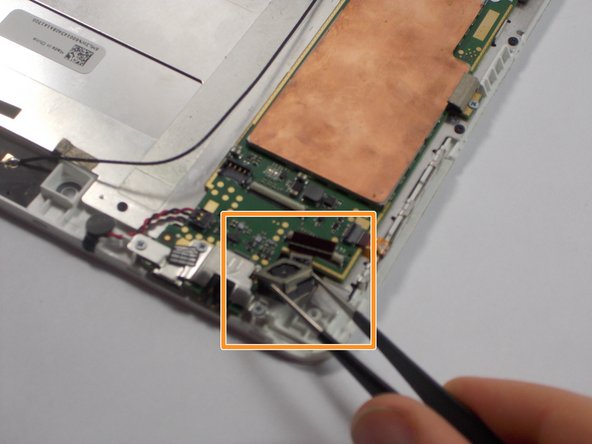
주요 콘텐츠로 건너뛰기

Acer Iconia A1-830 Rear Facing Camera Replacement

필요한 것

  1. Acer Iconia A1-830 Rear Facing Camera Replacement, Disassembling Acer Iconia A1-830 Back Panel: 1 단계, 이미지 1/2 Acer Iconia A1-830 Rear Facing Camera Replacement, Disassembling Acer Iconia A1-830 Back Panel: 1 단계, 이미지 2/2
    • Prepare your working space. The ideal work space has a flat, level surface that is clean and well lit.

    • Shut down your Acer Iconia A1-830.

    • Remove any cables or exterior covers from your tablet.

    • Place it on your work space, with the screen facing up.

  2. Acer Iconia A1-830 Rear Facing Camera Replacement: 2 단계, 이미지 1/2 Acer Iconia A1-830 Rear Facing Camera Replacement: 2 단계, 이미지 2/2
    • Wedge the plastic opening tool into the tiny gap between the white plastic front bezel and the aluminum rear panel.

    • Do not try to pry apart the top edge on the front side near the front-facing camera.

  3. Acer Iconia A1-830 Rear Facing Camera Replacement, Battery: 3 단계, 이미지 1/2 Acer Iconia A1-830 Rear Facing Camera Replacement, Battery: 3 단계, 이미지 2/2
    • Remove the small clear plastic cover on top of the battery cable with the nylon or metal spudger.

  4. Acer Iconia A1-830 Rear Facing Camera Replacement: 4 단계, 이미지 1/1
    • Remove the battery cable by lifting it up with the pointy end of the black nylon spudger.

  5. Acer Iconia A1-830 Rear Facing Camera Replacement: 5 단계, 이미지 1/2 Acer Iconia A1-830 Rear Facing Camera Replacement: 5 단계, 이미지 2/2
    • Un-stick the battery from the metal plate using the black nylon spudger.

    • Be careful not to puncture the battery while removing it.

  6. Acer Iconia A1-830 Rear Facing Camera Replacement, Rear Facing Camera: 6 단계, 이미지 1/1
    • Remove the piece of black tape covering the rear facing camera ribbon cable connector.

  7. Acer Iconia A1-830 Rear Facing Camera Replacement: 7 단계, 이미지 1/2 Acer Iconia A1-830 Rear Facing Camera Replacement: 7 단계, 이미지 2/2
    • Lift up the small white lever on the the ribbon cable connector with the metal tweezers to remove the ribbon cable.

    • Lift out the rear facing camera from the plastic frame with the metal tweezers.

결론

To reassemble your device, follow these instructions in reverse order.

Brendan Coveney

회원 가입일: 10/18/15

593 평판

안내서 3개 작성하였습니다

UMass Dartmouth, Team 4-6, Catania Fall 2015 UMass Dartmouth, Team 4-6, Catania Fall 2015 회원

UMASSD-CATANIA-F15S4G6

3 회원들

안내서 5개 작성하였습니다

댓글 0개

댓글 쓰기

조회 통계:

24 시간 전: 0

7일 전: 0

30일 전: 1

전체 시간: 398