주요 콘텐츠로 건너뛰기

Acer Iconia B1-711 Audio Jack Connector Replacement

필요한 것

동영상 개요

  1. Acer Iconia B1-711 Audio Jack Connector Replacement, Back Cover: 1 단계, 이미지 1/3 Acer Iconia B1-711 Audio Jack Connector Replacement, Back Cover: 1 단계, 이미지 2/3 Acer Iconia B1-711 Audio Jack Connector Replacement, Back Cover: 1 단계, 이미지 3/3
    • Switch-off the tablet.

    • Remove any SIM and/or Memory Card.

    • Start opening near to the Volume Up/Down buttons. It's more well to use a plastic opening tool to avoid damaging the cover.

    • When lifting the cover, be careful not to tear the Loudspeaker cable at the bottom right side.

    • Disconnect the Loudspeaker cable from the Logic board.

  2. Acer Iconia B1-711 Audio Jack Connector Replacement: 2 단계, 이미지 1/2 Acer Iconia B1-711 Audio Jack Connector Replacement: 2 단계, 이미지 2/2
    • Before doing anything, disconnect the battery.

  3. Acer Iconia B1-711 Audio Jack Connector Replacement, Audio Jack Connector: 3 단계, 이미지 1/3 Acer Iconia B1-711 Audio Jack Connector Replacement, Audio Jack Connector: 3 단계, 이미지 2/3 Acer Iconia B1-711 Audio Jack Connector Replacement, Audio Jack Connector: 3 단계, 이미지 3/3
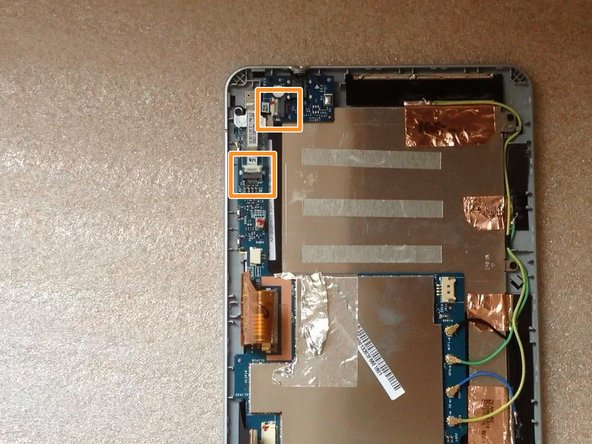
    • Unscrew 2x Philips screws

    • Disconnect and remove the Audio Jack Board flex cable.

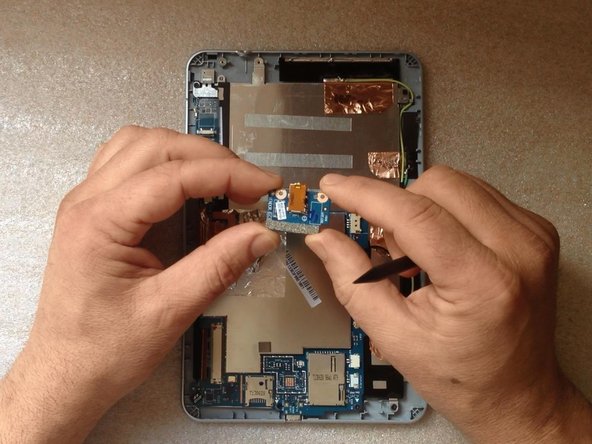
    • Remove the board with the Audio Jack Connector.

결론

To reassemble your device, follow these instructions in reverse order.

ZFix

회원 가입일: 12/09/13

191,278 평판

안내서 330개 작성하였습니다

Master Techs Master Techs 회원

Community

322 회원들

안내서 2,528개 작성하였습니다

댓글 한 개

Can anyone suggest part number for whole jack board or just of jack?

Alexander Zaripov - 답글

댓글 쓰기

조회 통계:

24 시간 전: 0

7일 전: 0

30일 전: 1

전체 시간: 576