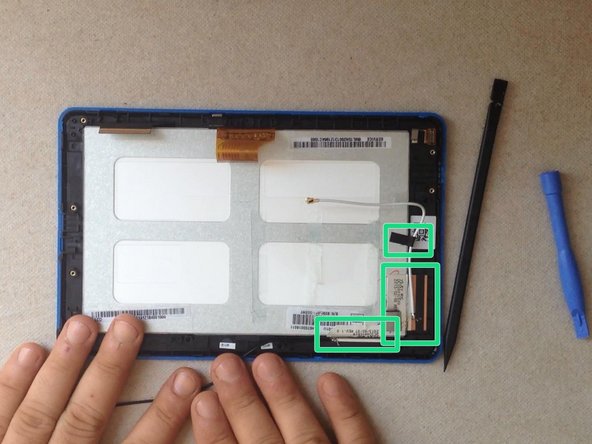
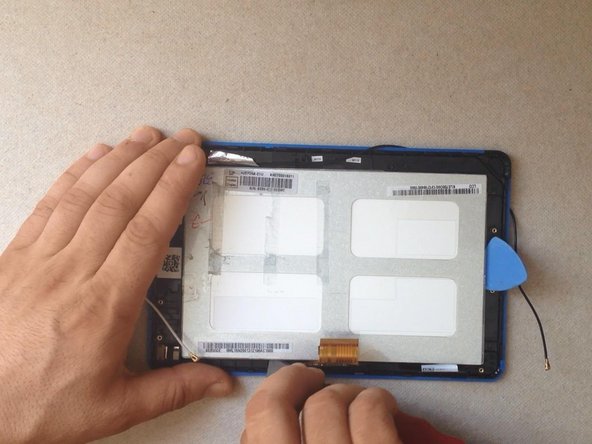
주요 콘텐츠로 건너뛰기

Acer Iconia B1-A71 LCD Display Replacement

필요한 것

동영상 개요

  1. Acer Iconia B1-A71 LCD Display Replacement, Acer Iconia B1-A71 LCD Display Replacement: 1 단계, 이미지 1/3 Acer Iconia B1-A71 LCD Display Replacement, Acer Iconia B1-A71 LCD Display Replacement: 1 단계, 이미지 2/3 Acer Iconia B1-A71 LCD Display Replacement, Acer Iconia B1-A71 LCD Display Replacement: 1 단계, 이미지 3/3
    • Switch-off the tablet.

    • If you can't switch it off, use the reset button to do this.

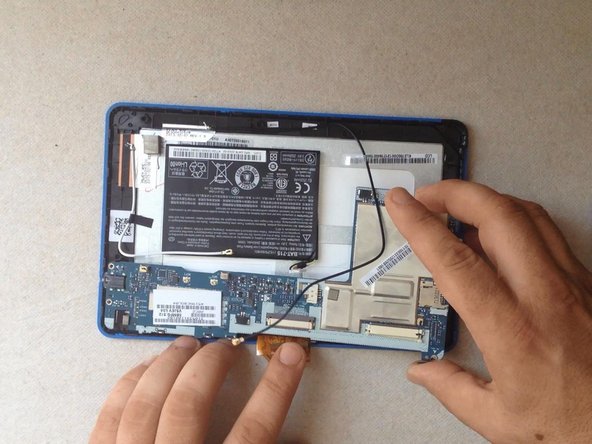
    • With a cutter and a plastic tool remove the back cover.

    • If you have a memory card inside, don't forget to remove it!

  2. Acer Iconia B1-A71 LCD Display Replacement: 2 단계, 이미지 1/2 Acer Iconia B1-A71 LCD Display Replacement: 2 단계, 이미지 2/2
    • First, disconnect the battery.

    • Now, disconnect the loudspeaker and remove the back cover.

    • Remove all scotch tapes and disconnect the touch screen flex cable...

    • LCD display flex cable,

    • the microphone,

    • and the WiFi and Bluetooth antennas flex cables.

  3. Acer Iconia B1-A71 LCD Display Replacement: 3 단계, 이미지 1/3 Acer Iconia B1-A71 LCD Display Replacement: 3 단계, 이미지 2/3 Acer Iconia B1-A71 LCD Display Replacement: 3 단계, 이미지 3/3
    • Unscrew 5x screws and rmove the main board.

  4. Acer Iconia B1-A71 LCD Display Replacement: 4 단계, 이미지 1/3 Acer Iconia B1-A71 LCD Display Replacement: 4 단계, 이미지 2/3 Acer Iconia B1-A71 LCD Display Replacement: 4 단계, 이미지 3/3
    • The battery is glued to the LCD display metal shield with a double sided adhesive tape.

    • Use plastic tools and carefully remove it.

    • Remove all tapes from the LCD display metal shield.

  5. Acer Iconia B1-A71 LCD Display Replacement: 5 단계, 이미지 1/3 Acer Iconia B1-A71 LCD Display Replacement: 5 단계, 이미지 2/3 Acer Iconia B1-A71 LCD Display Replacement: 5 단계, 이미지 3/3
    • The LCD display is held by metal frame and some locking clips on it.

    • Use a cutter and a plastic tool to separate the LCD.

    • You have to work slowly so as not to break the display.

    • Now, install the new LCD display and reassemble the tablet.

    • .

    • Did you do it successfully?

    • Please SUBSCRIBE to my channel ツ

결론

To reassemble your device, follow these instructions in reverse order.

다른 6명이 해당 안내서를 완성하였습니다.

ZFix

회원 가입일: 12/09/13

191,182 평판

안내서 330개 작성하였습니다

Master Techs Master Techs 회원

Community

322 회원들

안내서 2,521개 작성하였습니다

댓글 0개

댓글 쓰기

조회 통계:

24 시간 전: 0

7일 전: 2

30일 전: 5

전체 시간: 11,026