주요 콘텐츠로 건너뛰기

이 안내서에는 최근 변경 사항이 더 있습니다. 최신 비검증 버전으로 전환하십시오.

Acer Iconia One 10 B3-A30 Repair Camera Replacement

필요한 것

  1. Acer Iconia One 10 B3-A30 Repair Camera Replacement, Camera: 1 단계, 이미지 1/2 Acer Iconia One 10 B3-A30 Repair Camera Replacement, Camera: 1 단계, 이미지 2/2
    • Make sure the device is powered off.

    • Pry open media port cover at the top of the tablet.

    • Use the Phillips 00 screwdriver to remove the 1 mm screw.

  2. Acer Iconia One 10 B3-A30 Repair Camera Replacement: 2 단계, 이미지 1/3 Acer Iconia One 10 B3-A30 Repair Camera Replacement: 2 단계, 이미지 2/3 Acer Iconia One 10 B3-A30 Repair Camera Replacement: 2 단계, 이미지 3/3
    • Using the metal spudger, carefully pry open the back cover.

  3. Acer Iconia One 10 B3-A30 Repair Camera Replacement: 3 단계, 이미지 1/3 Acer Iconia One 10 B3-A30 Repair Camera Replacement: 3 단계, 이미지 2/3 Acer Iconia One 10 B3-A30 Repair Camera Replacement: 3 단계, 이미지 3/3
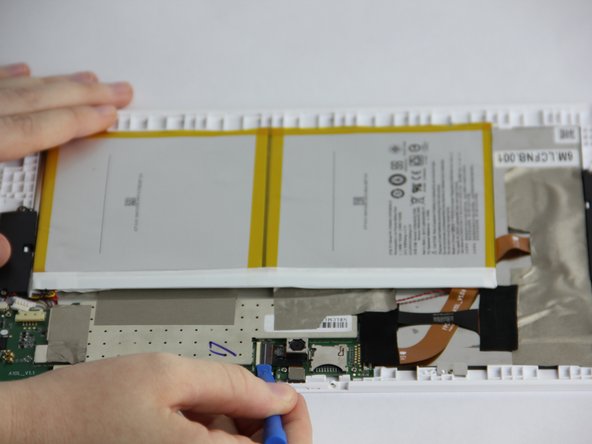
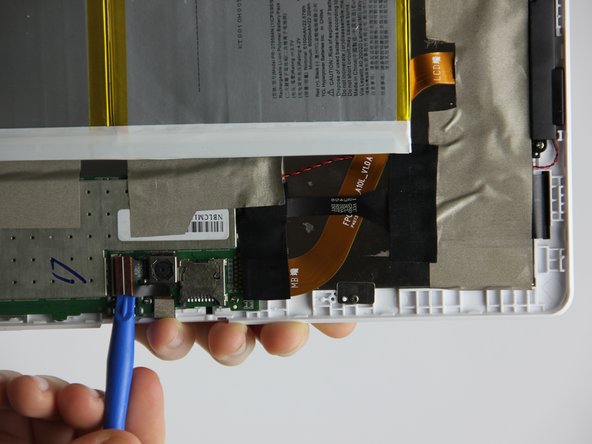
    • Using the plastic opening tool gently place the tip of it under the connection and pry up. It will pop out.

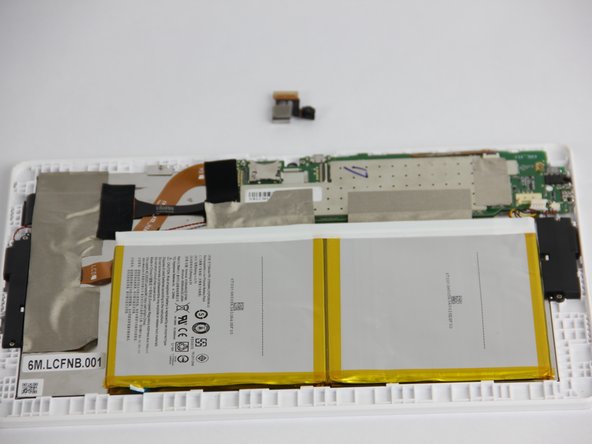
  4. Acer Iconia One 10 B3-A30 Repair Camera Replacement: 4 단계, 이미지 1/2 Acer Iconia One 10 B3-A30 Repair Camera Replacement: 4 단계, 이미지 2/2
    • Use the plastic opening tool to pry up the rear facing camera. Once removed the front facing camera will come out as well.

결론

To reassemble your device, follow these instructions in reverse order.

Austin Pickart

회원 가입일: 09/28/17

688 평판

안내서 5개 작성하였습니다

USF Tampa, Team S1-G5, Nance Fall 2017 USF Tampa, Team S1-G5, Nance Fall 2017 회원

USFT-NANCE-F17S1G5

4 회원들

안내서 5개 작성하였습니다

댓글 0개

댓글 쓰기

조회 통계:

24 시간 전: 0

7일 전: 0

30일 전: 0

전체 시간: 638