주요 콘텐츠로 건너뛰기

Acer Iconia Tab A200 Microphone Replacement

필요한 것

  1. Acer Iconia Tab A200 Microphone Replacement, Battery: 1 단계, 이미지 1/2 Acer Iconia Tab A200 Microphone Replacement, Battery: 1 단계, 이미지 2/2
    • With the plastic opening tool pry open the grey plastic siding on both sides of the tablet.

  2. Acer Iconia Tab A200 Microphone Replacement: 2 단계, 이미지 1/2 Acer Iconia Tab A200 Microphone Replacement: 2 단계, 이미지 2/2
    • Using a Phillips #00 screwdriver remove the 4.0 mm screws on the sides of the tablet.

    • There are two screws on each side of the tablet that need to be removed before the back casing can be removed.

  3. Acer Iconia Tab A200 Microphone Replacement: 3 단계, 이미지 1/2 Acer Iconia Tab A200 Microphone Replacement: 3 단계, 이미지 2/2
    • Once the 4 screws have been removed use the plastic opening tool to pry open the device on the side of the device.

    • Be careful prying on the sides where you removed the screw as the plastic casing is not very strong and may break.

    • After prying open the case with the plastic opening tool carefully remove the case from the device and place the device face down on its screen.

  4. Acer Iconia Tab A200 Microphone Replacement: 4 단계, 이미지 1/2 Acer Iconia Tab A200 Microphone Replacement: 4 단계, 이미지 2/2
    • Using a Phillips #00 screwdriver remove the 4.0 mm screws holding the battery in place.

  5. Acer Iconia Tab A200 Microphone Replacement: 5 단계, 이미지 1/2 Acer Iconia Tab A200 Microphone Replacement: 5 단계, 이미지 2/2
    • Lift the battery out of the device, and disconnect the cable attached to the motherboard by pulling it out to the side not lifting it up.

  6. Acer Iconia Tab A200 Microphone Replacement, Microphone: 6 단계, 이미지 1/2 Acer Iconia Tab A200 Microphone Replacement, Microphone: 6 단계, 이미지 2/2
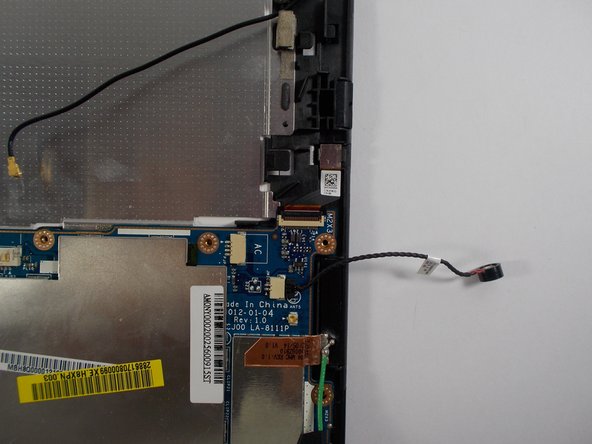
    • Lift up on the microphone cable to lift the microphone component away from the case.

  7. Acer Iconia Tab A200 Microphone Replacement: 7 단계, 이미지 1/1
    • Once the microphone has been lifted away from the case, disconnect the microphone cable from the motherboard by pulling the cable out horizontally. Do not lift up to remove.

결론

To reassemble your device, follow these instructions in reverse order.

Jaimie Payne

회원 가입일: 03/06/16

477 평판

안내서 3개 작성하였습니다

UMass Dartmouth, Team 5-5, Landers Spring 2016 UMass Dartmouth, Team 5-5, Landers Spring 2016 회원

UMASSD-LANDERS-S16S5G5

3 회원들

안내서 6개 작성하였습니다

댓글 0개

댓글 쓰기

조회 통계:

24 시간 전: 0

7일 전: 0

30일 전: 0

전체 시간: 153