주요 콘텐츠로 건너뛰기

Acer Iconia W3-810 Speaker Replacement

필요한 것

  1. Acer Iconia W3-810 Speaker Replacement, Back Panel: 1 단계, 이미지 1/1
    • Place the tablet face down on a flat surface with the charger facing toward you.

  2. Acer Iconia W3-810 Speaker Replacement: 2 단계, 이미지 1/1
    • Use a plastic opening tool to pry the back panel off of the device.

    • Be careful to not use the plastic opening tool near the charging dock or any media ports.

  3. Acer Iconia W3-810 Speaker Replacement, Speaker: 3 단계, 이미지 1/1
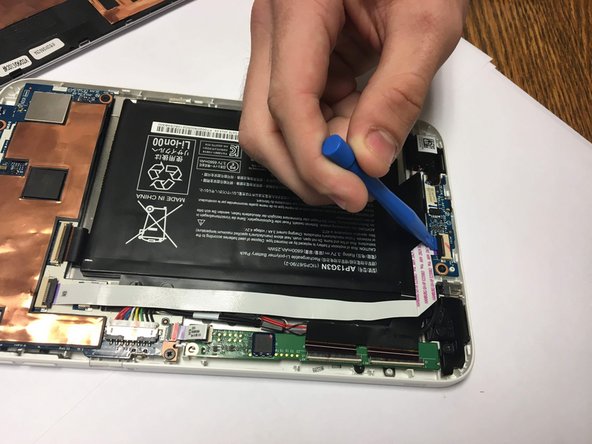
    • Lift the retaining flaps fastening the screen ribbon cord to the screen circuit board using a plastic opening tool.

  4. Acer Iconia W3-810 Speaker Replacement: 4 단계, 이미지 1/1
    • Pull the ribbon cord out of its slot.

  5. Acer Iconia W3-810 Speaker Replacement: 5 단계, 이미지 1/1
    • Lift the retaining flap fastening the ribbon cord.

  6. Acer Iconia W3-810 Speaker Replacement: 6 단계, 이미지 1/1
    • Remove the ribbon cord from its slot.

  7. Acer Iconia W3-810 Speaker Replacement: 7 단계, 이미지 1/1
    • Unscrew the Phillips head HH0 3mm screws holding down the right speaker.

  8. Acer Iconia W3-810 Speaker Replacement: 8 단계, 이미지 1/1
    • Unscrew the HHO 3mm screws holding the left speaker.

  9. Acer Iconia W3-810 Speaker Replacement: 9 단계, 이미지 1/1
    • Lift the speakers from the front panel.

  10. Acer Iconia W3-810 Speaker Replacement: 10 단계, 이미지 1/1
    • Pull the speakers underneath the headphone cord.

  11. Acer Iconia W3-810 Speaker Replacement: 11 단계, 이미지 1/1
    • Use a plastic opening tool to remove the speaker cord from its slot.

  12. Acer Iconia W3-810 Speaker Replacement: 12 단계, 이미지 1/1
    • Remove the speakers from the device.

결론

To reassemble your device, follow these instructions in reverse order.

Griffin Hocker

회원 가입일: 09/15/16

394 평판

안내서 3개 작성하였습니다

USF Tampa, Team 18-4, Blackwell Fall 2016 USF Tampa, Team 18-4, Blackwell Fall 2016 회원

USFT-BLACKWELL-F16S18G4

4 회원들

안내서 6개 작성하였습니다

댓글 0개

댓글 쓰기

조회 통계:

24 시간 전: 0

7일 전: 2

30일 전: 7

전체 시간: 403