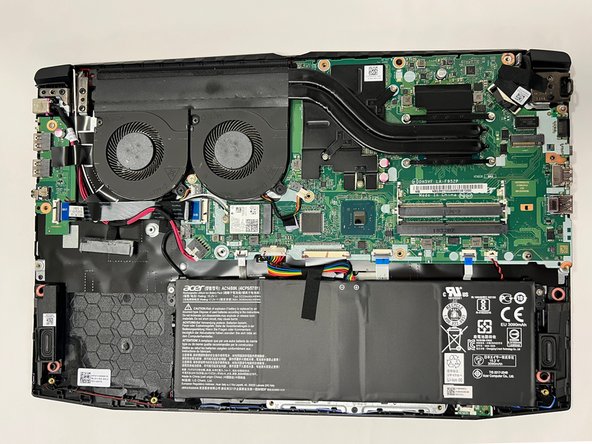
주요 콘텐츠로 건너뛰기

Acer Nitro 5 AN515-53-52FA Fan Replacement

필요한 것

  1. Acer Nitro 5 AN515-53-52FA Fan Replacement, Fan: 1 단계, 이미지 1/1
    • Before starting the replacement, make sure the laptop is turned off and unplugged.

    • Flip the laptop upside down so that the bottom is facing up

  2. Acer Nitro 5 AN515-53-52FA Fan Replacement: 2 단계, 이미지 1/2 Acer Nitro 5 AN515-53-52FA Fan Replacement: 2 단계, 이미지 2/2
    • Use the Phillips #0 screwdriver to unscrew the sixteen 9 mm screws holding the back cover in place.

  3. Acer Nitro 5 AN515-53-52FA Fan Replacement: 3 단계, 이미지 1/2 Acer Nitro 5 AN515-53-52FA Fan Replacement: 3 단계, 이미지 2/2
    • Use a plastic opening pick to work your way around the edges to remove the bottom case carefully.

    • Do not try to put too much force on the shell off as you may damage it.

    • Removing the backshell of the laptop will reveal the inside of it.

    • The fan of the laptop is located on the top left of the laptop.

  4. Acer Nitro 5 AN515-53-52FA Fan Replacement: 4 단계, 이미지 1/2 Acer Nitro 5 AN515-53-52FA Fan Replacement: 4 단계, 이미지 2/2
    • Use the Phillips #0 screwdriver to remove the four 9 mm screws securing the fans.

  5. Acer Nitro 5 AN515-53-52FA Fan Replacement: 5 단계, 이미지 1/3 Acer Nitro 5 AN515-53-52FA Fan Replacement: 5 단계, 이미지 2/3 Acer Nitro 5 AN515-53-52FA Fan Replacement: 5 단계, 이미지 3/3
    • Unplug the connectors before taking the fan out.

  6. Acer Nitro 5 AN515-53-52FA Fan Replacement: 6 단계, 이미지 1/2 Acer Nitro 5 AN515-53-52FA Fan Replacement: 6 단계, 이미지 2/2
    • Gently remove the fans from the adhesive strip.

결론

To reassemble your device, follow these instructions in reverse order.

다른 3명이 해당 안내서를 완성하였습니다.

Alfredo Prieto

회원 가입일: 09/01/22

827 평판

안내서 5개 작성하였습니다

Gateway, Team 1-3, Pee Fall 2022 Gateway, Team 1-3, Pee Fall 2022 회원

GCC-PEE-F22S1G3

4 회원들

안내서 5개 작성하였습니다

댓글 한 개

댓글 쓰기

조회 통계:

24 시간 전: 6

7일 전: 20

30일 전: 54

전체 시간: 902