주요 콘텐츠로 건너뛰기

Acer Nitro 5 AN515-55-55M1 Fan Replacement

필요한 것

  1. Acer Nitro 5 AN515-55-55M1 Fan Replacement, Bottom Cover: 1 단계, 이미지 1/1
    • Make sure the device is off and unplugged from power.

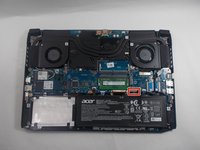
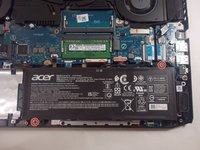
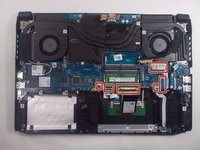
    • Flip the device so the bottom is facing up.

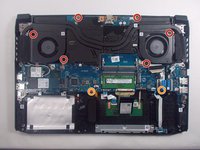
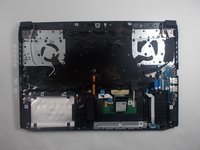
    • Remove 11 screws from the bottom case using a Phillips #1 screwdriver.

  2. Acer Nitro 5 AN515-55-55M1 Fan Replacement: 2 단계, 이미지 1/2 Acer Nitro 5 AN515-55-55M1 Fan Replacement: 2 단계, 이미지 2/2
    • Lift the top left and right corners up and away from the device.

    • This may require some force and will make harsh clicking sounds. This is normal; it's the plastic tabs separating from each other.

    • Remove the panel from the laptop.

  3. Acer Nitro 5 AN515-55-55M1 Fan Replacement, Battery: 3 단계, 이미지 1/3 Acer Nitro 5 AN515-55-55M1 Fan Replacement, Battery: 3 단계, 이미지 2/3 Acer Nitro 5 AN515-55-55M1 Fan Replacement, Battery: 3 단계, 이미지 3/3
    • Use an opening tool to disconnect the battery from the motherboard.

  4. Acer Nitro 5 AN515-55-55M1 Fan Replacement: 4 단계, 이미지 1/2 Acer Nitro 5 AN515-55-55M1 Fan Replacement: 4 단계, 이미지 2/2
    • Remove the two screws from the battery with a Phillips #1 screwdriver.

    • Remove the battery by pulling up and out from the left side.

  5. Acer Nitro 5 AN515-55-55M1 Fan Replacement, Motherboard: 5 단계, 이미지 1/3 Acer Nitro 5 AN515-55-55M1 Fan Replacement, Motherboard: 5 단계, 이미지 2/3 Acer Nitro 5 AN515-55-55M1 Fan Replacement, Motherboard: 5 단계, 이미지 3/3
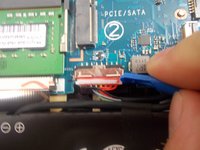
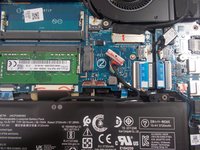
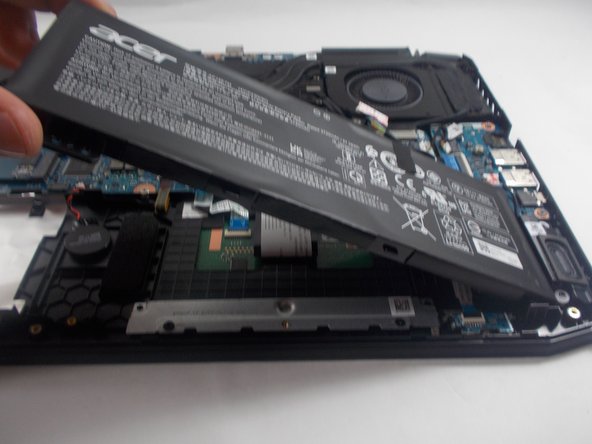
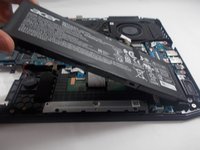
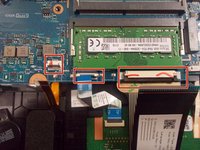
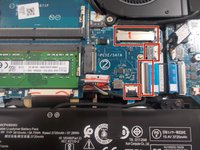
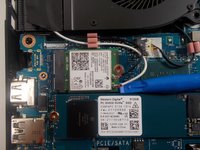
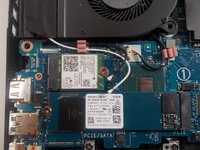
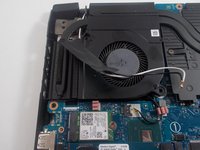
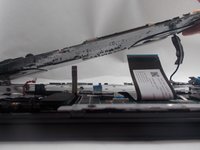
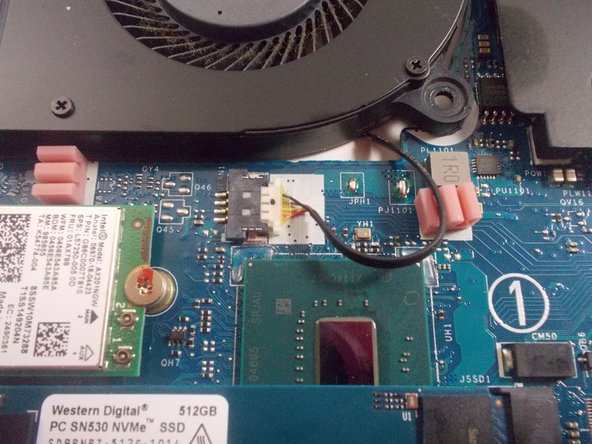
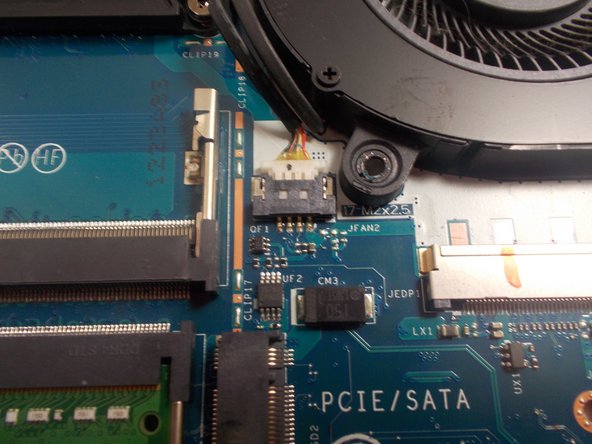
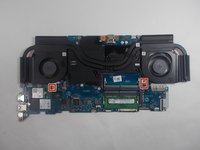
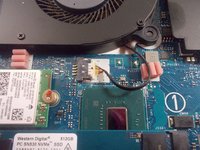
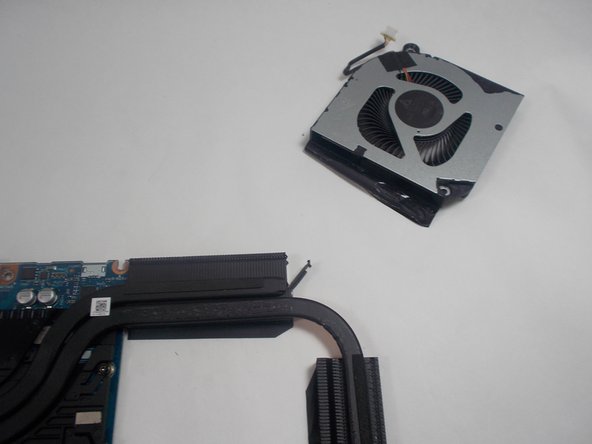
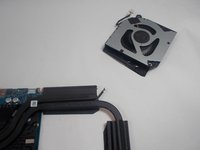
    • Disconnect the seven cables from the motherboard using an iFixit opening tool.

  6. Acer Nitro 5 AN515-55-55M1 Fan Replacement: 6 단계, 이미지 1/3 Acer Nitro 5 AN515-55-55M1 Fan Replacement: 6 단계, 이미지 2/3 Acer Nitro 5 AN515-55-55M1 Fan Replacement: 6 단계, 이미지 3/3
    • Use an iFixit opening tool to lift the two Wi-Fi antenna cables up and away from the Wi-Fi card.

  7. Acer Nitro 5 AN515-55-55M1 Fan Replacement: 7 단계, 이미지 1/3 Acer Nitro 5 AN515-55-55M1 Fan Replacement: 7 단계, 이미지 2/3 Acer Nitro 5 AN515-55-55M1 Fan Replacement: 7 단계, 이미지 3/3
    • Remove the six screws surrounding the fan using a Phillips #1 screwdriver.

    • Remove the two shorter screws from the motherboard using a Phillips #1 screwdriver.

    • Lift the taped wires off of the fans on the right and left sides.

  8. Acer Nitro 5 AN515-55-55M1 Fan Replacement: 8 단계, 이미지 1/3 Acer Nitro 5 AN515-55-55M1 Fan Replacement: 8 단계, 이미지 2/3 Acer Nitro 5 AN515-55-55M1 Fan Replacement: 8 단계, 이미지 3/3
    • Lift up the right side of the motherboard.

    • The cables may need some guidance to leave the management holes on the motherboard.

    • Continue to lift at an angle until there is a give.

    • Remove the motherboard and fans from the laptop.

  9. Acer Nitro 5 AN515-55-55M1 Fan Replacement, Fan: 9 단계, 이미지 1/3 Acer Nitro 5 AN515-55-55M1 Fan Replacement, Fan: 9 단계, 이미지 2/3 Acer Nitro 5 AN515-55-55M1 Fan Replacement, Fan: 9 단계, 이미지 3/3
    • Unplug the two fan connectors from each side of the motherboard using an opening tool.

  10. Acer Nitro 5 AN515-55-55M1 Fan Replacement: 10 단계, 이미지 1/2 Acer Nitro 5 AN515-55-55M1 Fan Replacement: 10 단계, 이미지 2/2
    • Both fans are loose at this point and are only being held in by thermal tape.

    • Lift both fans up on each side and fold over the heat pipe.

  11. Acer Nitro 5 AN515-55-55M1 Fan Replacement: 11 단계, 이미지 1/2 Acer Nitro 5 AN515-55-55M1 Fan Replacement: 11 단계, 이미지 2/2
    • Pull the fan away from the heat pipe on both sides of the motherboard.

    • The tape will separate off of the heat pipe.

결론

To reassemble your device, follow these instructions in reverse order.

다른 2명이 해당 안내서를 완성하였습니다.

Samuel Rouillard

회원 가입일: 03/30/21

674 평판

안내서 5개 작성하였습니다

UMass Dartmouth, Team 1-4, Mellen Spring 2022 UMass Dartmouth, Team 1-4, Mellen Spring 2022 회원

UMASSD-MELLEN-S22S1G4

3 회원들

안내서 5개 작성하였습니다

댓글 0개

댓글 쓰기

조회 통계:

24 시간 전: 0

7일 전: 17

30일 전: 69

전체 시간: 1,282