주요 콘텐츠로 건너뛰기

Acer One 10 S1003-114M Track Pad Replacement

필요한 것

  1. Acer One 10 S1003-114M Track Pad Replacement, Track Pad: 1 단계, 이미지 1/1
    • Open the screen.

  2. Acer One 10 S1003-114M Track Pad Replacement: 2 단계, 이미지 1/1
    • Remove the screen portion from the keyboard.

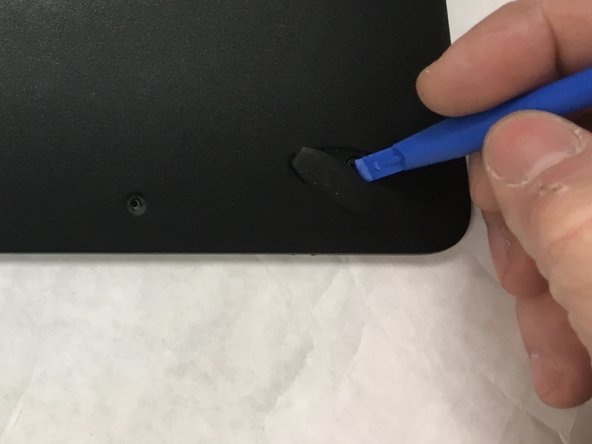
  3. Acer One 10 S1003-114M Track Pad Replacement: 3 단계, 이미지 1/2 Acer One 10 S1003-114M Track Pad Replacement: 3 단계, 이미지 2/2
    • Turn over the keyboard and use the plastic pry tool to remove the two adhesive backed rubber pads furthest from the hinge.

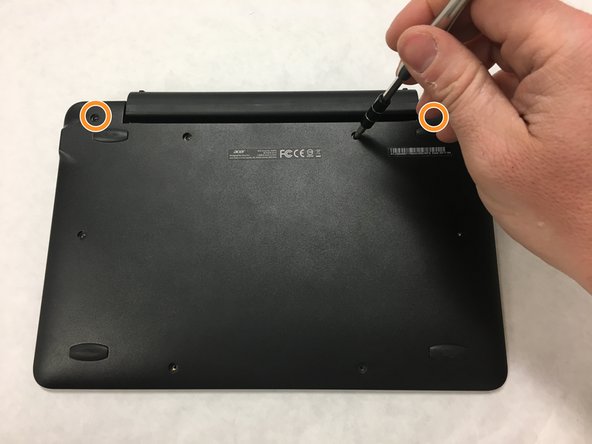
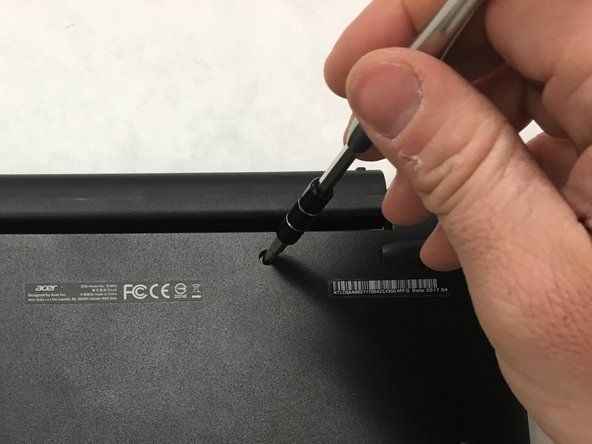
  4. Acer One 10 S1003-114M Track Pad Replacement: 4 단계, 이미지 1/3 Acer One 10 S1003-114M Track Pad Replacement: 4 단계, 이미지 2/3 Acer One 10 S1003-114M Track Pad Replacement: 4 단계, 이미지 3/3
    • Remove ten total screws from the back cover with a Phillips #1 screwdriver.

    • 8 screws 4.25mm in length with 4.00mm diameter heads.

    • 2 screws 6.00mm in length with 4.00mm diameter heads.

  5. Acer One 10 S1003-114M Track Pad Replacement: 5 단계, 이미지 1/1
    • Use the plastic opening tool to separate the front and back halves of the keyboard.

  6. Acer One 10 S1003-114M Track Pad Replacement: 6 단계, 이미지 1/1
    • Lift away the loosened back cover.

  7. Acer One 10 S1003-114M Track Pad Replacement: 7 단계, 이미지 1/1
    • Use an opening tool to remove/peel off the adhesive tape from the trackpad electrical connector

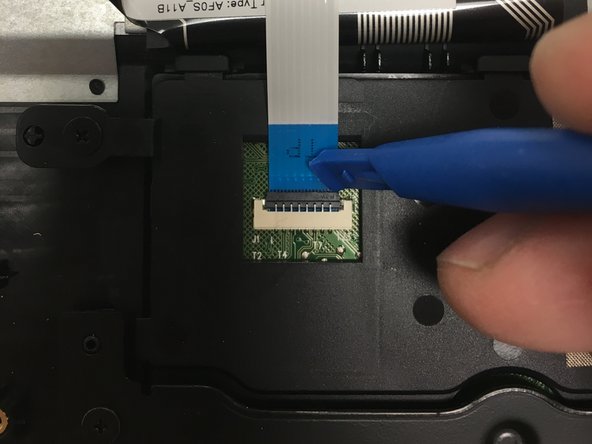
  8. Acer One 10 S1003-114M Track Pad Replacement: 8 단계, 이미지 1/2 Acer One 10 S1003-114M Track Pad Replacement: 8 단계, 이미지 2/2
    • Use an opening tool to flip/pop the switch holding down the electric connector to the keyboard.

  9. Acer One 10 S1003-114M Track Pad Replacement: 9 단계, 이미지 1/2 Acer One 10 S1003-114M Track Pad Replacement: 9 단계, 이미지 2/2
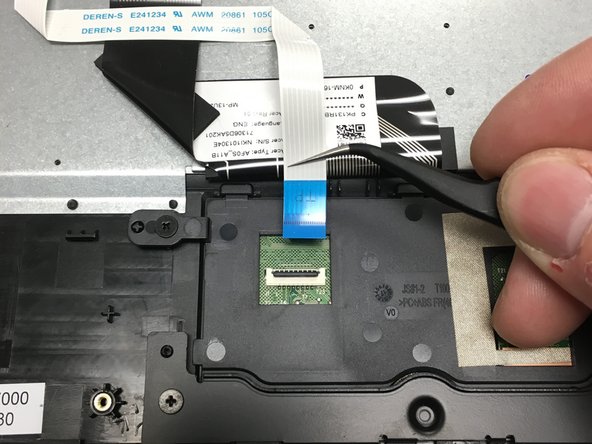
    • Use the fine tip tweezers to remove the electrical connector for the trackpad. Pull gently.

  10. Acer One 10 S1003-114M Track Pad Replacement: 10 단계, 이미지 1/3 Acer One 10 S1003-114M Track Pad Replacement: 10 단계, 이미지 2/3 Acer One 10 S1003-114M Track Pad Replacement: 10 단계, 이미지 3/3
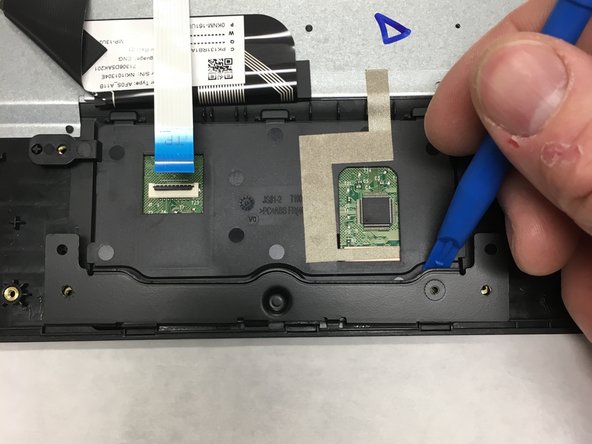
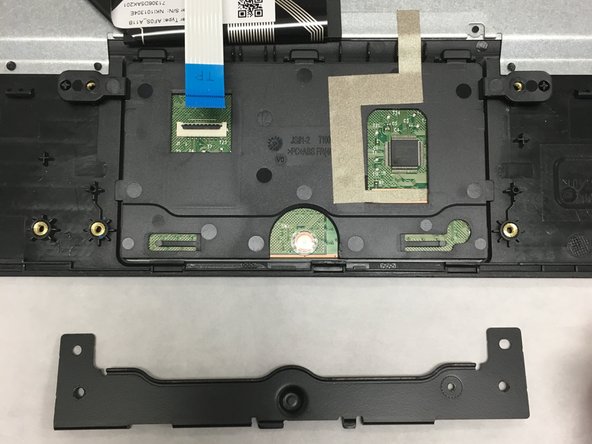
    • To free the retainer, remove the 2 mount screws, 3.50mm length and 4.90mm diameter heads, with a Phillips #0 screwdriver.

  11. Acer One 10 S1003-114M Track Pad Replacement: 11 단계, 이미지 1/1
    • To free the trackpad, remove the 2 mount screws, 3.50mm length and 4.90mm diameter heads, with a Phillips #0 screwdriver.

  12. Acer One 10 S1003-114M Track Pad Replacement: 12 단계, 이미지 1/1
    • Use a pair of fine tip tweezers to remove the adhesive metallic strap holding the trackpad to the keyboard.

  13. Acer One 10 S1003-114M Track Pad Replacement: 13 단계, 이미지 1/1
    • Gently remove the trackpad from the keyboard.

결론

To reassemble your device, follow these instructions in reverse order.

Karan Karthik

회원 가입일: 04/01/19

217 평판

안내서 1개 작성함

IUPUI, Team S2-G6, Harley Spring 2019 IUPUI, Team S2-G6, Harley Spring 2019 회원

IUPUI-HARLEY-S19S2G6

4 회원들

안내서 2개 작성하였습니다

댓글 0개

댓글 쓰기

조회 통계:

24 시간 전: 0

7일 전: 2

30일 전: 9

전체 시간: 732