주요 콘텐츠로 건너뛰기

Acer Spin 3 SP315-51-757C Speaker Replacement

필요한 것

  1. Acer Spin 3 SP315-51-757C Speaker Replacement, Back Panel: 1 단계, 이미지 1/2 Acer Spin 3 SP315-51-757C Speaker Replacement, Back Panel: 1 단계, 이미지 2/2
    • Remove eleven Phillips #0 screws from the back panel.

  2. Acer Spin 3 SP315-51-757C Speaker Replacement: 2 단계, 이미지 1/3 Acer Spin 3 SP315-51-757C Speaker Replacement: 2 단계, 이미지 2/3 Acer Spin 3 SP315-51-757C Speaker Replacement: 2 단계, 이미지 3/3
    • Using an opening tool, pry open the back panel, starting at the silver screen hinges.

    • You may need to apply more force than usual. If you don't find any success at the hinges, you can try to start at another area that looks easier to open.

    • You can also use some plastic opening picks to help hold parts of the panel open while you work on other sides.

  3. Acer Spin 3 SP315-51-757C Speaker Replacement: 3 단계, 이미지 1/1
    • Lift the back panel off of the laptop.

  4. Acer Spin 3 SP315-51-757C Speaker Replacement, Speaker: 4 단계, 이미지 1/2 Acer Spin 3 SP315-51-757C Speaker Replacement, Speaker: 4 단계, 이미지 2/2
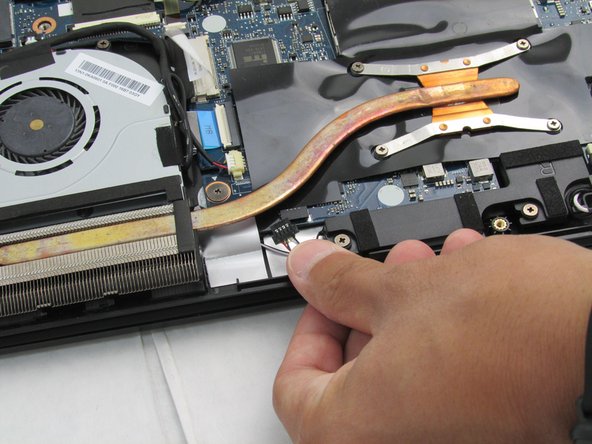
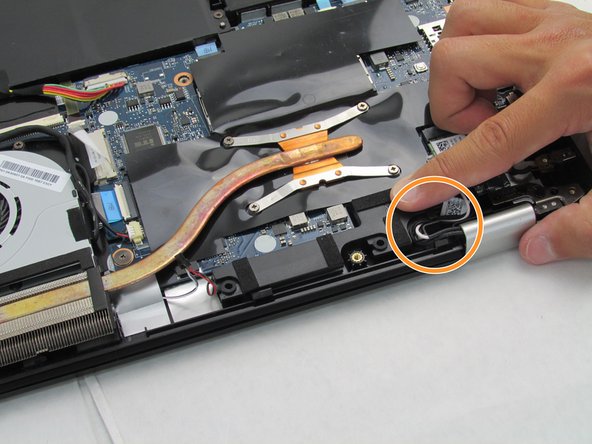
    • Using either your nails or a pair of small tweezers, remove the speaker's motherboard cable.

  5. Acer Spin 3 SP315-51-757C Speaker Replacement: 5 단계, 이미지 1/2 Acer Spin 3 SP315-51-757C Speaker Replacement: 5 단계, 이미지 2/2
    • Remove the Phillips #0 screws from each speaker.

    • After unscrewing the right-side speaker, you will notice that its corner is used to secure a couple cables. You will need to remove these in order to remove the speaker.

  6. Acer Spin 3 SP315-51-757C Speaker Replacement: 6 단계, 이미지 1/1
    • Remove the Phillips #0 screws holding down the laptop's fan.

  7. Acer Spin 3 SP315-51-757C Speaker Replacement: 7 단계, 이미지 1/1
    • Lift up the fan as lightly as possible to remove the speaker's wires underneath.

    • Be careful not to bend the copper conduction rod too much. A small bend is okay as long as there are no breaks in the rod.

  8. Acer Spin 3 SP315-51-757C Speaker Replacement: 8 단계, 이미지 1/1
    • Carefully maneuver the wires from under the fan and remove each speaker from the case.

결론

To reassemble your device, follow these instructions in reverse order.

Skyler Ognibene

회원 가입일: 09/17/19

934 평판

안내서 6개 작성하였습니다

댓글 0개

댓글 쓰기

조회 통계:

24 시간 전: 0

7일 전: 0

30일 전: 1

전체 시간: 532