주요 콘텐츠로 건너뛰기

Air Hog Smash Bots Front Panel Replacement

필요한 것

  1. Air Hog Smash Bots Front Panel Replacement, Front Panel: 1 단계, 이미지 1/2 Air Hog Smash Bots Front Panel Replacement, Front Panel: 1 단계, 이미지 2/2
    • Take out your controller and access to the back of the controller.

  2. Air Hog Smash Bots Front Panel Replacement: 2 단계, 이미지 1/1
    • Remove the screw on the battery lid. Using the Hex 4 socket and PH #0 bit, remove the 8 mm screw.

  3. Air Hog Smash Bots Front Panel Replacement: 3 단계, 이미지 1/1
    • Remove the 2 AAA batteries.

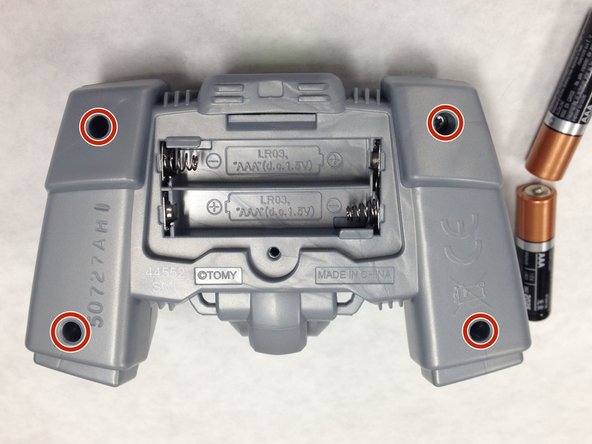
  4. Air Hog Smash Bots Front Panel Replacement: 4 단계, 이미지 1/2 Air Hog Smash Bots Front Panel Replacement: 4 단계, 이미지 2/2
    • Using the Hex 4 socket and PH #0 bit, remove the four 8 mm screws on the panel.

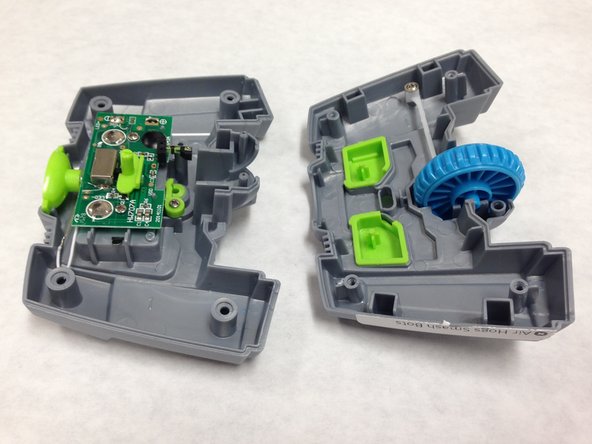
  5. Air Hog Smash Bots Front Panel Replacement: 5 단계, 이미지 1/2 Air Hog Smash Bots Front Panel Replacement: 5 단계, 이미지 2/2
    • Use the plastic opening tool to disconnect the front and back parts of the panel.

    • Some of the internal components may be displaced when opening the controller.

결론

To reassemble your device, follow these instructions in reverse order.

Jiani Xie

회원 가입일: 02/08/16

173 평판

안내서 1개 작성함

IUPUI, Team 1-1, Baechle Spring 2016 IUPUI, Team 1-1, Baechle Spring 2016 회원

IUPUI-BAECHLE-S16S1G1

4 회원들

안내서 14개 작성하였습니다

댓글 0개

댓글 쓰기

조회 통계:

24 시간 전: 1

7일 전: 5

30일 전: 10

전체 시간: 181