
AirPods Battery Replacement

REWA 및
최종 수정일 2026년 3월 30일
조회수: 51만
통계 보기:
- 지난 24시간
- 289
- 지난 7일:
- 1,980
- 지난 30일:
- 7,979
- 전체 시간:
- 512,641
댓글: 23
2 comments on steps, 21 guide comments.
Go to guide comments완료함: 68 69
68명이 이 안내서를 "완료"로 표시했습니다. 다음은 귀하의 차례입니까?
69명이 이 안내서를 "완료"로 표시했습니다. 귀하를 포함해서요 — 수고하셨어요!
즐겨찾기: 9 10
9명이 이 가이드를 즐겨찾기 (및 구독) 했습니다. 다음은 귀하의 차례입니까?
10명이 이 가이드를 즐겨찾기 (및 구독) 했습니다 — 귀하를 포함해서요!
커뮤니티-기여 안내서
이 안내서는 저희 커뮤니티의 멋진 회원이 작성하였습니다. iFixit 직원이 작성하지 않습니다.
소개
1단계로 이동하기 ↓The repair of AirPods has always been a difficulty not only for repair shop owners but also Apple. The after-sales policy of Apple now is replacing AirPods that meet after-sales standards directly with new ones. From a user experience perspective, this approach can ensure user satisfaction, but it also reflects the difficulty of repair. Today our repair course is about replacing the battery of AirPods 1.
필요한 것
부품

도구


동영상 개요
-
-
-
Set the temperature of the Hot Air Gun to 100℃ and airflow to 7. Switch to helical wind.
-
Place the AirPods 20mm around the Hot Air Gun and heat the metal cap for 3 minutes. During the heating process, we need to flip the AirPods constantly to heat it evenly.
 FixBot에 문의하기
-
-
이 단계에 사용된 도구:Tweezers$4.99
-
Pry up the metal cap from the side with an L. The back of the L side has a flex cable. Please do not damage the flex cable while prying.
-
Remove adhesive with tweezers. We need to heat the AirPods constantly while removing adhesive.
-
-
-
Please pay attention to the black flex cable while prying the metal cap. Attach the AirPods to the holder and keep removing adhesive with tweezers. To take out the battery, the adhesive must be removed completely.
-
A small amount of alcohol can be added to facilitate adhesive removal.
-
-
-
Insulate with aluminum foil after adhesive removal.
-
Set the temperature of the Soldering Iron to 365℃ and apply some Paste Flux to the bonding pad.
-
-
-
-
Heat with Soldering Iron and pry up the cathode of the battery. Please do not touch the aluminum foil while applying heat to avoid damaging the plastic case. Since the anode of the battery is on the other side of the cathode of the flex cable, we need to pry up the flex cable.
-
Keep applying a small amount of Paste Flux. Heat with Soldering Iron to separate the anode of the battery from the flex cable.
-
Remove the anode iron plate of the battery with a Cutting Nipper.
-
-
-
Then we take out the battery with revamped tweezers. Detach the AirPods from the holder. Heat the bottom of the AirPods evenly for 3-5 minutes with Hot Air Gun at 100℃.
-
Insert the two holes of the battery anode with tweezers and clamp the anode to remove the battery.
-
-
-
Take out excess adhesive. For easy installation later, remove adhesive around the metal cap completely.
-
Apply tin to the anode of the battery with Soldering Iron.
-
-
-
Plug the battery into the AirPods.
-
Attach the AirPods to the holder and insulate with aluminum foil. Heat with Soldering Iron to solder the battery anode to the flex cable.
-
-
-
After soldering, press the flex cable down. Put the battery anode in position and heat with Soldering Iron to solder.
-
Then we put the AirPods into the charging case to test. The AirPods can be charged.
-
Apply B7000 Adhesive to the bottom of the AirPods.
-
-
-
Close the metal cap and fix it with tape. After about 1 hour, the adhesive has set and we peel off the tape.
-
Put the AirPods into the charging case to test. The AirPods can pair with the phone and music can be played.
-
Take off the AirPods and the music stops. The battery has been successfully replaced.
-
-


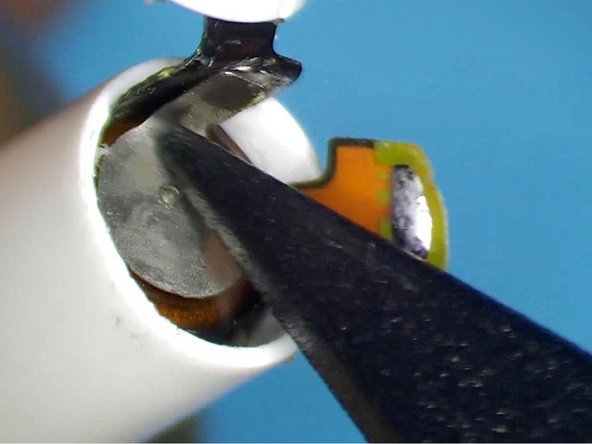


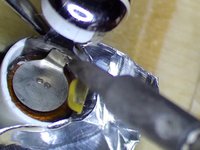


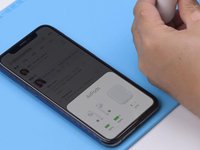

To replace the battery of AirPods, use Hot Air Gun with helical wind to heat the metal cap. Pry up the metal cap from the side with an L letter after heating for about three minutes. Then remove adhesive and pay attention not to damage the flex cable. After adhesive removal, protect the plastic case with aluminum foil and separate the cathode and anode of the battery from the flex cable. To remove the battery, keep heating the bottom of the AirPods and take out the battery with revamped tweezers. Lastly, we install the new battery, solder the cathode and anode of the battery, and fix with adhesive.
다른 68명이 해당 안내서를 완성하였습니다.

21가이드 댓글
Where do you buy the batteries?
When it don’t work no more I love taking things apart and possibly upgrading them. I really don’t know why people throw electronics away when it could either be fixed or taken apart to build something else. Like many circuit boards for example.
Repair Pug - 답글 공유
