주요 콘텐츠로 건너뛰기

Alienware M14xR2 RAM Replacement

필요한 것

  1. Alienware M14xR2 RAM Replacement, Battery: 1 단계, 이미지 1/1
    • Turn the computer off.

    • Disconnect the charging cable from the computer.

    • Failure to unplug the charging cable could result in electric shock and serious injury.

    • Flip the computer upside down.

  2. Alienware M14xR2 RAM Replacement: 2 단계, 이미지 1/3 Alienware M14xR2 RAM Replacement: 2 단계, 이미지 2/3 Alienware M14xR2 RAM Replacement: 2 단계, 이미지 3/3
    • Loosen the two 6.35 mm size 1 Phillips screws on the back cover.

    • The two screws are spring loaded and will not separate from the cover.

    • Slide the back cover towards you and then lift upwards to remove.

  3. Alienware M14xR2 RAM Replacement: 3 단계, 이미지 1/1
    • Loosen the two 6.35 mm size 1 Philips screws attaching the battery to the laptop.

    • The two screws are clipped into the battery and will not detach.

  4. Alienware M14xR2 RAM Replacement: 4 단계, 이미지 1/3 Alienware M14xR2 RAM Replacement: 4 단계, 이미지 2/3 Alienware M14xR2 RAM Replacement: 4 단계, 이미지 3/3
    • Pull up on the black tab on the battery to reveal the connection between the battery and laptop.

    • Pull up on the white connector to disconnect it from the laptop.

    • The battery is now free to remove from the laptop and can be set aside.

  5. Alienware M14xR2 RAM Replacement, Optical Drive: 5 단계, 이미지 1/3 Alienware M14xR2 RAM Replacement, Optical Drive: 5 단계, 이미지 2/3 Alienware M14xR2 RAM Replacement, Optical Drive: 5 단계, 이미지 3/3
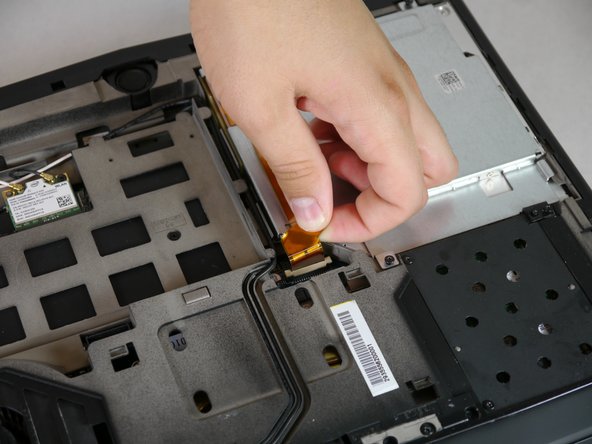
    • Unscrew the four 6.35 mm size 1 screws.

    • Pull up on the end of the orange tab to detach it from the white connector.

    • Lift the optical drive up and out of the laptop and set it aside.

  6. Alienware M14xR2 RAM Replacement, RAM: 6 단계, 이미지 1/3 Alienware M14xR2 RAM Replacement, RAM: 6 단계, 이미지 2/3 Alienware M14xR2 RAM Replacement, RAM: 6 단계, 이미지 3/3
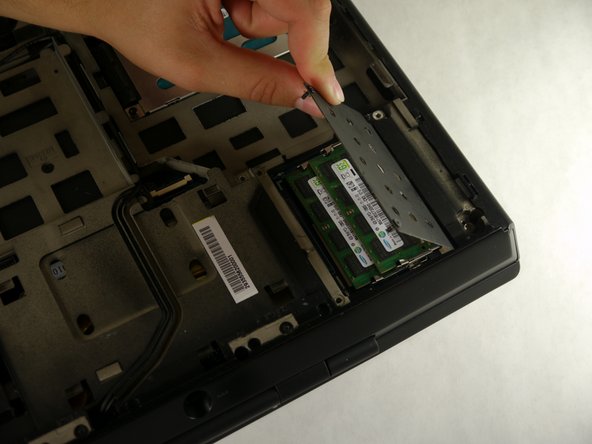
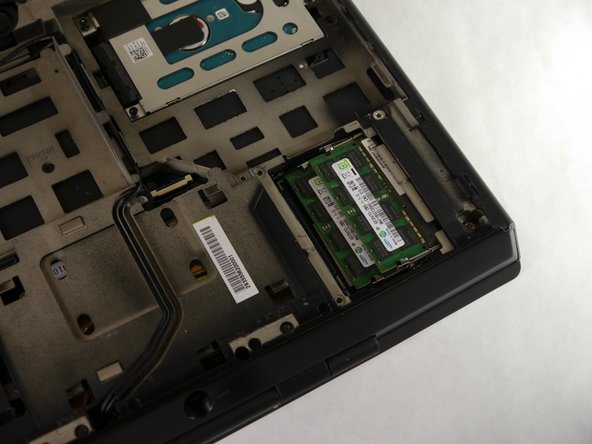
    • Unscrew the two 6.35 mm size 1 screws.

    • Lift up and remove the panel covering the RAM sticks.

  7. Alienware M14xR2 RAM Replacement: 7 단계, 이미지 1/2 Alienware M14xR2 RAM Replacement: 7 단계, 이미지 2/2
    • Push outward on both prongs that secure the RAM sticks in place.

    • The RAM sticks will rise upward when released from the prongs.

  8. Alienware M14xR2 RAM Replacement: 8 단계, 이미지 1/2 Alienware M14xR2 RAM Replacement: 8 단계, 이미지 2/2
    • Grab and pull the RAM sticks up and out of their casing and set them aside.

결론

To reassemble your device, follow these instructions in reverse order.

다른 4명이 해당 안내서를 완성하였습니다.

Eugene Park

회원 가입일: 09/30/13

195 평판

안내서 1개 작성함

Cal Poly, Team 13-4, Forte Fall 2013 Cal Poly, Team 13-4, Forte Fall 2013 회원

CPSU-FORTE-F13S13G4

5 회원들

안내서 6개 작성하였습니다

댓글 3개

How max is the ram upgrade compatible with the m14x ifixit?!

doantuan85 - 답글

I meaned r1 model

doantuan85 - 답글

Yo, man! If my RAM slot is damaged somehow, is there any possibility to change/repair it? It won't detect a RAM card, keeps beeping 4 times at the start.

tasanov - 답글

댓글 쓰기

조회 통계:

24 시간 전: 0

7일 전: 0

30일 전: 3

전체 시간: 2,192