주요 콘텐츠로 건너뛰기

Alienware M15x Hard Drive Replacement

필요한 것

  1. Alienware M15x Hard Drive Replacement, Battery: 1 단계, 이미지 1/3 Alienware M15x Hard Drive Replacement, Battery: 1 단계, 이미지 2/3 Alienware M15x Hard Drive Replacement, Battery: 1 단계, 이미지 3/3
    • Remove the battery by sliding the latch to the left and pulling the battery up.

  2. Alienware M15x Hard Drive Replacement, Compartment Door: 2 단계, 이미지 1/2 Alienware M15x Hard Drive Replacement, Compartment Door: 2 단계, 이미지 2/2
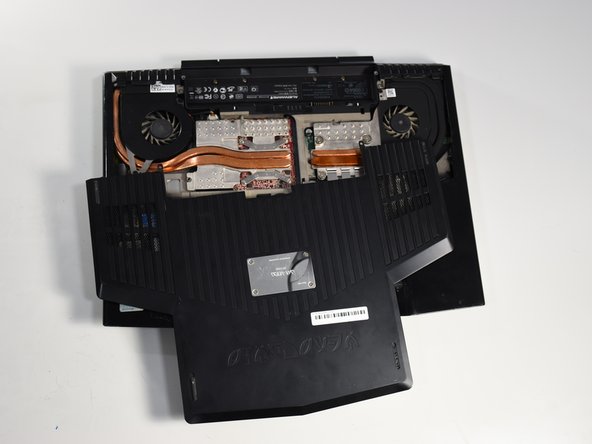
    • Remove the two 4-mm screws that hold the compartment door to the rest of the computer using a PH#0 screwdriver tip.

  3. Alienware M15x Hard Drive Replacement: 3 단계, 이미지 1/3 Alienware M15x Hard Drive Replacement: 3 단계, 이미지 2/3 Alienware M15x Hard Drive Replacement: 3 단계, 이미지 3/3
    • Slide the compartment door towards the front of the computer and lift.

  4. Alienware M15x Hard Drive Replacement, Hard Drive: 4 단계, 이미지 1/1
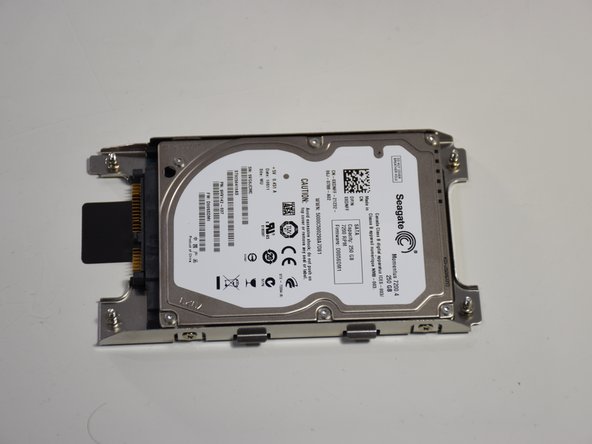
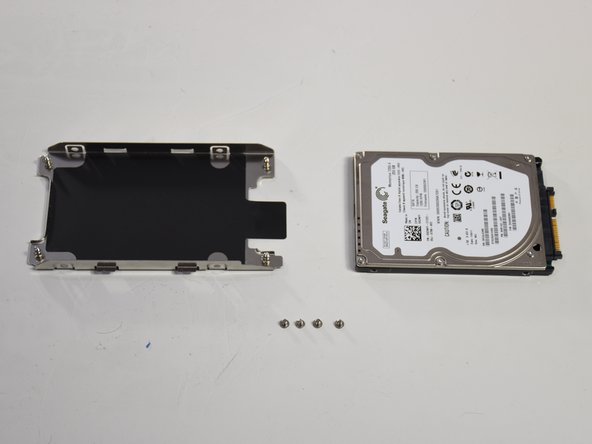
    • Use Phillips #1 screwdriver to loosen the four screws on the hard drive enclosure.

  5. Alienware M15x Hard Drive Replacement: 5 단계, 이미지 1/2 Alienware M15x Hard Drive Replacement: 5 단계, 이미지 2/2
    • Once the screws are loosened use the "PULL" tab to remove the current hard drive from the computer.

  6. Alienware M15x Hard Drive Replacement: 6 단계, 이미지 1/2 Alienware M15x Hard Drive Replacement: 6 단계, 이미지 2/2
    • Remove the four small screws indicated to remove the casing to the hard drive.

  7. Alienware M15x Hard Drive Replacement: 7 단계, 이미지 1/1
    • Now take off the SATA converter and then connect it to the drive you would like to replace it with.

결론

To reassemble your device, follow these instructions in reverse order.

David Sann

회원 가입일: 01/22/18

111 평판

안내서 1개 작성함

Cal Poly, Team S11-G3, Banghart Winter 2018 Cal Poly, Team S11-G3, Banghart Winter 2018 회원

CPSU-BANGHART-W18S11G3

5 회원들

안내서 6개 작성하였습니다

댓글 0개

댓글 쓰기

조회 통계:

24 시간 전: 0

7일 전: 0

30일 전: 10

전체 시간: 835