이 버전에는 잘못된 편집 사항이 있을 수 있습니다. 최신 확인된 스냅샷으로 전환하십시오.
필요한 것
-
이 단계는 번역되지 않았습니다. 번역을 도와주십시오
-
Using your hands, remove the pegs (4+4) from the front and back of the speaker.
-
-
-
이 단계는 번역되지 않았습니다. 번역을 도와주십시오
-
Using tweezers remove the rubber stoppers (4 at the back + 2 at the front).
-
-
이 단계는 번역되지 않았습니다. 번역을 도와주십시오
-
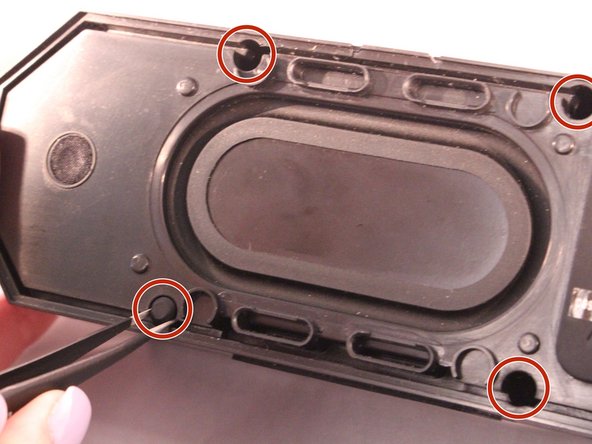
Using the size PH1 screwdriver remove the screws exposed from the rubber stoppers (4 + 2).
-
-
이 단계는 번역되지 않았습니다. 번역을 도와주십시오
-
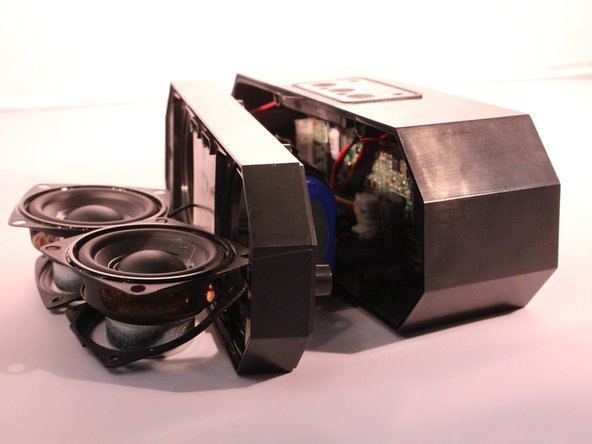
Pull the case apart and you will be able to see all the components inside the speaker.
-


팀

Eastern Washington University, Team S2-G2, Rowley Spring 2017 Eastern Washington University, Team S2-G2, Rowley Spring 2017 회원
EWU-ROWLEY-S17S2G2
4 회원들
안내서 5개 작성하였습니다