주요 콘텐츠로 건너뛰기

Aluratek ADMPF310F Speakers Replacement

필요한 것

  1. Aluratek ADMPF310F Speakers Replacement, Speakers: 1 단계, 이미지 1/3 Aluratek ADMPF310F Speakers Replacement, Speakers: 1 단계, 이미지 2/3 Aluratek ADMPF310F Speakers Replacement, Speakers: 1 단계, 이미지 3/3
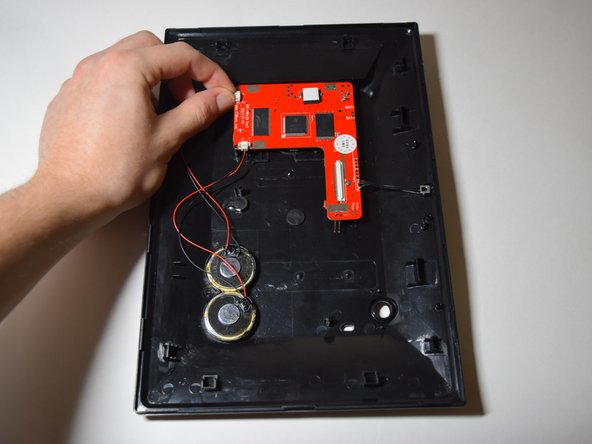
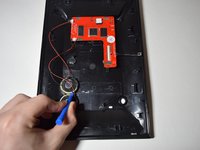
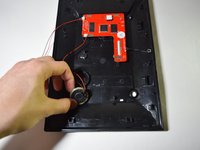
    • Using the plastic opening tool pry off the clips all around the frame. You will hear a popping sound for every clip

    • Be sure not to pry to hard because you could crack or break the plastic facing of the device.

  2. Aluratek ADMPF310F Speakers Replacement: 2 단계, 이미지 1/1
    • Lift screen out of place so you can access the plugs that connect it.

    • Be careful not to pull the screen to far away when placing to the side, many fragile wires are connected.

  3. Aluratek ADMPF310F Speakers Replacement: 3 단계, 이미지 1/2 Aluratek ADMPF310F Speakers Replacement: 3 단계, 이미지 2/2
    • Unplug both plugs for the speakers to the motherboard

  4. Aluratek ADMPF310F Speakers Replacement: 4 단계, 이미지 1/2 Aluratek ADMPF310F Speakers Replacement: 4 단계, 이미지 2/2
    • Use plastic opening tool to pull out one of the speakers.

    • Then use your hand to take out the other speaker

  5. Aluratek ADMPF310F Speakers Replacement: 5 단계, 이미지 1/1
    • Disconnect the wires off of the old speakers and solder the old wires onto the new speakers.

결론

To reassemble your device, follow these instructions in reverse order.

Chris Belair

회원 가입일: 10/20/16

333 평판

안내서 2개 작성하였습니다

UMass Dartmouth, Team 5-1, Martin Fall 2016 UMass Dartmouth, Team 5-1, Martin Fall 2016 회원

UMASSD-MARTIN-F16S5G1

3 회원들

안내서 5개 작성하였습니다

댓글 0개

댓글 쓰기

조회 통계:

24 시간 전: 0

7일 전: 2

30일 전: 2

전체 시간: 105