주요 콘텐츠로 건너뛰기

Amazon Echo Show 15 Buttons Replacement

필요한 것

  1. Amazon Echo Show 15 Buttons Replacement, Back Panel: 1 단계, 이미지 1/3 Amazon Echo Show 15 Buttons Replacement, Back Panel: 1 단계, 이미지 2/3 Amazon Echo Show 15 Buttons Replacement, Back Panel: 1 단계, 이미지 3/3
    • Remove the four white stickers on your device's back panel.

    • Due to the strong adhesive supporting the stickers, we recommend heating them up to make removal easier.

    • A hair dryer may work best for this step.

  2. Amazon Echo Show 15 Buttons Replacement: 2 단계, 이미지 1/3 Amazon Echo Show 15 Buttons Replacement: 2 단계, 이미지 2/3 Amazon Echo Show 15 Buttons Replacement: 2 단계, 이미지 3/3
    • Unscrew the four 50 mm screws with a T3 Torx screwdriver.

    • Pop the sides and remove the back panel of the device.

  3. Amazon Echo Show 15 Buttons Replacement, Inner Black Panel: 3 단계, 이미지 1/3 Amazon Echo Show 15 Buttons Replacement, Inner Black Panel: 3 단계, 이미지 2/3 Amazon Echo Show 15 Buttons Replacement, Inner Black Panel: 3 단계, 이미지 3/3
    • In the top right corner you will find a small black panel.

    • Remove the five 2 mm screws with a Torx T5 screwdriver.

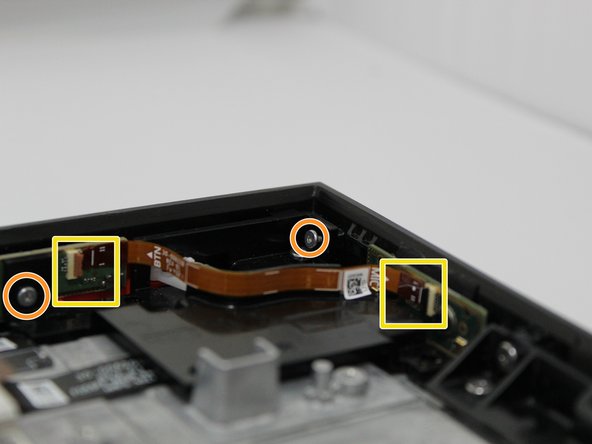
    • Remove the two 5 mm with a Torx T3 screwdriver.

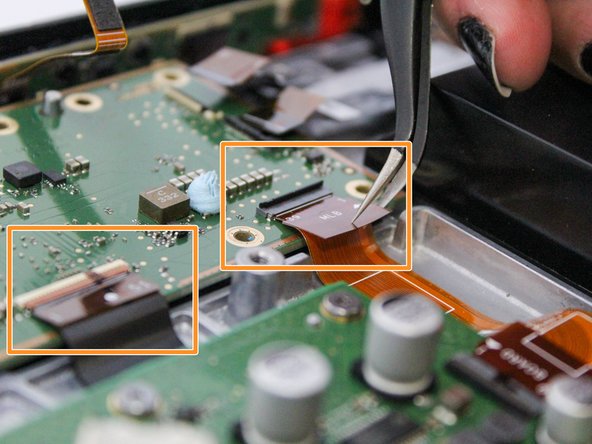
    • Remove both ends of the connector from the main device.

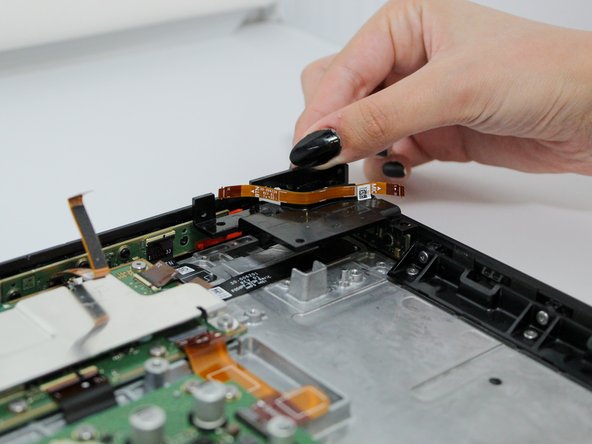
    • Remove the black panel.

  4. Amazon Echo Show 15 Buttons Replacement, Motherboard: 4 단계, 이미지 1/3 Amazon Echo Show 15 Buttons Replacement, Motherboard: 4 단계, 이미지 2/3 Amazon Echo Show 15 Buttons Replacement, Motherboard: 4 단계, 이미지 3/3
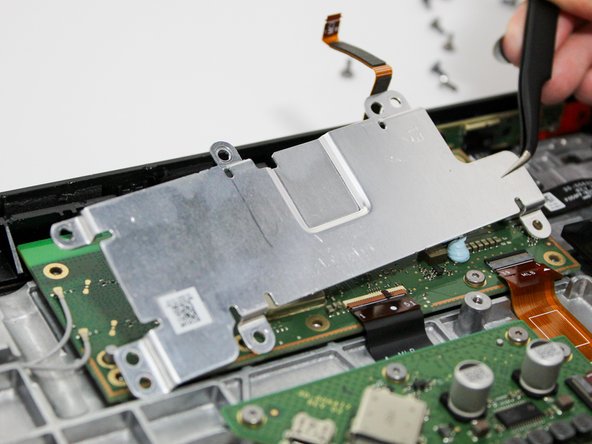
    • Remove the five 3 mm screws from the metal protector using a Torx T5 screwdriver.

    • Take off the metal protector.

    • The metal protector is connected to the motherboard with adhesive. More force may be necessary.

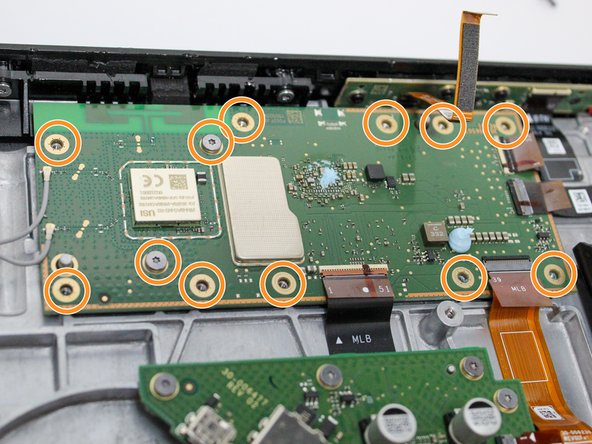
    • Remove the twelve 3 mm screws from the motherboard using the Torx T5 screwdriver.

  5. Amazon Echo Show 15 Buttons Replacement: 5 단계, 이미지 1/3 Amazon Echo Show 15 Buttons Replacement: 5 단계, 이미지 2/3 Amazon Echo Show 15 Buttons Replacement: 5 단계, 이미지 3/3
    • Detach the connectors for the camera and buttons from the motherboard.

    • Detach the connectors for the power station and speakers from the motherboard.

    • Detach the small white coaxial cables from the motherboard.

    • These connectors will be reused, so be very careful with them. The small white connectors come off by being pulled up.

  6. Amazon Echo Show 15 Buttons Replacement: 6 단계, 이미지 1/1
    • Remove the motherboard from the main device.

  7. Amazon Echo Show 15 Buttons Replacement, Buttons: 7 단계, 이미지 1/3 Amazon Echo Show 15 Buttons Replacement, Buttons: 7 단계, 이미지 2/3 Amazon Echo Show 15 Buttons Replacement, Buttons: 7 단계, 이미지 3/3
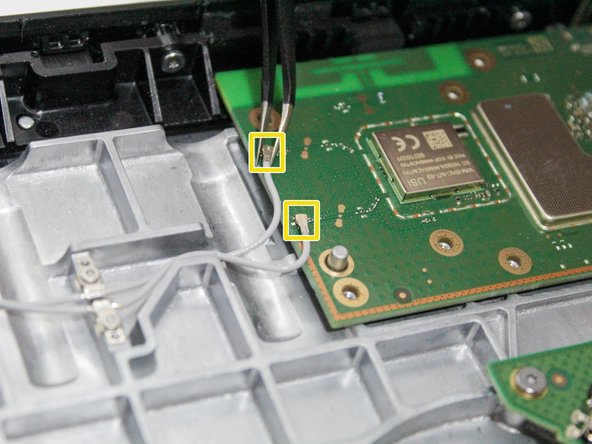
    • Remove the three 3 mm screws from the green panel in the top right-hand corner of the device using a Phillips #1 screwdriver.

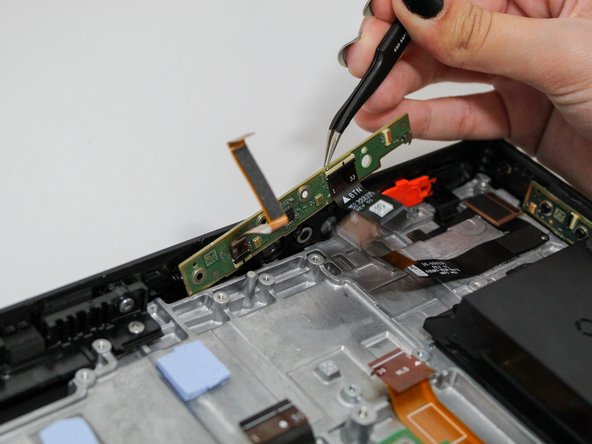
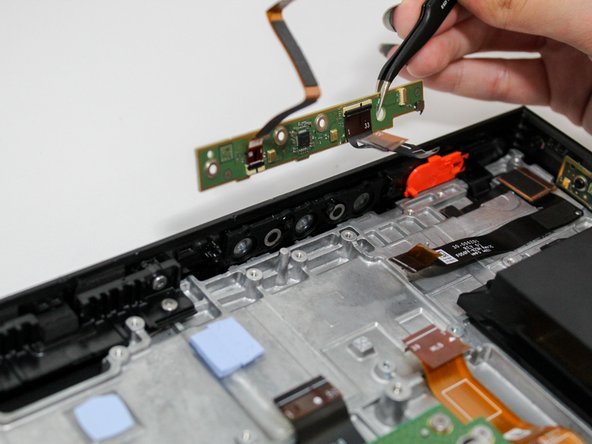
    • Remove the green panel.

    • The green panel is connected to the main device with adhesive. You will need to use a bit more force to get it out.

  8. Amazon Echo Show 15 Buttons Replacement: 8 단계, 이미지 1/1
    • Remove the rubber part of the buttons.

결론

To reassemble your device, follow these instructions in reverse order.

다른 한 분이 해당 안내서를 완성하였습니다.

Julia Silvestrin

회원 가입일: 09/20/23

228 평판

안내서 2개 작성하였습니다

Utah Tech University, Team 1-4, McMurrin Fall 2023 Utah Tech University, Team 1-4, McMurrin Fall 2023 회원

UTAHTECH-MCMURRIN-F23S1G4

3 회원들

안내서 7개 작성하였습니다

댓글 0개

댓글 쓰기

조회 통계:

24 시간 전: 0

7일 전: 0

30일 전: 2

전체 시간: 112