주요 콘텐츠로 건너뛰기

Amazon Fire HDX 8.9" 4th Gen. Display Daughter Board Replacement

필요한 것

  1. Amazon Fire HDX 8.9" 4th Gen. Display Daughter Board Replacement, Screen: 1 단계, 이미지 1/3 Amazon Fire HDX 8.9" 4th Gen. Display Daughter Board Replacement, Screen: 1 단계, 이미지 2/3 Amazon Fire HDX 8.9" 4th Gen. Display Daughter Board Replacement, Screen: 1 단계, 이미지 3/3
    • Ensure that the device is turned off.

    • Holding the device firmly, wedge a plastic opening tool between the speaker cover and the device. Then pry up to separate it from the device.

    • Then begin to firmly pry up the plastic cover with the plastic opening tool.

    • The backing is connected with adhesive so force may be necessary.

    • Be careful to not damage the plastic in any way.

    • Once you can fit your finger under the plastic cover, begin to slide your finger down the cover while simultaneously prying up.

  2. Amazon Fire HDX 8.9" 4th Gen. Display Daughter Board Replacement: 2 단계, 이미지 1/2 Amazon Fire HDX 8.9" 4th Gen. Display Daughter Board Replacement: 2 단계, 이미지 2/2
    • Once you reach the end of the plastic cover you should be able to completely remove it from the device.

  3. Amazon Fire HDX 8.9" 4th Gen. Display Daughter Board Replacement: 3 단계, 이미지 1/2 Amazon Fire HDX 8.9" 4th Gen. Display Daughter Board Replacement: 3 단계, 이미지 2/2
    • Use a T5 screwdriver to remove the four 3.5 mm T5 screws at the top of the device, where the black plastic trim was located.

  4. Amazon Fire HDX 8.9" 4th Gen. Display Daughter Board Replacement: 4 단계, 이미지 1/3 Amazon Fire HDX 8.9" 4th Gen. Display Daughter Board Replacement: 4 단계, 이미지 2/3 Amazon Fire HDX 8.9" 4th Gen. Display Daughter Board Replacement: 4 단계, 이미지 3/3
    • Release the two clear plastic clips at the top of the device near the speaker using the spudger.

    • Simply push down the clip with the tip of the spudger.

    • Push lightly to ensure that the clips aren't damaged.

  5. Amazon Fire HDX 8.9" 4th Gen. Display Daughter Board Replacement: 5 단계, 이미지 1/3 Amazon Fire HDX 8.9" 4th Gen. Display Daughter Board Replacement: 5 단계, 이미지 2/3 Amazon Fire HDX 8.9" 4th Gen. Display Daughter Board Replacement: 5 단계, 이미지 3/3
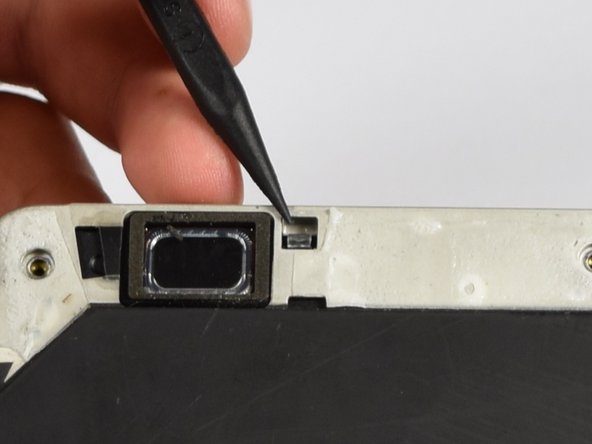
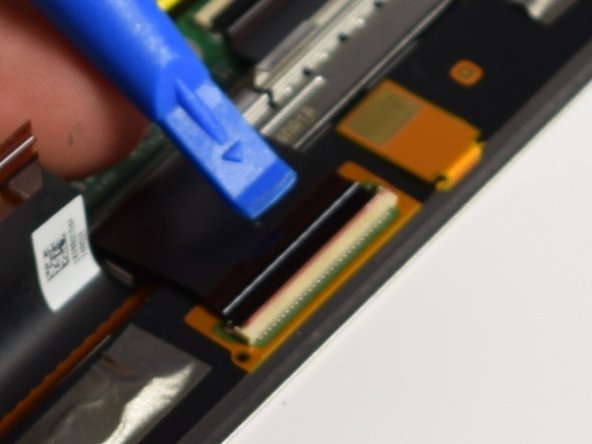
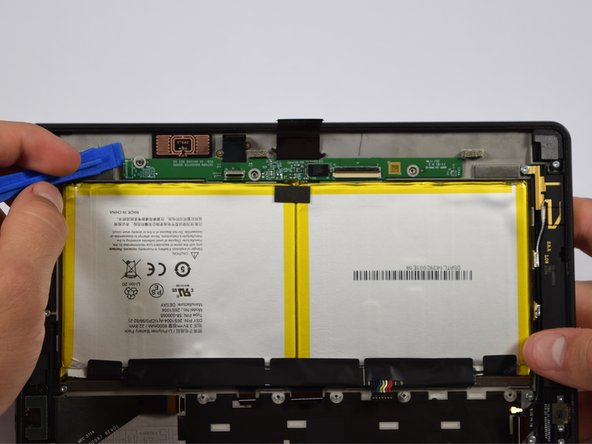
    • Use a plastic opening tool to wedge between the screen and the device, while simultaneously holding the clip open from step 4.

    • Pry the screen very gently to avoid cracking the glass

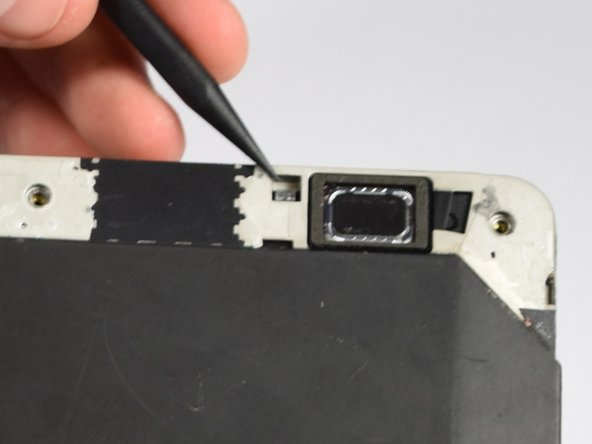
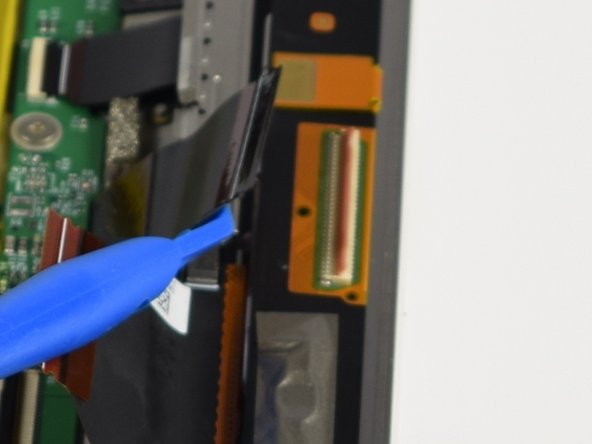
    • Start to remove the screen from where the black plastic trim was removed and work the tool around the sides of the device. You will here small pops from the clips on the sides being released.

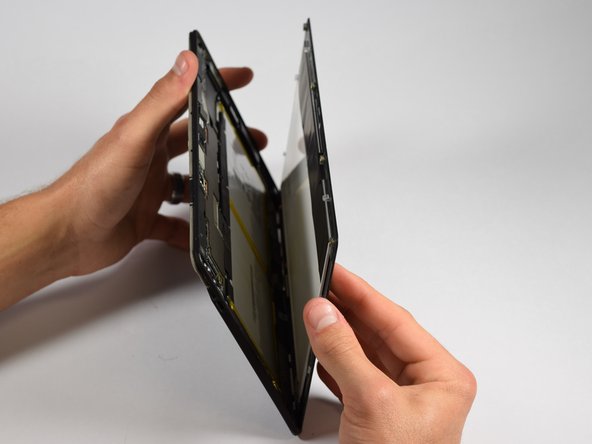
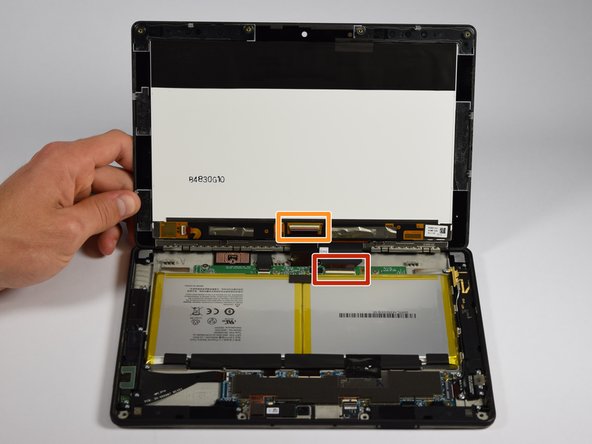
    • The Amazon Fire can now be opened with the two flex cables at the base still connected

  6. Amazon Fire HDX 8.9" 4th Gen. Display Daughter Board Replacement: 6 단계, 이미지 1/2 Amazon Fire HDX 8.9" 4th Gen. Display Daughter Board Replacement: 6 단계, 이미지 2/2
    • Now we have to remove the two flex cables attached to both the screen assembly and body of the device.

    • The cable addressed in step 8 is highlighted in orange.

  7. Amazon Fire HDX 8.9" 4th Gen. Display Daughter Board Replacement: 7 단계, 이미지 1/3 Amazon Fire HDX 8.9" 4th Gen. Display Daughter Board Replacement: 7 단계, 이미지 2/3 Amazon Fire HDX 8.9" 4th Gen. Display Daughter Board Replacement: 7 단계, 이미지 3/3
    • First turn the device 90 degrees counterclockwise.

    • Wedge a spudger or plastic opening tool under the black flap of the larger connector and lift up.

    • Pull the belt out of the connector and lift it up.

  8. Amazon Fire HDX 8.9" 4th Gen. Display Daughter Board Replacement: 8 단계, 이미지 1/3 Amazon Fire HDX 8.9" 4th Gen. Display Daughter Board Replacement: 8 단계, 이미지 2/3 Amazon Fire HDX 8.9" 4th Gen. Display Daughter Board Replacement: 8 단계, 이미지 3/3
    • Turn the device 180 degrees.

    • Repeat step 7 for the smaller flex cable connection.

  9. Amazon Fire HDX 8.9" 4th Gen. Display Daughter Board Replacement: 9 단계, 이미지 1/1
    • Your screen assembly has now been removed and can be replaced.

  10. Amazon Fire HDX 8.9" 4th Gen. Display Daughter Board Replacement, Display Daughterboard: 10 단계, 이미지 1/1
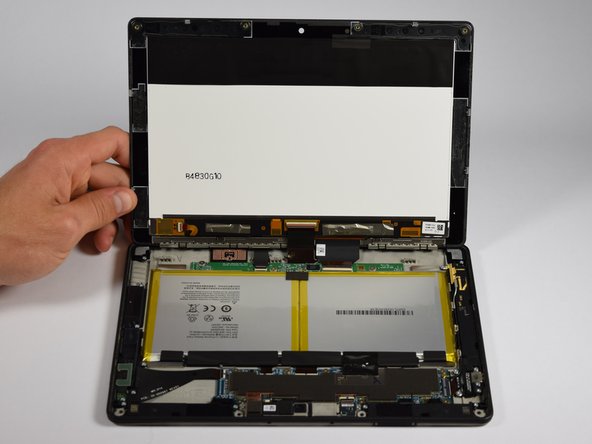
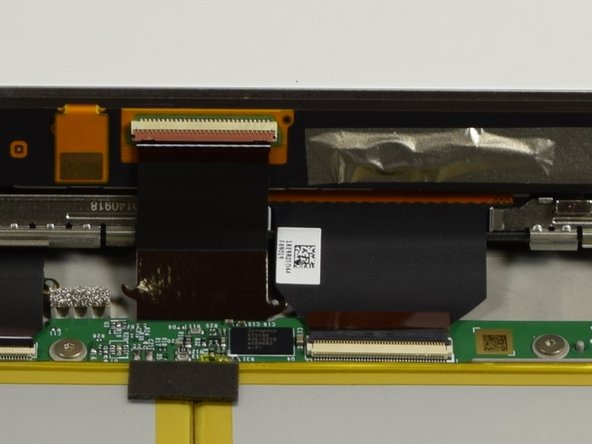
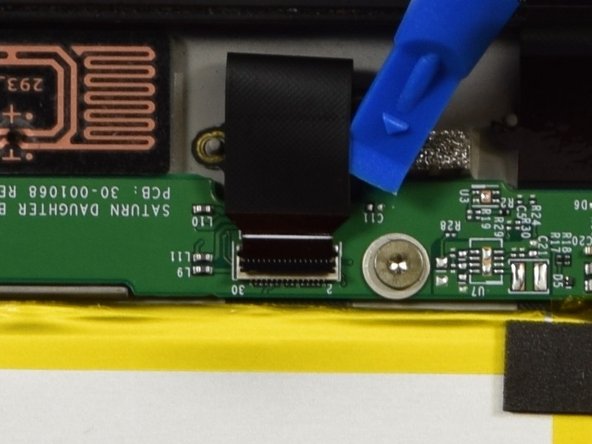
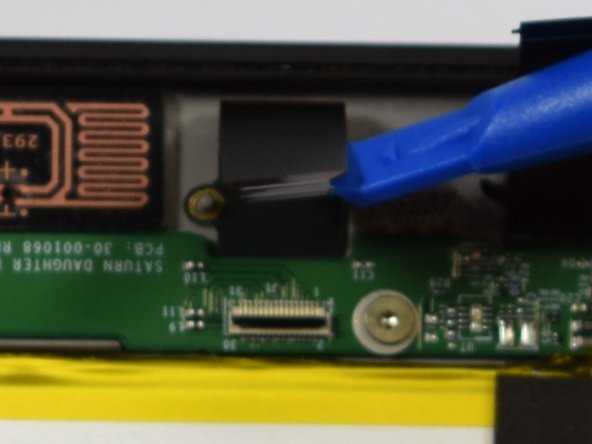
    • We can now remove the display daughterboard.

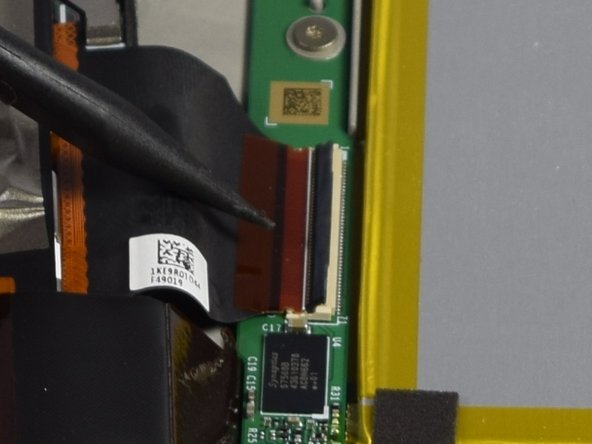
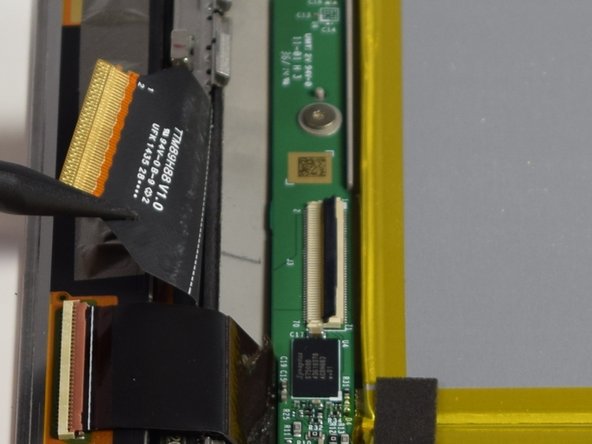
    • Start by disconnecting the lone flex cable still connected to the daughterboard.

  11. Amazon Fire HDX 8.9" 4th Gen. Display Daughter Board Replacement: 11 단계, 이미지 1/3 Amazon Fire HDX 8.9" 4th Gen. Display Daughter Board Replacement: 11 단계, 이미지 2/3 Amazon Fire HDX 8.9" 4th Gen. Display Daughter Board Replacement: 11 단계, 이미지 3/3
    • Turn the device 180 degrees.

    • Use a plastic opening tool to flip the black tab up on the connector.

    • Pull the flex cable out and up.

  12. Amazon Fire HDX 8.9" 4th Gen. Display Daughter Board Replacement: 12 단계, 이미지 1/3 Amazon Fire HDX 8.9" 4th Gen. Display Daughter Board Replacement: 12 단계, 이미지 2/3 Amazon Fire HDX 8.9" 4th Gen. Display Daughter Board Replacement: 12 단계, 이미지 3/3
    • With a T5 screw driver remove the three 2 mm T5 screws securing the daughterboard to the device.

    • Use a plastic opening tool to lift up the daughterboard from the device.

    • The daughterboard has now been completely removed, and can be replaced.

결론

To reassemble your device, follow these instructions in reverse order.

다른 2명이 해당 안내서를 완성하였습니다.

Jacob Rogers

회원 가입일: 04/11/16

285 평판

안내서 2개 작성하였습니다

Cal Poly, Team 1-8, Maness Spring 2016 Cal Poly, Team 1-8, Maness Spring 2016 회원

CPSU-MANESS-S16S1G8

5 회원들

안내서 6개 작성하였습니다

댓글 0개

댓글 쓰기

조회 통계:

24 시간 전: 0

7일 전: 5

30일 전: 13

전체 시간: 1,077