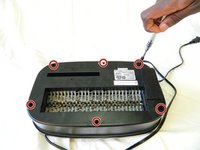
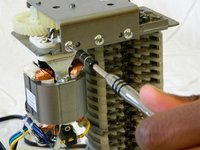
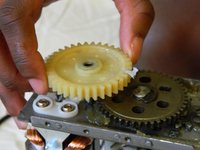
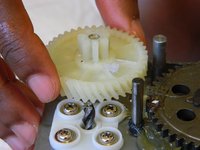
주요 콘텐츠로 건너뛰기

AmazonBasics B00Q3KFX8U Motor Replacement

필요한 것

  1. AmazonBasics B00Q3KFX8U Motor Replacement, Drive Gear: 1 단계, 이미지 1개 중 1개
    • Remove the shredder assembly from the paper scrap bin.

  2. AmazonBasics B00Q3KFX8U Motor Replacement: 2 단계, 이미지 1개 중 1개
    • Remove the two 10mm PH1 screws holding the small black panel in place.

  3. AmazonBasics B00Q3KFX8U Motor Replacement: 3 단계, 이미지 2개 중 1개 AmazonBasics B00Q3KFX8U Motor Replacement: 3 단계, 이미지 2개 중 2개
    • Remove the six 14mm PH1 screws holding the bottom cover in place.

    • Remove the cover by lifting straight upwards.

    • One of the screws will be hidden beneath a warranty sticker. Simply push the head of the screwdriver through the sticker to access the screw.

  4. AmazonBasics B00Q3KFX8U Motor Replacement: 4 단계, 이미지 1개 중 1개
    • Remove the blade/motor assembly from the top cover by lifting straight upwards. Do not disconnect any wiring just yet.

    • The blades are sharp. Coming into contact with them may result in injury.

  5. AmazonBasics B00Q3KFX8U Motor Replacement: 5 단계, 이미지 2개 중 1개 AmazonBasics B00Q3KFX8U Motor Replacement: 5 단계, 이미지 2개 중 2개
    • Remove the five 8mm PH2 screws from the bracket holding the gears in place.

  6. AmazonBasics B00Q3KFX8U Motor Replacement: 6 단계, 이미지 1개 중 1개
    • Use a metal spudger to pry the bracket from the main shredder assembly.

    • If the bracket is attached too tightly for the spudger, carefully use a metal screwdriver to pry it loose.

  7. AmazonBasics B00Q3KFX8U Motor Replacement: 7 단계, 이미지 2개 중 1개 AmazonBasics B00Q3KFX8U Motor Replacement: 7 단계, 이미지 2개 중 2개
    • Remove the two plastic drive gears from the shredder assembly by lifting straight upwards.

  8. AmazonBasics B00Q3KFX8U Motor Replacement, Motor: 8 단계, 이미지 1개 중 1개
    • Remove the four 18mm PH2 screws holding the motor to the main shredder assembly.

  9. AmazonBasics B00Q3KFX8U Motor Replacement: 9 단계, 이미지 1개 중 1개
    • Disconnect the motor from the motherboard by either clipping the wires, or using a soldering iron to disconnect the wires directly at the board.

    • To reattach the motor, solder the wires back together, or to the motherboard depending on how you removed them.

결론

To reassemble your device, follow these instructions in reverse order.

다른 한 분이 해당 안내서를 완성하였습니다.

작성자

2다른 기여자 명과 함께

William Foley

회원 가입일: 03/25/16

548 평판

안내서 4개를 작성함

UMass Dartmouth, Team 1-3, Miles Spring 2016 UMass Dartmouth, Team 1-3, Miles Spring 2016 회원

UMASSD-MILES-S16S1G3

2 회원들

안내서 4개를 작성함

1가이드 댓글

Do you sell motor?

Binh - 답글

댓글 쓰기

조회 통계:

지난 24시간: 1

지난 7일: 5

지난 30일: 16

전체 시간: 1,035