주요 콘텐츠로 건너뛰기

Analogue Pocket Left Speaker Replacement

필요한 것

  1. Analogue Pocket Left Speaker Replacement, Prepare your device for disassembly: 1 단계, 이미지 1/3 Analogue Pocket Left Speaker Replacement, Prepare your device for disassembly: 1 단계, 이미지 2/3 Analogue Pocket Left Speaker Replacement, Prepare your device for disassembly: 1 단계, 이미지 3/3
    • Unplug all cables and fully power off your device.

    • Working on your device requires laying it screen-side down. To prevent damage, lay it on a soft surface such as a towel.

  2. Analogue Pocket Left Speaker Replacement, Unfasten the battery shell: 2 단계, 이미지 1/2 Analogue Pocket Left Speaker Replacement, Unfasten the battery shell: 2 단계, 이미지 2/2
    • Use a T6 Torx screwdriver to remove the four 13.4 mm‑long screws securing the battery shell.

  3. Analogue Pocket Left Speaker Replacement, Remove the battery shell: 3 단계, 이미지 1/3 Analogue Pocket Left Speaker Replacement, Remove the battery shell: 3 단계, 이미지 2/3 Analogue Pocket Left Speaker Replacement, Remove the battery shell: 3 단계, 이미지 3/3
  4. Analogue Pocket Left Speaker Replacement, Disconnect the battery: 4 단계, 이미지 1/3 Analogue Pocket Left Speaker Replacement, Disconnect the battery: 4 단계, 이미지 2/3 Analogue Pocket Left Speaker Replacement, Disconnect the battery: 4 단계, 이미지 3/3
    이 단계에 사용된 도구:
    Tweezers
    $4.99
    구매
    • Use blunt nose tweezers to pull the battery connector out of its socket on the bottom right corner of your device.

    • If you're having trouble, try rocking the connector side-to-side to help loosen it.

    • During reassembly, use the flat end of a spudger to push down on the edges of the connector until it's secure in the socket.

  5. Analogue Pocket Left Speaker Replacement, Remove the battery: 5 단계, 이미지 1/3 Analogue Pocket Left Speaker Replacement, Remove the battery: 5 단계, 이미지 2/3 Analogue Pocket Left Speaker Replacement, Remove the battery: 5 단계, 이미지 3/3
    • Lift one of the battery's short edges until the clips release.

    • Remove the battery.

    • During reassembly, push the battery into its recess until the clips engage.

  6. Analogue Pocket Left Speaker Replacement, Unclip the button board: 6 단계, 이미지 1/3 Analogue Pocket Left Speaker Replacement, Unclip the button board: 6 단계, 이미지 2/3 Analogue Pocket Left Speaker Replacement, Unclip the button board: 6 단계, 이미지 3/3
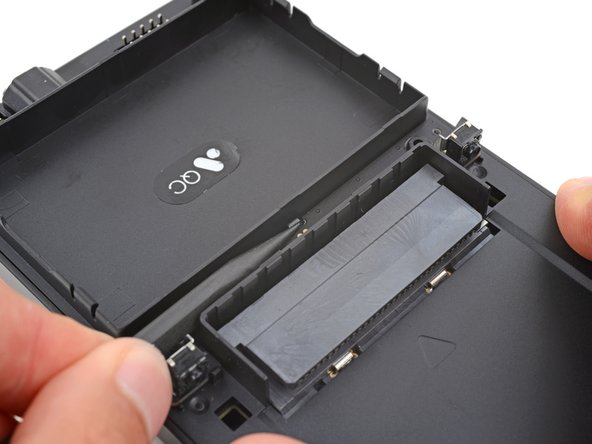
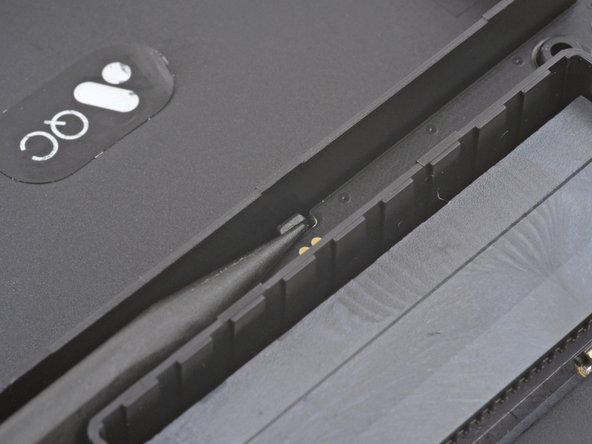
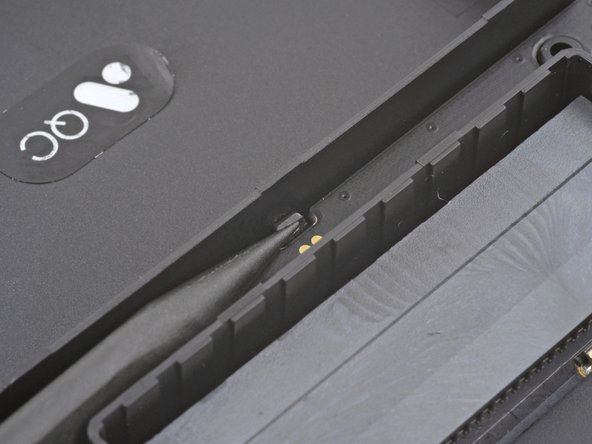
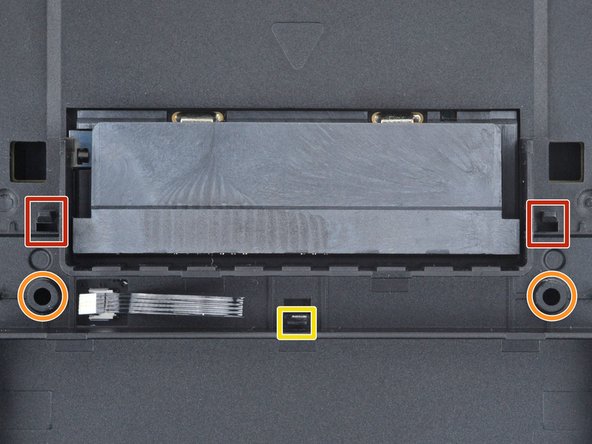
    • A plastic clip secures the center of the button board.

    • Use the point of a spudger to push the clip out and release the board.

    • Don't try to remove the board—a delicate ribbon cable secures it to the device.

  7. Analogue Pocket Left Speaker Replacement, Reposition the button board: 7 단계, 이미지 1/3 Analogue Pocket Left Speaker Replacement, Reposition the button board: 7 단계, 이미지 2/3 Analogue Pocket Left Speaker Replacement, Reposition the button board: 7 단계, 이미지 3/3
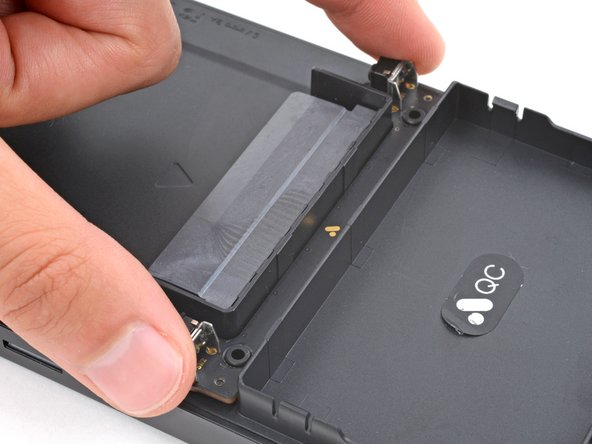
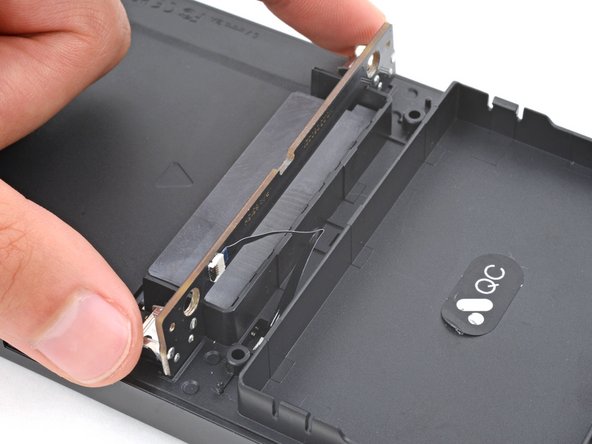
    • Swing the bottom edge of the button board up and over the cartridge reader.

    • Set the board on top of the cartridge reader so the cable's connector is facing the bottom of the device.

    • During reassembly:

    • Put the top edges of the board under their tabs on the rear shell.

    • Lay the board onto the rear shell so the alignment posts go into their circular cutouts on the board.

    • Press the board down until the plastic clip engages.

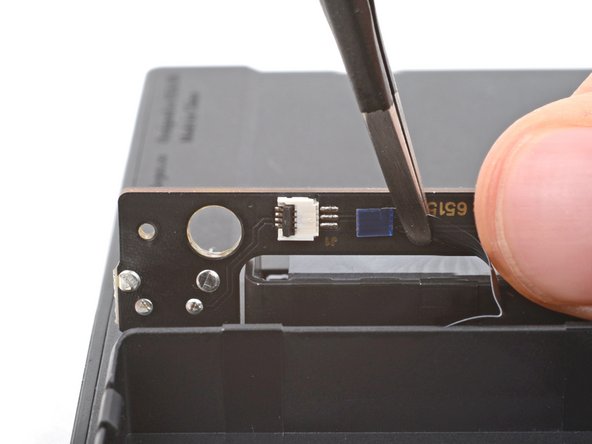
  8. Analogue Pocket Left Speaker Replacement, Disconnect the button board: 8 단계, 이미지 1/3 Analogue Pocket Left Speaker Replacement, Disconnect the button board: 8 단계, 이미지 2/3 Analogue Pocket Left Speaker Replacement, Disconnect the button board: 8 단계, 이미지 3/3
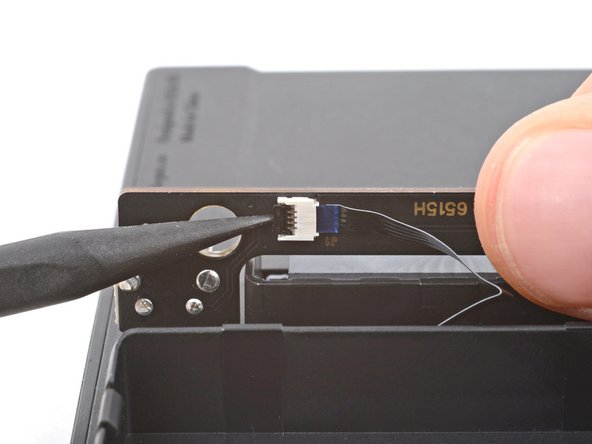
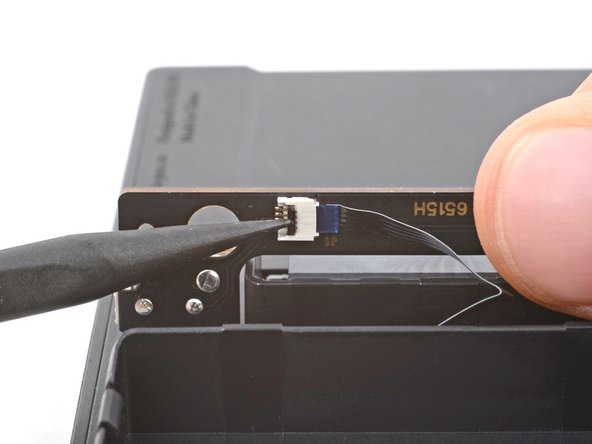
    • Use the tip of a spudger or a clean fingernail to flip up the hinged locking flap on the board cable ZIF connector located on the board itself.

    • Use blunt nose tweezers to pull the cable straight out of its socket.

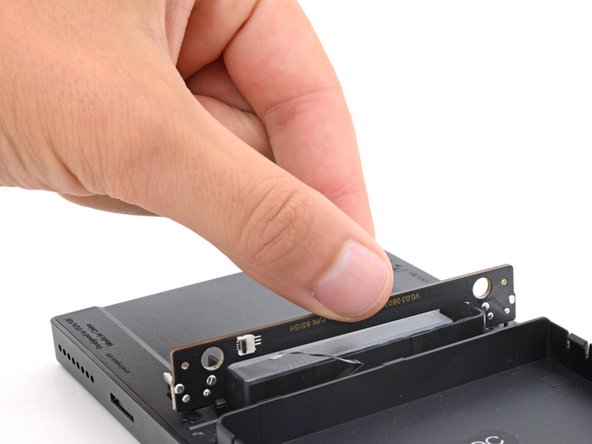
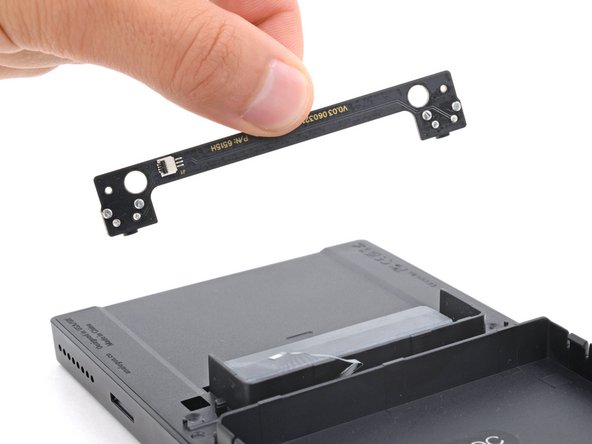
  9. Analogue Pocket Left Speaker Replacement, Remove the board: 9 단계, 이미지 1/2 Analogue Pocket Left Speaker Replacement, Remove the board: 9 단계, 이미지 2/2
    • Remove the board.

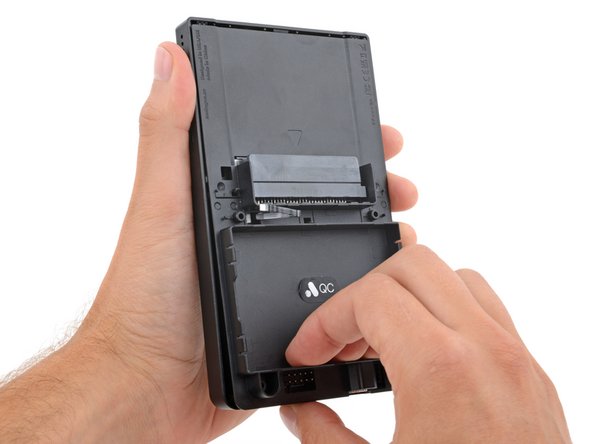
  10. Analogue Pocket Left Speaker Replacement, Unclip the rear shell: 10 단계, 이미지 1/3 Analogue Pocket Left Speaker Replacement, Unclip the rear shell: 10 단계, 이미지 2/3 Analogue Pocket Left Speaker Replacement, Unclip the rear shell: 10 단계, 이미지 3/3
    • Sliding tabs secure the perimeter of the rear shell.

    • Firmly grip your device with one hand.

    • With your free hand, lift the bottom edge of the rear shell until it clears the front shell.

    • Pull the rear shell down until the sliding tabs disengage.

  11. Analogue Pocket Left Speaker Replacement, Remove the rear shell: 11 단계, 이미지 1/3 Analogue Pocket Left Speaker Replacement, Remove the rear shell: 11 단계, 이미지 2/3 Analogue Pocket Left Speaker Replacement, Remove the rear shell: 11 단계, 이미지 3/3
    • Remove the rear shell.

    • During reassembly:

    • Thread the button board cable through its slot in the rear shell.

    • Lay the rear shell on the front shell so its bottom edge slightly overhangs.

    • This allows the tabs to slide into place. If the rear shell is perfectly flush with the front shell, the tabs won't slide.

    • Push the rear shell in and slide it up to engage the sliding tabs.

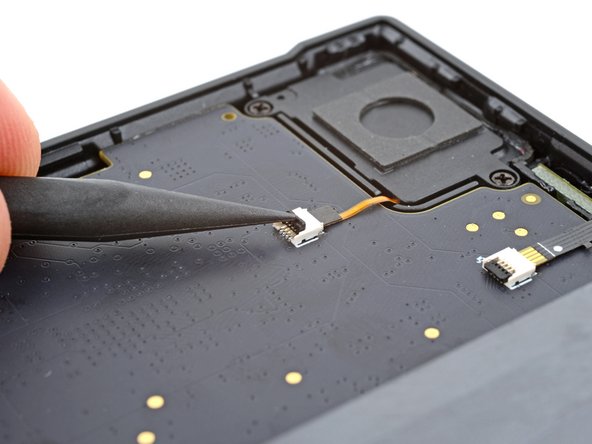
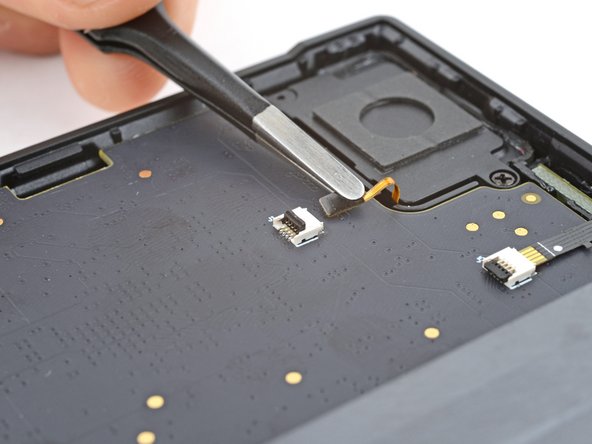
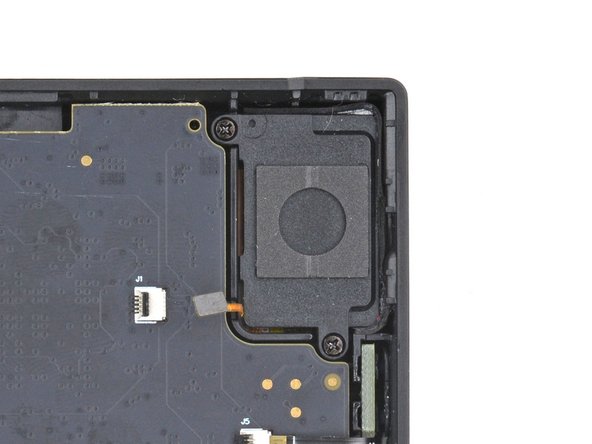
  12. Analogue Pocket Left Speaker Replacement, Disconnect the speaker: 12 단계, 이미지 1/3 Analogue Pocket Left Speaker Replacement, Disconnect the speaker: 12 단계, 이미지 2/3 Analogue Pocket Left Speaker Replacement, Disconnect the speaker: 12 단계, 이미지 3/3
    이 단계에 사용된 도구:
    Tweezers
    $4.99
    구매
    • The left speaker will be on your right-hand side, as the device is laying upside down.

    • Use the tip of a spudger or a clean fingernail to flip up the hinged locking flap on the left speaker cable ZIF connector.

    • Use blunt nose tweezers to pull the cable straight out of its socket.

  13. Analogue Pocket Left Speaker Replacement, Unfasten the speaker: 13 단계, 이미지 1/2 Analogue Pocket Left Speaker Replacement, Unfasten the speaker: 13 단계, 이미지 2/2
    • Use a Phillips screwdriver to remove the two 4.7 mm‑long screws securing the left speaker.

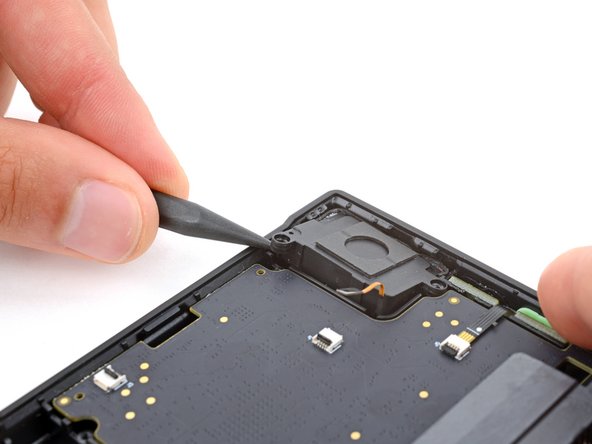
  14. Analogue Pocket Left Speaker Replacement, Remove the speaker: 14 단계, 이미지 1/3 Analogue Pocket Left Speaker Replacement, Remove the speaker: 14 단계, 이미지 2/3 Analogue Pocket Left Speaker Replacement, Remove the speaker: 14 단계, 이미지 3/3
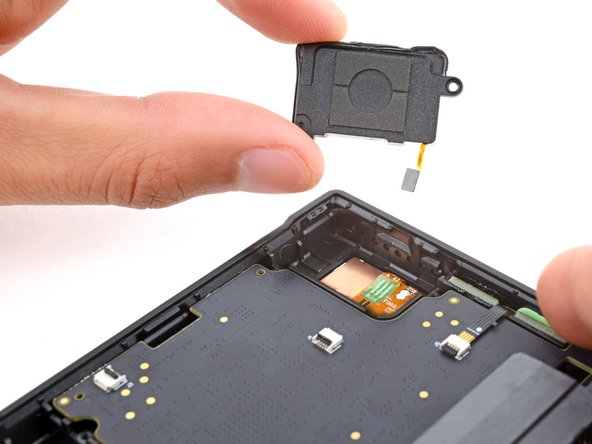
    • Insert the point of a spudger between the top left corner of the speaker and the front shell.

    • Pry up the speaker and remove it.

결론

To reassemble your device, follow these instructions in reverse order.

Take your e-waste to an R2 or e-Stewards certified recycler.

Repair didn’t go as planned? Try some basic troubleshooting, or ask our Answers community for help.

Spencer Day

회원 가입일: 09/14/22

55,203 평판

안내서 408개 작성하였습니다

iFixit iFixit 회원

Staff

136 회원들

안내서 17,432개 작성하였습니다

댓글 0개

댓글 쓰기

조회 통계:

24 시간 전: 0

7일 전: 1

30일 전: 6

전체 시간: 89