이 버전에는 잘못된 편집 사항이 있을 수 있습니다. 최신 확인된 스냅샷으로 전환하십시오.
필요한 것
-
이 단계는 번역되지 않았습니다. 번역을 도와주십시오
-
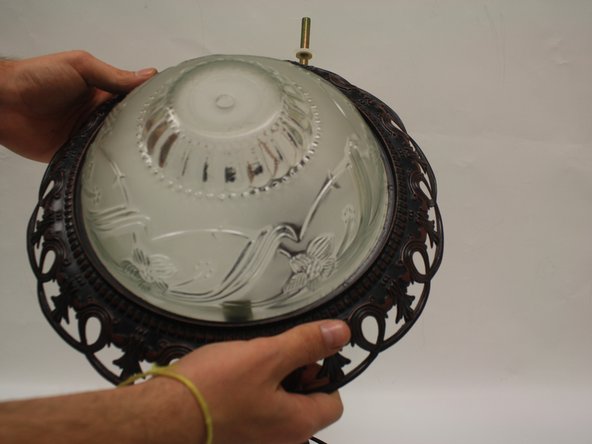
Start by unscrewing the decorative nut from the top of the canopy. Then lift the canopy off the old support.
-
-
이 단계는 번역되지 않았습니다. 번역을 도와주십시오
-
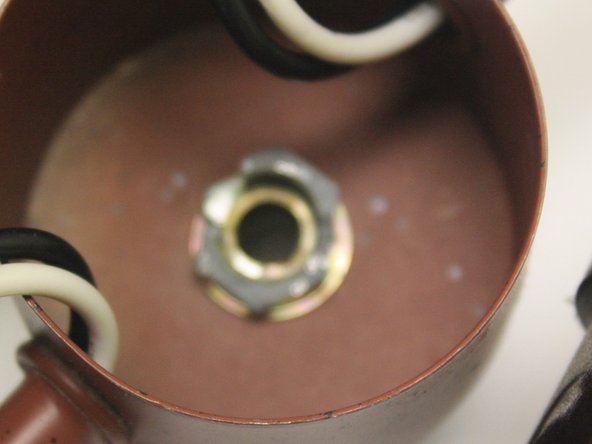
When the canopy is removed from the lamp, lift the broken support off. The wires should now be accessible from the top.
-
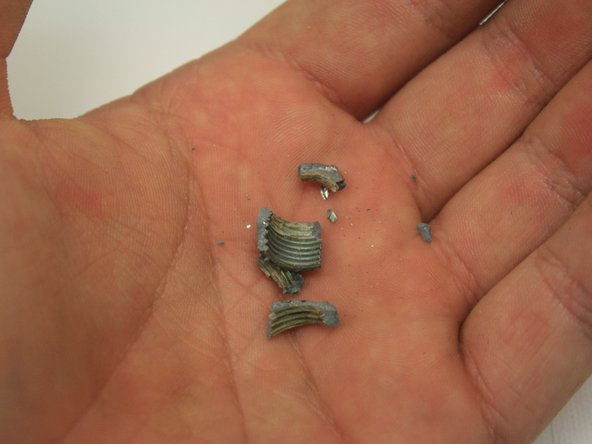
Save these pieces, as they might be useful in reassembly.
-
Mark the positive wire on the main power cord; this can be done with a marker, tape, or most any other method.
-
-
이 단계는 번역되지 않았습니다. 번역을 도와주십시오
-
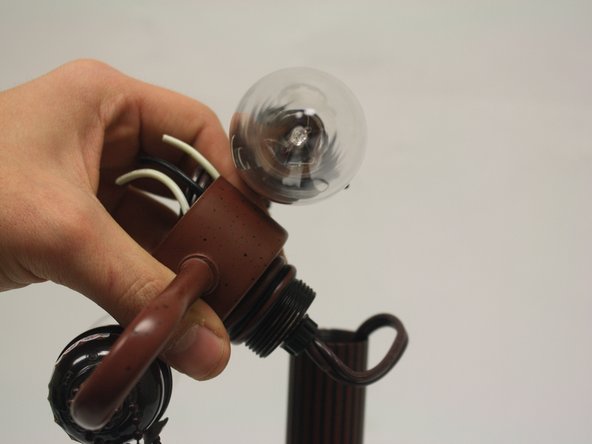
With the wires loose, unscrew the top light fixture and remove it from the lamp base.
-
If there is a small crimp nut holding the wires in the tube of the lamp base, then unscrew the nut, but leave attached to the power cord.
-
-
이 단계는 번역되지 않았습니다. 번역을 도와주십시오
-
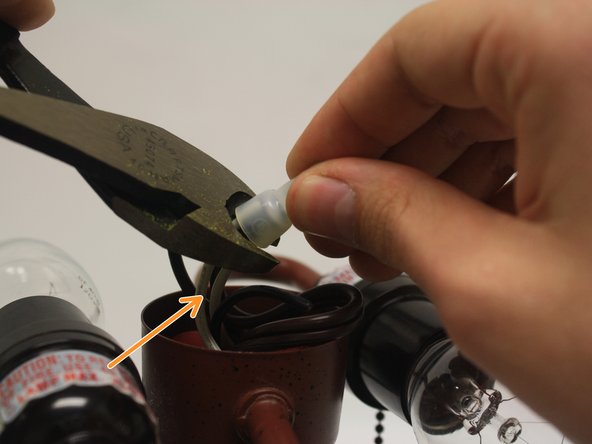
Now the broken support part from the lamp. It will simply unthread from the rest of the lamp.
-
Older lamps especially can contain pieces made of softer metals. This can cause them to crumble.
-
-
-
이 단계는 번역되지 않았습니다. 번역을 도와주십시오
-
Twist the old coupling off with a pair of fingers or pliers. The couplers are often very soft on antique lamps and tend crumble easily.
-
-
이 단계는 번역되지 않았습니다. 번역을 도와주십시오
-
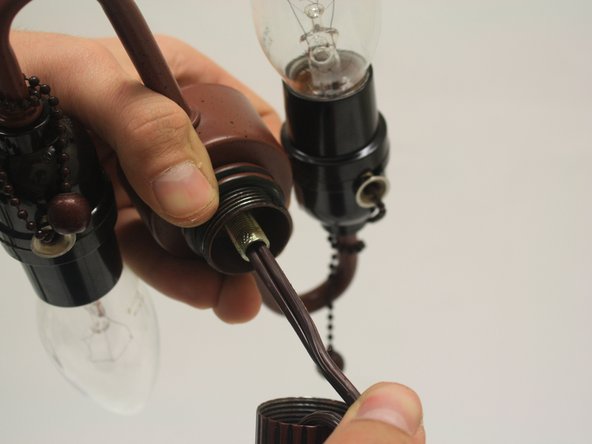
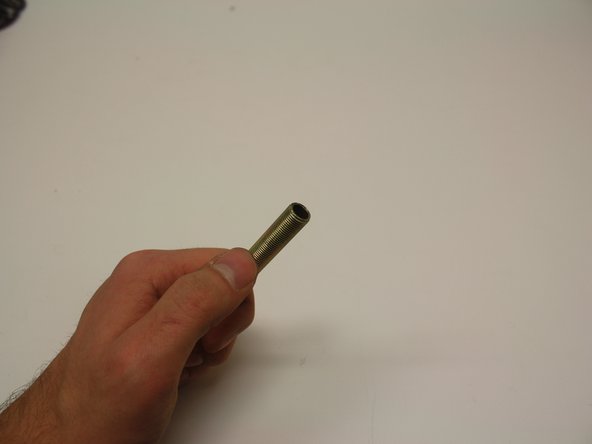
Now install the new coupler and support rod (the size of the threads on the lamp will determine the size needed).
-
-
이 단계는 번역되지 않았습니다. 번역을 도와주십시오
-
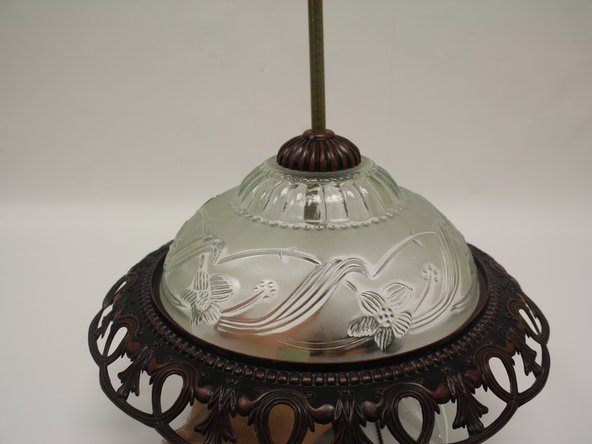
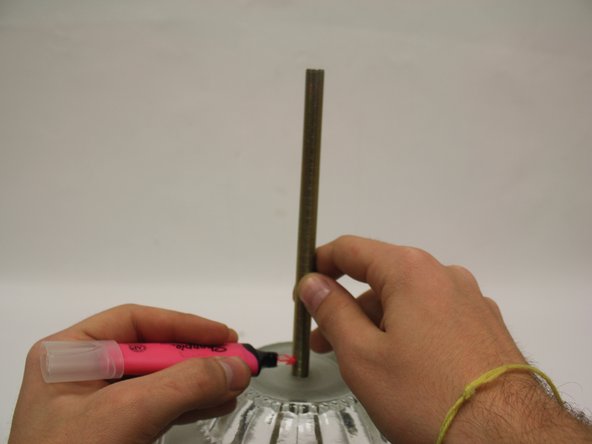
Once the rod is in place, the wire cover can be properly fitted, along with the canopy. Its better to have a support rod that is too long, as it can be cut to fit. How much is cut off depends on how high the canopy needs to sit. Mark the rod with a marker so a cut can be made.
-
-
이 단계는 번역되지 않았습니다. 번역을 도와주십시오
-
Using a metal hacksaw, cut the rod where the mark was made. Remember to measure twice, cut once.
-
-
이 단계는 번역되지 않았습니다. 번역을 도와주십시오
-
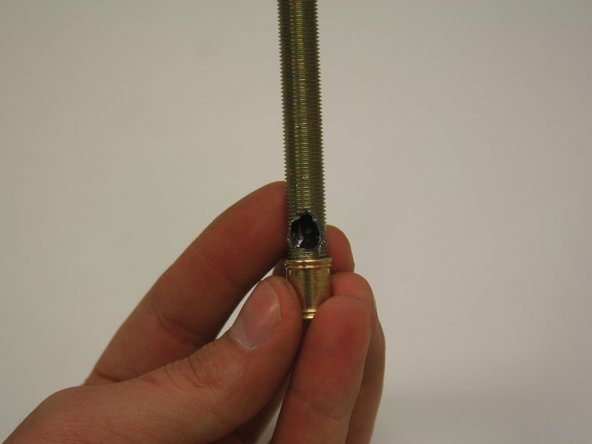
The threaded rod and coupling may need a hole for the wires to pass through. Remove the coupling and rod from the light fixture; do not move the coupler up the threaded rod. The coupler's location will serve as a reference for the hole.
-
Make a hole with the drill; if the size of the whole needed is unknown, a stepped drill bit is useful. Do not apply too much pressure as the metal is likely soft.
-
-
이 단계는 번역되지 않았습니다. 번역을 도와주십시오
-
The hole only needs to be big enough for the wires to pass through, and once that's done, the lamp can be re-assembled just the way it was put together. Let there be light!
-


다른 한 분이 해당 안내서를 완성하였습니다.
팀

Missouri Western, Team S40-G9, Kunkel Spring 2017 Missouri Western, Team S40-G9, Kunkel Spring 2017 회원
MWSU-KUNKEL-S17S40G9
2 회원들
안내서 1개 작성하였습니다
댓글 한 개
Thanks for sharing this blog. For lamps and home decor items please visit Lavish home decors. They provide elite home decor products at reasonable rates.