주요 콘텐츠로 건너뛰기

Aorus x7 v2 Fan Assembly Replacement

필요한 것

  1. Aorus x7 v2 Fan Assembly Replacement, Fan Assembly: 1 단계, 이미지 3개 중 1개 Aorus x7 v2 Fan Assembly Replacement, Fan Assembly: 1 단계, 이미지 3개 중 2개 Aorus x7 v2 Fan Assembly Replacement, Fan Assembly: 1 단계, 이미지 3개 중 3개
    • Flip the laptop over.

    • Unscrew the 12 screws holding on the bottom cover.

    • Take off the bottom cover.

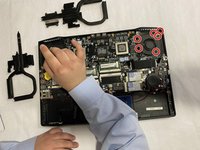
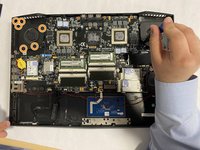
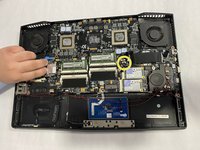
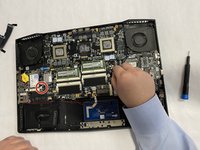
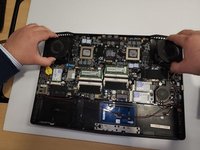
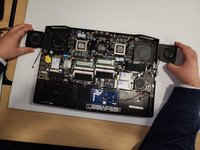
    • Remove the 12 screws from the heat sink.

  2. Aorus x7 v2 Fan Assembly Replacement: 2 단계, 이미지 3개 중 1개 Aorus x7 v2 Fan Assembly Replacement: 2 단계, 이미지 3개 중 2개 Aorus x7 v2 Fan Assembly Replacement: 2 단계, 이미지 3개 중 3개
    • Remove the heat sinks one by one.

  3. Aorus x7 v2 Fan Assembly Replacement: 3 단계, 이미지 3개 중 1개 Aorus x7 v2 Fan Assembly Replacement: 3 단계, 이미지 3개 중 2개 Aorus x7 v2 Fan Assembly Replacement: 3 단계, 이미지 3개 중 3개
    • Unscrew the six screws from the right fan.

    • Unscrew the six screws from the left fan.

    • Locate the connection plug for the fan to the motherboard and disconnect the left fan connector.

  4. Aorus x7 v2 Fan Assembly Replacement: 4 단계, 이미지 3개 중 1개 Aorus x7 v2 Fan Assembly Replacement: 4 단계, 이미지 3개 중 2개 Aorus x7 v2 Fan Assembly Replacement: 4 단계, 이미지 3개 중 3개
    • Disconnect the right fan connector.

    • Carefully lift up the left and right fans.

    • Set the fans to the side before installing new fans.

결론

To reassemble your device, follow these instructions in reverse order using new left and right fans.

다른 한 분이 해당 안내서를 완성하였습니다.

작성자

7다른 기여자 명과 함께

Alexis Hernandez Jimenez

회원 가입일: 08/25/22

601 평판

안내서 5개를 작성함

Gateway, Team 1-4, Pee Fall 2022 Gateway, Team 1-4, Pee Fall 2022 회원

GCC-PEE-F22S1G4

3 회원들

안내서 6개를 작성함

0가이드 댓글

댓글 쓰기

조회 통계:

지난 24시간: 1

지난 7일: 13

지난 30일: 66

전체 시간: 928