CAUTION: When removing the back panel of the tablet, take caution around the speaker. This is located in the lower right corner when looking at the back of the tablet. There are two wires inside connecting the tablet back panel to the device itself and this connection may be severed if the back is pulled off without care.
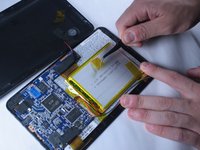
The back panel should now be disconnected from the device. This provides access to the components of the device for repairing and replacing parts of the tablet.
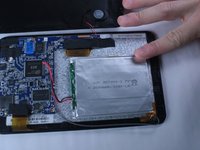
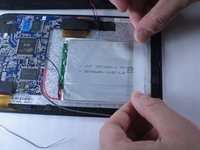
The battery is very fragile, so this process may cause some damage to the old battery during removal. Take extra care if you need the old battery to remain intact.
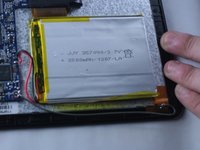
The battery is held to the back of the device by an adhesive under the battery. Use a ruler or spudger to slowly separate the battery from the glue underneath.
Take care not to bend or puncture the battery, which can cause a fire.
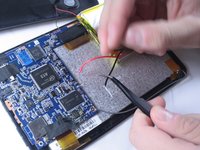
Apply heat to the solder holding each of the black and red wires to the circuit board while gently pulling with tweezers. When hot enough, the wire should pull away freely from the joint.
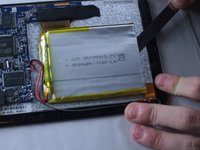
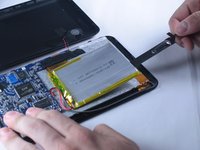
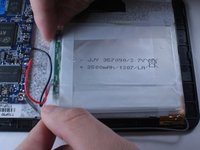
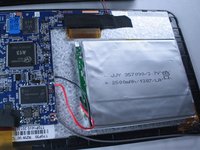
Find the red and black wires coming from the battery. You will now need to solder the tips back onto the circuit board where you removed the old connections.
The red wire connects to positive (+) and the black wire connects to negative (-), as shown in the picture.
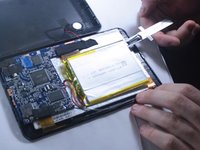
Place the red wire tip on the positive terminal. Hold the solder strand so that it is touching the terminal and tip, and apply heat with the soldering iron until the two fuse together and produce a small amount of smoke.
Repeat the procedure for the black wire tip to the negative terminal.
Finally, use a heat-resistant tape to secure the battery in place to the device. Center the battery in the middle and apply strips of tape until it sits securely mounted to the device.
Your battery is now connected and secured to your tablet