이 버전에는 잘못된 편집 사항이 있을 수 있습니다. 최신 확인된 스냅샷으로 전환하십시오.
필요한 것
-
이 단계는 번역되지 않았습니다. 번역을 도와주십시오
-
Remove the 5.1mm Phillips screw from the bottom of the AirPort. This screw is located under the identification sticker. You will have to remove the sticker or make a hole to remove it.
-
-
이 단계는 번역되지 않았습니다. 번역을 도와주십시오
-
Lift the bottom and top casing straight apart and then lift metal casing straight up from the bottom plastic casing.
-
-
-
이 단계는 번역되지 않았습니다. 번역을 도와주십시오
-
Unplug the black connector on the top of the metal casing by gently pulling horizontally.
-
-
이 단계는 번역되지 않았습니다. 번역을 도와주십시오
-
Remove the four 4.3mm phillips screws from the bottom of the metal casing.
-
-
이 단계는 번역되지 않았습니다. 번역을 도와주십시오
-
Lift and separate the top and bottom of the metal casing. You will now expose the motherboard and the AirPort card.
-
To remove the AirPort card, gently pull the plastic tab horizontally.
-
-
이 단계는 번역되지 않았습니다. 번역을 도와주십시오
-
Locate and remove the three 5.0mm phillips screws from the heat sink.
-
Lift to remove the heat sink from the motherboard.
-
-
이 단계는 번역되지 않았습니다. 번역을 도와주십시오
-
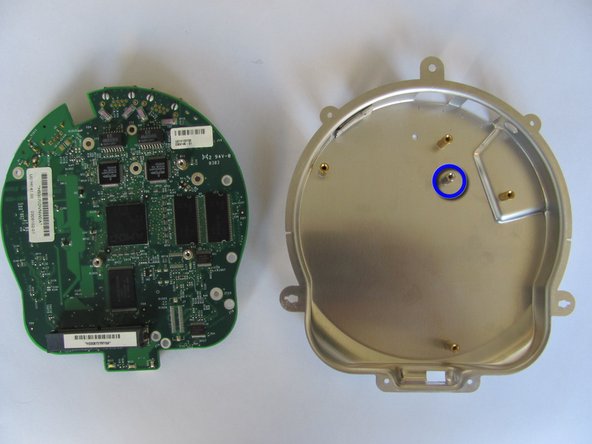
Locate and remove the five 7.5mm phillips screws from the motherboard.
-
Lift and separate the motherboard from the bottom metal casing.
-


다른 2명이 해당 안내서를 완성하였습니다.
팀

Cal Poly, Team 17-15, Regan Fall 2011 Cal Poly, Team 17-15, Regan Fall 2011 회원
CPSU-REGAN-F11S17G15
3 회원들
안내서 13개 작성하였습니다