이 버전에는 잘못된 편집 사항이 있을 수 있습니다. 최신 확인된 스냅샷으로 전환하십시오.
필요한 것
-
이 단계는 번역되지 않았습니다. 번역을 도와주십시오
-
With the Generally Disassembly completed, you may proceed to floppy drive installation.
-
-
이 단계는 번역되지 않았습니다. 번역을 도와주십시오
-
Reverse the computer to access the peripheral panel in the back.
-
Remove the two T8 Torx screws on either side of the bar code panel.
-
-
-
이 단계는 번역되지 않았습니다. 번역을 도와주십시오
-
Reverse the computer to have the monitor and mousepad facing you.
-
Remove the plastic panel underneath the display.
-
-
이 단계는 번역되지 않았습니다. 번역을 도와주십시오
-
Remove the three T8 Torx screws securing the floppy drive to the frame.
-
-
이 단계는 번역되지 않았습니다. 번역을 도와주십시오
-
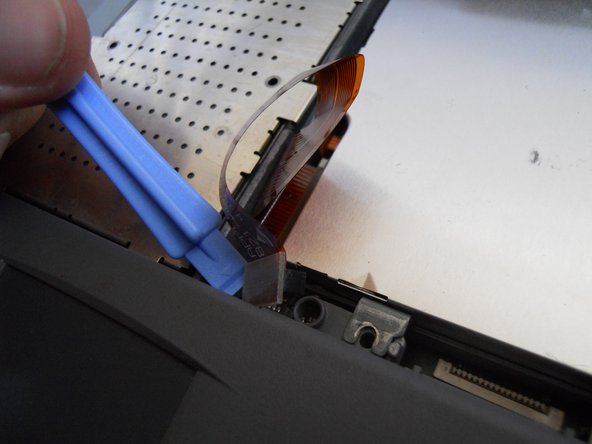
Using a spudger, lift the plastic tabs on the floppy drive securing the ribbon cable to the ribbon port.
-
-
이 단계는 번역되지 않았습니다. 번역을 도와주십시오
-
Replace the defective drive with a new drive.
-
Follow these instructions in reverse order to reassemble the device.
-


다른 2명이 해당 안내서를 완성하였습니다.

팀

Cal Poly, Team 20-66, Walters Spring 2011 Cal Poly, Team 20-66, Walters Spring 2011 회원
CPSU-WALTERS-S11S20G66
4 회원들
안내서 3개 작성하였습니다
댓글 한 개
Does anyone know where I can actually find another FDD for this PowerBook? Because I think i broke mine ((