주요 콘텐츠로 건너뛰기

이 버전에는 잘못된 편집 사항이 있을 수 있습니다. 최신 확인된 스냅샷으로 전환하십시오.

필요한 것

  1. 이 단계는 번역되지 않았습니다. 번역을 도와주십시오

    : 1 단계, 이미지 1/2 : 1 단계, 이미지 2/2
    • Turn computer over.

    • Remove battery expansion cover and battery.

  2. 이 단계는 번역되지 않았습니다. 번역을 도와주십시오

    : 2 단계, 이미지 1/1
    • With monitor hinge at the bottom, remove the two top center screws.

  3. 이 단계는 번역되지 않았습니다. 번역을 도와주십시오

    : 3 단계, 이미지 1/1
    • Remove top left and top right screws.

  4. 이 단계는 번역되지 않았습니다. 번역을 도와주십시오

    : 4 단계, 이미지 1/1
    • Remove middle left and middle right screws.

  5. 이 단계는 번역되지 않았습니다. 번역을 도와주십시오

    : 5 단계, 이미지 1/1
    • Open computer kickstands.

    • Remove screws underneath each kickstand.

  6. 이 단계는 번역되지 않았습니다. 번역을 도와주십시오

    : 6 단계, 이미지 1/1
    • Lift keyboard from bottom and take out of shell.

  7. 이 단계는 번역되지 않았습니다. 번역을 도와주십시오

    : 7 단계, 이미지 1/3 : 7 단계, 이미지 2/3 : 7 단계, 이미지 3/3
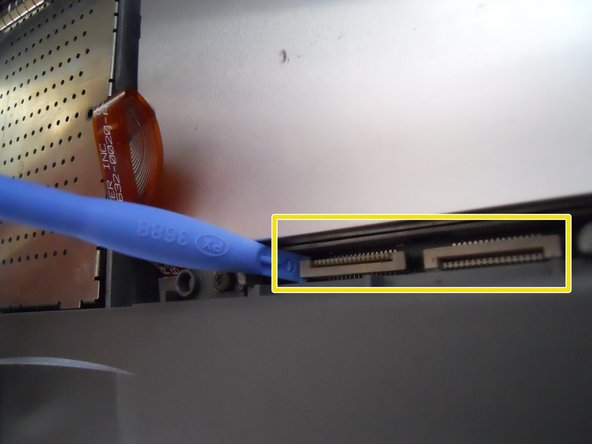
    • Lift the white ribbon clamps securing the keyboard ribbon cables to the motherboard. You can do this using a plastic opening tool.

    • Removing both ribbon cables from the motherboard will leave the clamps like so.

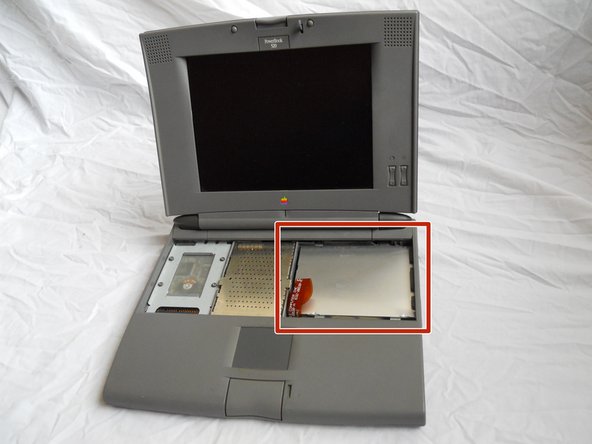
    • From here you can access the logic board, hard drive, and floppy drive.

결승점

다른 9명이 해당 안내서를 완성하였습니다.

Mark McNeff

회원 가입일: 04/20/11

497 평판

안내서 2개 작성하였습니다

댓글 2개

http://tim.id.au/laptops/apple/powerbook... (PDF)

Apple Service Source: PowerBook 500 Series

Guides for everything.

tas - 답글

Thanks been trying to fix this for a long time

Luke - 답글

댓글 쓰기

조회 통계:

24 시간 전: 4

7일 전: 16

30일 전: 49

전체 시간: 6,689