주요 콘텐츠로 건너뛰기

Apple TV 3rd Generation Status LED Replacement

필요한 것

  1. Apple TV 3rd Generation Status LED Replacement, Snap-on Base: 1 단계, 이미지 1/1
    • As the device base is firmly clipped, insert two metal spudgers to gently release the first clips.

  2. Apple TV 3rd Generation Status LED Replacement: 2 단계, 이미지 1/1
    • Continue releasing the last plastic clips with your hands taking care not to break any of the plastic elements attached to the base.

  3. Apple TV 3rd Generation Status LED Replacement, Logic Board: 3 단계, 이미지 1/1
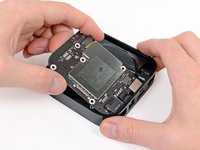
    • Use a philips screwdriver to remove the 5 screws securing the metal heat sink. On Rev A (A1469) you need a T7 srewdriver

  4. Apple TV 3rd Generation Status LED Replacement: 4 단계, 이미지 1/2 Apple TV 3rd Generation Status LED Replacement: 4 단계, 이미지 2/2
    • Disconnect the power supply connector from the logic board with a spudger.

  5. Apple TV 3rd Generation Status LED Replacement, Power Supply: 5 단계, 이미지 1/2 Apple TV 3rd Generation Status LED Replacement, Power Supply: 5 단계, 이미지 2/2
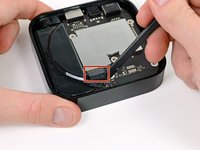
    • Before you remove completely the power supply, unscrew the T5 screws on each side of the socket.

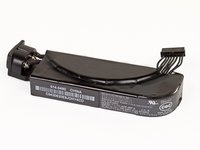
    • You may now be able to remove the power supply with a spudger.

    • The rating of the power supply is 3.4V at 1.75A, which is identical to the 2nd Gen Apple TV's 5.95 watts.

  6. Apple TV 3rd Generation Status LED Replacement, Status LED: 6 단계, 이미지 1/2 Apple TV 3rd Generation Status LED Replacement, Status LED: 6 단계, 이미지 2/2
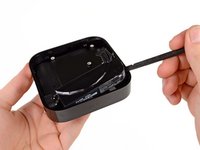
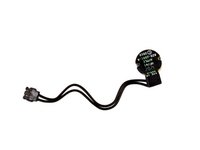
    • The last remaining part in the Apple TV is the status LED. You can remove this part with your plastic spudger.

결론

To reassemble your device, follow these instructions in reverse order.

다른 4명이 해당 안내서를 완성하였습니다.

Vincent Monteil

회원 가입일: 07/06/13

6,975 평판

안내서 19개 작성하였습니다

댓글 한 개

Step 2: “caring not to break….”. Thanks, great guide. David

David Apimerika - 답글

댓글 쓰기

조회 통계:

24 시간 전: 0

7일 전: 1

30일 전: 11

전체 시간: 3,063