소개
Unfortunately, opening up your Apple Watch may damage the Force Touch sensor, which also serves as a gasketing seal. The sensor is made up of two layers, glued together. These layers may separate when you open your watch, compromising its seal after reassembly. If this happens, you'll need to repair or replace the sensor before reassembling your watch.
필요한 것
-
-
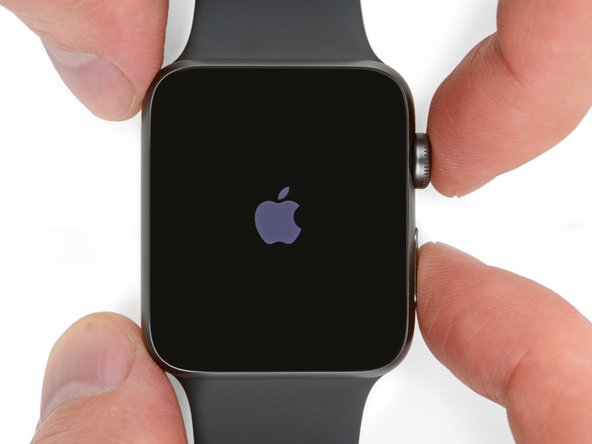
Before starting repairs, take your watch off the charger and power it down.
-
-
-
Prepare an iOpener (or grab a hair dryer or heat gun) and heat the face of the watch until it's slightly too hot to touch.
-
Leave the iOpener on the watch for at least a minute to fully heat the screen and soften the adhesive holding it to the case.
-
-
In my instance, the problem started with the face/screen popping off because the battery swelled. So I didn’t need to heat the face and pry it off. I did heat it a bit in order to warm the residue adhesive on the edge of the face and the case frame and found it easier to scrap it off gently with the craft blade that came with the $39.21 battery replacement kit. If this is your issue, you can skip the prying up steps.
Same situation as jeb605 - my watch battery swelled and popped the screen off. Fortunately the force touch sensor did not debond from the watch. Thinking about just cleaning the back side of the screen and applying new adhesive. I used an alternate kit that did not come with the force touch sensor.
-
-
Place the curved section of the blade in the gap between the glass and case on the lower edge of the watch face, and press firmly straight down into the gap.
-
When the glass has lifted, gently rotate the knife down, opening the gap more by pushing the glass up.
It is not possible to separate the screen from the casing? I have heated this thing numerous times and the opening is way too small to get any type of blade, knife or other tool in between. Any suggestions???
Using a curved blade like the guide recommends, angle the blade straight down between the glass and the edge of the frame, mid-way along the bottom edge of the case. The metal of the case will flex *just a little bit*, allowing you to slowly rotate the blade so the cutting edge is now pointing towards the center of the watch instead of down towards your work surface. You may need to rock the blade back and forth, sort of massaging the curve into the seam between the glass and the metal before it works. And like they mention above, lots of heat. I used the heatpack they sell, put it in my toaster oven on 200. I started at 130, and went up in 20 degree increments until it worked.
Pete -
I've tried everything, heating it up until it's too hot to touch, pressing the knife in the gap straight down, at an angle, nothing seems to work. I've tried using all my arm strength and it still doesn't even enter the gap. Is the iFixit Jimmy not thin enough for the job?
It’s not. The Jimmy’s a great pry tool, but not a cutting blade and not sharp enough for this particular job. You want a curved razor like the guide suggests.
Just to emphasise after quite a struggle - the blade absolutely matters!! I tried about 5 and almost gave up before the last one lifted the glass quite easily. Obviously, you want a thin blade! No, thinner than that!
Mark Moore - 답글
I got hung up on this step for over an hour. The key for me was to keep the watch straps on! I initially took them off thinking it would be easier to work with the watch, but I guess just the little pressure I placed on the glass while trying to hold the watch and use the blade was enough to keep it in place. At first I thought I didn’t use enough heat and ended up reheating the iOpener a few times and applying it to the watch over the course of an hour. I put the top strap on, put it back flat on the table and held the watch secure with just the strap. I gave it another go with the blade and the screen instantly popped off. Also, be careful with the force you use on the blade… it seems with adequate heat, you don’t need to use that much (I ended up cutting through the Force Touch sensor and punctured the battery).
I would never use a knife like this to remove the screen. It’s way to wide to get in between the glass and body, without potentially breaking the glass. I use the Ultra Thin iFlex Opening Tool, sold by IFIXIT. Seriously. You won’t wanna use a fat blade like that after you take the iFlex for a test drive.
I used the rounded blade provided by iFixIt themselves as part of the Series 1 battery replacement kit and even that was wide enough that it scratched my case while trying to pry the screen up. Also I had to heat the iOpener like 3 or 4 times consecutively at 30s each and leave it on the screen for 5+ minutes before the screen would even budge. Heating for 30 sec and leaving on the screen for 1 minute was not even close to enough.
The display came off nicely after heating the iOpener a couple of times and wiggling the blade a bit. Now i have replaced the battery and the force touch sensor an thought I was ready for a dry run. So I did not peel off the final layer of film so that I can still remove the display. What I see is not good, the display is full of stipes and pixles in many colors. So, did I break the display (e.g. by heat) or does it have to be completely glued to the sensor in order to work?
I got the answer. Unfortunately, I broke the display. A magifying glass revealed that I have scratched the cable where I inserted the blade. Replacing the display and I fixed it!
Jörg -
For anyone who’s having trouble getting the screen separated from the case, try leaving the iopener on the Watch for longer like around 4 or 5 minutes
Eli Duffer - 답글
-
-
-
Pry slightly up on the right side of the screen, to free it from any remaining adhesive.
-
Pry up on the left to free it as well—but do not attempt to remove the screen as it is still held in place by two cables.
My iwatch screen came lose. There are two strips loose I don’t know how or where they connect to. The watch still powers on and screen is not cracked. Can you advise how to get it back on again?
-
-
-
The top layer of the sensor may be adhered to the back of the screen—if so, push it back down and separate it.
Hi, thanks for the guide, nice work. I miss a picture of the natural opening of the screen, as the mentioned “Force Touch sensor slides” gets connected from the screen to the main body of the watch by a pair of very thin wires. None of these wires are seen in any of the pictures among this guide, which may lead novices to not pay enough attention to them, broke them accidentally, or not knowing what are them for. Picture on step 13 is absolutely impossible without removing the slides / thin wires of the force touch sensor in advance.
Cheers
"If you can see the top layer of your Force Touch sensor" - How are we supposed to know whether we can see this or not? If one of your images shows us this then can you please point this out. Also, an image of what it should look like, without the problem would be good.
Just discovered this article you have posted about replacing the Force Touch Sensor. After looking at the article I can now see your first image, above, is showing the separated Force Touch Sensor. Perhaps you should link to it in this article, so people can get a better idea of what it is and what it looks like:
Same issue as djones I think. My watch was forced apart by an expanding battery and it came apart in such a way that the force touch sensor was still intact, connected to the watch back and still glued to the face. If I had an image showing the two connectors to the force touch sensor along the same side as the cables, I would have better understood and released the force touch sensor from the face before pulling the sensor away from it's connection in the base. Would have saved $20+ on buying a replacement sensor. Thank you for the documented process.
-
-
-
Lift the screen up and shift it to the left, minding the display data and digitizer cables.
I have 2 other small cables which are missing in your photos. Can you also explain what to do with them? https://drive.google.com/file/d/1_6ngMn9...
Looks like you forced touch sensor is still attached to the screen and not the body. I’ve got the same issues. I’m going to try to use the plastic tool and heat to gently remove it from the screen and return it down to the body. You can see it in their fix of it… Apple Watch Force Touch Sensor Replacement . Hope this helps.
-
-
-
Place the watch on an elevated surface, at least 1/2" or 1 cm tall—a small box or the edge of a book will work great. This will allow the screen to hang down vertically and give better access to the battery.
I would taped the watch to the elevated surface and rotated the surface around as I needed to
-
-
-
-
Use scissors to cut one of your opening picks to about the width of the battery. Try not to leave any sharp corners.
-
Insert the modified pick between the right side of the battery and the case.
-
Use constant, steady pressure to slowly pry the battery up, separating it from the adhesive securing it to the system board.
-
On the larger (42 mm) models, it's possible to accidentally pry at the system board underneath the battery. Insert the pick only far enough to get underneath the battery, not the system board.
-
If needed, apply a little high concentration isopropyl alcohol (90% or greater) around and under the battery to help weaken the adhesive.
I tried removing the battery with the prying tool as instructed, but I think it may have slightly damaged the outer black plastic wrapping of the battery. Does this mean the battery is now damaged and needs to be replaced? Or is that just a cover around the battery and it doesn’t matter? I just don’t want any battery chemicals leaking out. Asking before I stick the screen back on the watch, I’ve done all the rest and it seems fine otherwise.
Hi Danae, the black plastic is technically just protective, but I would highly recommend replacing the battery. It’s possible there is additional unseen damage, and that plastic helps protect against swelling and normal wear of the battery inside the device.
I had to use the pry tool instead of the pick as the pick was not moving it. Was careful not to damage the battery but found it much easier to get movement and know exactly where I was prying with the pry tool.
Great tutorial but I’ve run into a problem changing the battery on my 42mm Original Series watch .
Getting the battery off with the pick has proven impossible and I’m about to try using the isopropyl alcohol.
• Can you provide any tips on how best to apply it, how long to give it to take effect, how often to apply etc. ?
• Given how narrow the gap is, also how to ensure nothing gets damaged by the alcohol?
• Is there any inherent risk in using the pry tool as Joey ended up doing?
Thanks for any advice
Hey so I’m about to do a repair on one and noticed that it’s drains of battery making it pretty much safe to work with but do I really need to remove the battery? Like can’t I just remove the screen right there and now?
-
-
-
Hold the battery up and out of the way, to expose the battery cable connector.
-
Use a plastic opening tool, prying against the bottom of the case to separate the battery cable connector from the watch's battery cable.
-
Remove the battery from the watch.
Why should you remove the battery if you only need to replace the screen?...?
Douglas - this iFixit is for Apple Watch Battery Replacement - looks like you need to remove the screen to replace the battery...
jimvaughn6 - 답글
You will find that it is a good precautionary measure to disconnect the battery anytime you are repairing or replacing a screen as a short can occur when reconnecting the screen rendering it useless even if you have the unit turned off.
Bryan Solo - 답글
Great repair guide! You iFixit guys are awesome. Took me about 2 hours but then I am very careful and I replaced the touch sensor at the same time since I had it open anyway. Make sure you have at least 2, and better 3 adhesive gaskets. You need 2 and, well, it’s easy to mess one up while trying to place it.
Will removing the battery reset my icloud info? I have a guy who says he can do this, but i dont want him to run off with my watch after he replaces the battery…
I did not disconnect the battery first. After replacing the screen, it didn’t work. I have to assume I created a short. The watch will still turn on and haptics are evident, but the display doesn’t work. Are there any further repairs to save my watch at this point?
Yeah, sounds like you shorted part of the board. If it’s a Series 0 you’re working with, just go get a new one. Not worth fixing.
After replacing the battery I tried to turn it on and was presented with the red snake, I let it go for about an hour. When I checked it the red snake was gone, when I tried to turn it on it showed the Apple logo for about 4 seconds then went away. Is this normal, and if not what should I do?
I'm having a similar issue, did you manage to resolve it?
Did you calibrate the battery? You need to fill it up completely and let it continue to charge for a few hours first.
Is it possible to place a battery in and charge/start the watch without the screen plugged in? I want to check integrity of the battery. I was thinking to put it on charge in a closed clear plastic container without the new screen on to see if the battery is good. I ‘really’ do not want to wait another 20 days for a battery replacement and the battery has no visual punctures, front looks good and the back where the adhesive is (or were, rather) is deflated and slightly ‘knobby’. I do not know if it is damage or just how it generally looks like or maybe it looks like so because of the old adhesive. It is not inflated or abnormally expanded. Anyone who knows about this? I used a hair dryer directly on the watch opened to loosen up the adhesive, is that a no-no?
The battery swelled up and popped off the screen, so went directly to Step 12. Luckily the adhesive below the Force Touch sensor was intact. Was able to complete the fix using the Adhesive Strip after replacing the battery. Works again! Thanks!
Alex Danci - 답글
Hi Alex, I’m having the same problem with my series one with the screen has popped off due to the battery swelling. Did you have any issues starting from step 12?
Glenn -
The apple logo keeps flashing on my series 1 watch, tried force restart with crown and side button but it still just keeps on flashing the apple logo, does anyone have any advise? Is the issue with the battery? Do I need to get a new battery? I change the screen as the screen was broken and used the existing battery.
yes the issue was with battery, swapped with a new battery and booted up fine.
Having the same issue.good to hear it’s the battery and not me.
my watch was completely unloaded and stays in power saver mode when I charge. When I load in power saver mode the red light turns green for a few moments then switch back to red and no longer charge. When I remove the battery and put it back on the charger the charge starts again for a while and then stops. Do I need to change the battery? (apple watch serie 4 nike)
I replaced the screen and battery on mine. Now, it will not charge. Everything works fine, except charging. Any ideas why this may be?
My series one has two other cables/strings in the bottom left corner. Why do none of the pictures address this?
My watch hasn’t recalibrated with the new battery. Even a couple of weeks later I still get premature low battery - it can take hours for the final 10% to run out after the first 90% only took 9 hours. I left it off the charger for multiple days after installation and yet I could still quickly wake it up by pressing the crown to see the time reported with red numbers, so I don’t think it fully ran out.
Is there a way to force calibration? A Google search didn’t yield anything useful in the first several pages of results.
Hy Chris,
Same problem as you. Have you found a solution ?
luc poli -
Watching various videos and instructions from others, I found that there’s no need to remove the screen if your goal is to only swap out the battery.
It’s meant to make it easier to clean off the old glue and install some double-sided adhesive tape but it was far more simpler to loop the tape around the screen with a pair of tweezers than to try to wrangle with the metal bracket securing the display and digitiser cable connectors.
T-7000 glue can presumably be used in lieu of double-sided adhesive tape but it’s definitely more messier.
Anyway, I was initially quite annoyed about my battery expanding and popping the screen off but very quickly got over it when I realised it was a simple $20 DIY fix. Guess I got lucky this time..
I’m just replacing the battery. The screen and eveything is fine. While i’ve done just that and the new battery seems secure and eveything, i don’t know which is the adhesive strip that i’d use to re-secure the watch face back onto the watch itself. I don’t need a sensor because the watch face is fine, i just need the adhesive strip and i’m not seeing anything labelled as such in the kit. Ive got 2 tesa stickers (?) and one 3M sensor thing with a little compotent thingy attached to it. Which is the double sided adhesive that goes around the base of the watch to secure the face to the watch?? I was lucky in that my old swollen battery pushed the face off so replacing the battery was fairly easy. Now i just need to secure the face to the body. Any advice?
Have followed the guide as best I could but when everything is reconnected the watch will not power up. Have disconnected and reconnected several times but still the same. Fear that is only going to do damage. Watch was working before removing swollen battery which had caused screen to detach.
johnriding - 답글
How do you put in the battery and close the Watch
DOESN'T WORK FOR ME : Have followed the guide in every point but i have now the red snake.
Just after repairing i put the watch on the charger, let it some hours to charge.
when I took it, the watch was hot. It started up and was working. I let it discharge then put it back on the charger. After a few hours, it was not charged and showed the green snake. When I took it out, it showed the red snake.
Has anyone had this problem and found a solution?
Replaced my Series 1 battery/force sensor. The swelled original battery popped the watch open, so no prying necessary. However, the watch wouldn't work normally afterward, only displaying the "put me on my charger!" image of the charge cord with the disc on the end.
iFixIt was great about sending a replacement... battery, tools, force touch sensor, the whole kit, no charge. Replacement #2 required prying it open, but the force touch sensor stayed put, so I didn't have to replace that the second time. Watch is charging and behaving normally as I calibrate the battery. Can unlock etc.
Be very gentle/careful with the tiny force touch sensor screw. A great comment above says if you lose it, you can put in bit of a pick to press the sensor snug where the screw would hold it. I strongly recommend using a cheap hands-free, head-mounted magnifier w/light for this job. A loop of tape to stick the watch to a surface to hold it still while fiddling with the tiny cable connections was a HUGE help. Take your time!
Bonjour, connaissez-vous par hasard la référence de la batterie pour AppleWatch 2 de 42mm ?
Merci
Bonjour @drakkar1er35709
Nous la vendons dans notre boutique : Apple Watch (42 mm Series 2) Battery Si vous avez besoin d'autres infos, veuillez contacter notre service client au support@ifixit.com (pour la boutique américaine) ou au eustore@ifixit.com (pour la boutique européenne et française).
Ce sera un plaisir de vous aider !
Bien à vous, Claire
-
-
-
Use a plastic opening tool to flip the bracket toward the display and up from the speaker.
I managed to replace the force touch sensor without removing the screen
-
-
-
Steady the bracket from the left side using your fingers or tweezers.
-
At the same time, insert a small (1 mm) flathead screwdriver under the tiny tab on the right.
-
Finally, place one finger behind the tab, and pinch the bracket hard between your finger and the screwdriver to detach the cover.
Also agree: a little too much pressure and the ribbon cable tears at the point it enters the bracket. Take it SLOW and make sure you have really good light and vision. Orient yourself.
Dave Varon - 답글
And this is where things went south for me too. Ended up disconnecting from the rest of the watch and the Taptic Engine. I read through this and watched this portion of Ifixit’s YouTube video no less than 15 times, so confusing they way it’s worded and the pictures didn’t help. Now I’m out of luck and out of $190.
Pas de problèmes me particulier à cette étape. Le fait de pousser très légèrement sur la petite languette qui dépasse a suffit, il n’y a vraiment pas besoin de forcer.
If you lift out carefull the whole lit / coverbox of the screen connector between your thumb and your pointing finger.
Then you can peel the cover easy up with your other pointing finger Nail.
You can feel the smal clip with your nail and lift easy up.
It works fine by me without any metal of plastic tool.
I also tore the cable, I assume that once that happens I’m screwed? I have a battery and force touch sensor if anyone needs one for free let me know!
Evert is correct - this can be done with a fingernail and does not need to be hard. Seems much safer.
Evert is correct, using fingernail works.
It is possible to replace the force touch sensor without removing the screen
There isn’t really a latch that goes with this. Just use the screwdriver to create a bit of space and it comes right off. I assume where most people go wrong is by pinching the case together as they try to separate it. Also, to reduce your chance of breaking it, There is no need to bring it to the nearly 90 degree angle as depicted and 50-60 degree angle allows it to pop back a bit without damaging anything.
WATCH OUT! It is possible to slip with the screwdriver and completely bungle the connector that the screen plugs into. This is impossible to recover from unless you have the time and microsoldering skills to replace the cable that the screen plugs into.
Adam Roach - 답글
I skipped this part as I found it difficult to do and almost made me damaged the entire cover when I tried inserting the screw driver head to the holes beside side it and prying the side part too. So I stopped trying. Ended up looping the adhesive around the screen careful not to touch the adhesive’s sticky side. (I replaced the adhesive along with the swollen battery. ) It was a success.
Note: I should have zoomed in the photo and now it makes more sense.
-
-
-
Carefully pry up to disconnect the display data and digitizer cables.
-
Remove the display.
So how do you get the display off the screen or did I already mess it up cause I just did it
Hello guys , appreciate the effort that u guys are doing , have one question though , I own a series 2 watch and I was thinking about changing my screen caz is cracked but I can't find that many lcd for 2 series , and now my question Would a 1 series lcd match my 2series watch? Keep on searching but no answers!!! Many thanks
Great repair guide! You iFixit guys are awesome. Took me about 2 hours but then I am very careful and I replaced the touch sensor and the battery at the same time since I had it open anyway. Make sure you have at least 2, and better 3 adhesive gaskets. You need 2 and, well, it’s easy to mess one up while trying to place it.
I followed the above instructions and successfully replaced the broken screen, however the new screen won’t pair to my iphone or fully boot up, only goes to a certain point (Pairing stage) and then starts over; any suggestions on what the problem could be?
I agree with Jeff53, by far the retention clip bracket was the most nerve racking part on my first attempt. I found that inserting a sharp pointed exacto knife blade between the bracket and metal tops of the screen connectors along the edge that has the smaller clip (closest side to the battery connector) while it was still in a glued down position actually works easier than prying the entire connector up first as done in this guide and then trying to hold it with tweezer while inserting a flat tip screwdriver into that very tiny slit between the bracket and the top of the connectors. Once the excto blade is inserted, just a little twist of the blade pops the retention clip off easily.
One other suggestion is to plan on replacing the force touch pressure sensor gasket any time you pry a screen off one of these watches. They are very inexpensive now ($5 range) and easily damaged when prying up the screen or when trying to remove glass shards embedded along the edge of the screen. Replacing the gasket also assures new, fresh adhesive to hold the new screen onto the watch body properly and keeping water resistance intact. If you skip the gasket replacement, plan on a high likelihood of the new screen coming loose and having to take it all back apart again just to replace that $5 adhesive gasket down the road.
how do you put the screen back on
hi, after some advice. After replacing the battery and force touch pressure sensor i have no touch control of the screen. i’ve redone the procedure several times and everything looks perfect. but no touch. touch was working before the battery repplacement. i see no tears in the cables and i havent forced anything.
Kevin Rook - 답글
Hi Kevin
I have the same issue. Did you manage to find a solution or reason?
Thanks
It is possible to replace the force touch sensor without removing the screen
Great guide! I followed each of the steps, took my time and I’m actually successful. I replaced the new adhesive and reversed the steps. Took a little over an hour but I read more than once and really, really took my time. It took patience and the right tools. Thank you!
Did I miss how to make sure the face is secured once again after repairs are made?
Those steps are part of the Force Touch Sensor replacement guide as is indicated on the last step of this guide.
-
-
-
Use a Y000 driver to remove the single tri-point screw securing the Force Touch sensor connector cable.
Là je me suis senti un peu seul, car malgré le kit Iopener, la trousse à outils IFixit et une boite de tournevis en plus, aucun embout qui ne rentre dans cette empreinte. M’en suis sorti avec un tournevis plat de moins de 1 mm, issu d’une trousse de réparation d’horlogerie classique. En dehors de ce détail, plus d’encombre jusqu’à la fin du tuto.
The description is misleading! Be careful with the driver. The link to the driver they suggesting isn’t the one you need. And it’s missing in any iFixit sets.
-
-
-
Use tweezers to peel up any adhesive left behind on the lower case.
-
Clean all traces of adhesive (and broken glass, if any) thoroughly from the case before re-sealing your watch. Scour the case using the tip of an opening tool or spudger wrapped in a lint-free cloth or coffee filter, along with a little isopropyl alcohol (90% concentration or greater).
Don’t be in a hurry here. Be patient. Isopropyl alcohol works great to soften the adhesive. Remove every trace from both the body and screen. Wrapping the rag around the opening tool is a good idea. I also was able to use the rag under my thumbnail to scrub the adhesive off the edge of the screen.
the flat head driver included (one marked 1) is also a nice tool to use to get off any remaining adhesive 👍🏾
-
-
-
Set your new Force Touch sensor face-down (with the connector pins facing away from you).
-
Peel off and discard the first protective liner, exposing the adhesive underneath.
This look nothing like the one shipped. It had a 3M adhesive backing that need to be removed from the center first
I had no clue how to remove the covers of the delivered sensor. - Finally I removed everything and placed the sensor best I could, trying to touch the sides with the adhesive as less as possible. I had a hard time. Someone who knows how to do it correctly is invited to add a comment.
Once I adhere the sensor to its frame, how do I remover the clear plastic cover? The instructions don't cover that.
Can someone PLEASE tell me the steps to remove the sensor from the brown 3M backing? iFixit is really good but it goofed this time. The instructions doesn't apply to what was shipped to me.
-
-
-
Gently but firmly press the Force Touch sensor into place all around the perimeter of the watch case.
When firmly pressing the Force Touch sensor into place, be careful that your tool does not slip off of the protective liner in the vicinity of its cable.
-
-
-
Replace the Y000 tri-point screw securing the Force Touch sensor connector cable.
Replace the sensor gasket but force touch is still not working
Did you ever fix out what it was ?
Great repair guide! You iFixit guys are awesome. Took me about 2 hours but then I am very careful and I replaced the battery at the same time since I had it open anyway. Make sure you have at least 2, and better 3 adhesive gaskets. You need 2 and, well, it’s easy to mess one up while trying to place it.
do you need two adhesive strips, one for force sensor to case and another adhesive strip for screen? Or just one for force sensor?
I laid the Force Touch sensor down first, then one of the gaskets that came with it and the screen went on top. It fits very well and hasn’t come loose yet.
BEFORE YOU LEAVE THIS STEP: You must put an adhesive strip on top of that gasket or the screen will just pop off when the repair is done. The adhesive on the force touch gasket is not enough by itself to hold everything together! Save yourself the agony of needing to re-do this repair. Apple Watch Adhesive Replacement
The screwdriver delivered with the fix pack is not suitable for doing this job as the angle is too steep with the delivered handle. Lucky me I had another ifixit screwdriver set with an intermediate piece; with this: no problem.
-
-
-
Use a plastic opening tool to reconnect the display data and digitizer cable connectors.
Have a very good light source. The screen blocks a good amount of light, and light is what you to line these two connectors up. Had my wife hold a flashlight ( or torch for those in the UK) for me.
Sorry to spam this comment in a few places, but I’m trying to catch people where they are. If you’re at this step and did not put an adhesive strip on top of your new force touch gasket, your watch will not hold together at the end. You must stop here and follow this guide next, then come back: Apple Watch Adhesive Replacement
Its actually best if you put the battery in before hand, mine was not a charged battery.
-
-
-
Set the display connector bracket cover in place and slide it lengthwise to secure the large slotted tab at one end.
-
Press down on the cover to click the two smaller tabs at the other end into place.
I’m surprised at the small number of comments given how absolutely crazy this single step is. This is where I became convinced this product is not meant to be repaired by human beings. Both times I’ve done this, this it takes about an hour to get this bracket to make a clicking noise and be locked in place. I just did it for the second time and I can share what I think makes this a little easier. Bend that top bracket piece backward around the edge of something, like a table. You want to deform the part just a bit. This does two things: 1) ensures there’s a little more distance between the two sides, which are supposed to “grab” the edges of the lower part; 2) helps create a natural tension between the upper and lower part. Like I said, I’ve done this twice and I still have no idea what makes this part actually be together and I wonder how many people decide to just give up on the bracket and close the watch up as-is.
This step and the step before were absolutely the worst of the whole job. I didn’t have to deform the part but my bracket was too close to the edge of the watch for me to easily slide the large tab end of the bracket cover on like this after connecting the cables. The only way I could actually get the bracket cover on without immediately detaching the cable connectors was to: 1. pull the bracket up like you do in step 19, 2. hook the large tab end of the cover on, 3. push the bracket back down so the bracket cover stays in place and points up vertically, 4. fiddle for 10+ minutes to try and get the cables connected, 5. VERY CAREFULLY rotate the bracket cover 90 degrees, making sure it’s straight along the bracket sides 6. inevitably disconnect one or both of the cables or somehow flip off the cover and start the whole process over 10 times, then finally 7. once the cover actually comes down without disconnecting the cables, pinch down hard with tweezers on the end with two tabs until you hear the clicks.
This step seemed impossible, but I finally found a method that has now worked twice (and in less than two minutes each time). First, use tweezers to hook the two sides of the bracket cover nearest the edges of the phone on to the connectors. Be sure that the side of the bracket that has the extra tab hooks around and underneath the connector. Second, take a tip of the tweezers and put it into one of the cutouts in the top of the bracket. Third, with the tweezers just into the cutout, apply gentle sideways pressure on the bracket in the direction that is away from the side of the device and in the direction of the final side that needs to click on to the connectors. (If the bracket slides off the connectors, go back and make sure the backet tabs hooker around the two sides in step one.) Fourth, while keeping the gentle sideways pressure on the bracket with the tweezers, take a spludger and press down on to the final side of the bracket so that this side clicks on to the connectors.
-
-
-
Line the battery connector up with its mate on the cable inside the watch body.
-
Use tweezers to press the two connectors together.
This is VERY DIFFICULT to do. Go easy. Be patient. If I can do it with these giant thumbs, you can.
-
-
-
If needed, try re-using the existing adhesive to secure the battery. Alternatively, try a small piece of double-sided tape such as Tesa 61395, or a dab of liquid adhesive such as E6000.
-
Rotate the battery down into its slot, and press it into position.
-
Press the battery down against the system board to re-adhere it in place.
Mine was not powering up at this point but I figured out I needed to charge the battery first. Was about to return the battery thinking it was defective.
Der im Reparatur-Kit mitgelieferte Akku war bei mir so leer das die Uhr zunächst kein Lebenszeichen von sich gab. Ich dachte schon ich hätte was beschädigt und war fast dabei alles wieder aus einander zu nehmen. Ein Versuch am Ladegerät zeigte immerhin am Bildschirm an das der Akku leer sein (und ja - ich sehe auch das der Kommentator vor mir das gleiche geschrieben hatte - habe ich übersehen).
Translation for others: The battery included in the repair kit was so empty that the watch initially gave no sign of life. I thought I had damaged something and was almost about to take everything apart again. An attempt on the charger showed on the screen that the battery was empty (and yes - I also see that the commentator had written the same thing in front of me - I overlooked it).
It looks like my replaced force touch does not work. I checked the connections multiple times but when i tap the screen or push down on it, it doesn’t do anything. Every else works fine. Could I have a faulty force touch?
Hi Carlos, I know your comment was sometime ago, did you end up figuring out where things went wrong? I am experiencing the same issue.
Suggest testing the watch BEFORE removing the battery’s adhesive cover. You can do so by letting the battery simply sit on top of the system board and resting the screen in place. I put mine on the charger and waited for it to come alive with the charge state (full) and the time.
Agreed. That note probably should be moved to step 35.
Scott S -
I have the same problem as Carlos, my force touch sensor seems faulty.
As mentioned, I wish the instructions would flip these instructions to have the repairer test things before pressing down the battery on the adhesive. Like so:
Now is the best time to test powering on your watch and test the force touch function—if it doesn't turn on, double check all three connectors and try again.
Rotate the battery down into its slot, and press it into position.
Press the battery down against the system board to re-adhere it in place.
I accidentally damaged the force touch while replacing the battery. So i brought a brand new Force touch to replace it. Im stuck at this step. The watch able to turn on after 1hr charge but the touch screen is dead.
I already follow at the steps above. Now really had no idea what went wrong.
Hallo meine watch geht seitdem akku wechsel nur kurz an und der apfel ist blau mit strichen und dann geht sie wieder aus. Was kann ich tun?
Mike Hager - 답글
I made all the connections but watch display won’t light up. It did before the repair , only the battery had failed(swollen) causing screen to fall off. Cables don’t appear torn.
dmeade2347 - 답글
I went through the above steps and replaced the Force Touch sensor and battery. My watch now powers on which is great, but the screen is not responsive to my touch. What could be the issue?
My screen turns on but the force touch sensor isn’t working. Any suggestions?
Gemma Curl - 답글
-
-
-
For best results, detach the watch band and wrap a couple rubber bands around the Apple Watch's case to help the adhesive bond correctly.
For this step, I reheated the screen with the iopener before applying force to set the adhesive.
How long should I leave the rubber band ?
Baebe.bleu - 답글
for ever - adhesive doesn’t hold it and the display falls off
I removed all old adhesive and cleaned the watch and display very carefully with isopropanol but after one week the display came off. I switched the watch off, heated it with the iOpener and pressed the display with a strong clamp til it cooled down. It seems to hold now.
I used the iOpener as suggested by breadandbits for 15 minutes then wrapped the watch with 7 rubber bands tightly for 29 hours. After two hours the screen started to come loose again.
iFixit is going to send another gasket. I’m curious, can Hans-Hermann Gessler please update your comment as to what clamp you used and how long you allowed it set. iFixit won’t share the manufacturers curing time for the adhesive.
Thank you.
This fix was one of the hardest I’ve done. I got through it, Though. Thanks for the great Guides!
The Force Touch sensor comes with 2 gaskets. Should one of those be used? It seems like it’d be too thick.
My adhesive let loose after a day. I heated it with the iOpener and wrapped with rubber bands. left to cool. The next day, the adhesive let loose. I thought back to the package arriving and noticing 2 mystery gaskets. These gaskets are never mentioned in any guide. I stuck one gasket over the Force Touch sensor and put the screen back. I think this will work just fine now. The screen seems to sit *just a little bit* high, but not really noticeable. I mean, not even enough to make any real difference at all.
Just replaced a swollen battery- now the battery works but the touch doesn’t. I’ve triple check all the connections and all I can come up with is either I have a faulty force touch sensor or is it possible that it needs to be paired with the phone again? - step daughters watch and she’s not with us this week. TIA, cb
I found that the adhesive on the force sensor gasket to be too weak. So I place a thin layer of superglue in the channel and installed the sensor gasket. Then I place a thin layer on the screen flange and super glue the screen to the body. Seems to work fine.
How can I reprogram it again? There is a sign that it has a high temperature on the screen, and sometimes it shows a high temperature with time, and it does not work regularly.
There are multiple issues with this repair (mine Gen1 started with a battery replacement)
Heat removal (I used hot air station set at 100C) of original screen can bow it slightly (mine did). It’s not easily visible. Rocking the screen edge to edge can reveal the subtle bowing. Slightly bowed screen has 2 problems 1) doesn’t stick well as all surfaces don’t make contact 2) Force Touch sensor has a lot of errors causing poor touch screen results and false Force Touch actions.
Aftermarket force touch sensor gaskets are also poor. 4 layer construction that easily separates. The adhesive used is also somewhat useless. Picture link
My final solution was just to remove Force Touch sensor. Trying to heat back to perfect flat is probably quite difficult. B7000 glue screen to body directly. Watch works perfect. Useless Force Touch feature no longer exist.
B7000 glue eventually came loose even without force touch sensor and display cable ripped (2nd display cable that ripped as soon as screen comes loose). End of watch. Lesson learned. Probably need to use stronger glue along with no force touch sensor
Howard -
-


Take your e-waste to an R2 or e-Stewards certified recycler.
Repair didn’t go as planned? Try some basic troubleshooting, or search our Answers forum for help.
Take your e-waste to an R2 or e-Stewards certified recycler.
Repair didn’t go as planned? Try some basic troubleshooting, or search our Answers forum for help.
다른 237명이 해당 안내서를 완성하였습니다.

댓글 43개
I can't stress enough how important it is to not flex the digitizer ribbon cable. A cracked ribbon cable will necessitate replacing the entire lcd.
This is a Fact. It happened to me when the whole rig hit the floor lol
If there is a new induction frame - do not use double-sided adhesive tape.
How can I tell if there is a new induction frame?
By Induction Frame, what do you mean, exactly?
I have a new force touch sensor replacement part (9515364), which appears to have teal backing on both sides. Do I also need a gasket? Or is the gasket included in this part? Thanks!
I got 2 of those in my Force Touch sensor kit. My screen kept coming loose, so I used one of those gaskets on top of the Force Touch sensor and it works really well now.
can we switch ON the watch without this sensor ?
Yes, I broke the force touch sensor cable while replacing the battery. While I waited for the new sensor to arrive in the mail I re-assembled my watch and used it as normal. The only difference is that I could not use any functions that required the touch sensor.
You should be able to, just Force Touch will not function.
Aydan -
Do i have to put the 3d sensor on the adhesive and on that the display? or in another order?
I replaced the entire lcd following the instructions but I forgot to put back the clip that secures the two screen connectors!!! The screen seems to be working fine but now
I’m wondering whether I should open the watch again and put back that clip or if I can left it the way it is. Thanks
I wouldn’t think it’d be a huge problem, but if you hit the watch on something, the shock could dislodge one or both cables.
Is it possible to replace just the glass if I have a fully working digitiser with a broken glass?
They come as a unit, so No.
I’ve actually seen videos where the guy separates the digitizer from the display. Very tricky procedure and I don’t wanna do it.
C’est grave si la force touch et coupée à un angle
No, the connectors on the screen are different.
So my watch screen decides it doesn’t like sitting nicely on the watch anymore and popped off. Looks as though the battery has swollen and pushed it off. If I buy a new battery and replace it, what do I need to stick the face back down? Nothing is damaged inside other than a swollen battery
If you replace the battery you should also replace the force touch sensor because that is the part that holds it together.
I had a swollen battery out of warranty and repaired using this guide. But the screen pops back off by the end of the day. I cleaned it again, put another layer of adhesive (extra one came with the battery), heated and then clamped for 24 hrs. But still coming apart between the screen and sensor. Is it the adhesive? Or technique? Anyone have advice? I’m ready to forget the force touch sensor and superglue it.
What is the little orange piece on the battery cable connector for?
Great, clear and precise instructions. For newbies like me steps 18-19 were quite difficult. Its easier if you are able to look at the small metal bracket under a magnifying glass to see clearly what you’re dealing with. Thank you Andrew Optimus Goldheart (and 6 other contributors).
İf Apple Watch Force Touch Sensor also works to fix the screen to body then when that part below is used?
Apple Watch (42 mm) Adhesive Strip
İs it applied if given up to use the force touch function?
i recently replaced the screen on my series 7000 and now my watch is unresponsive. I can still power on and hard reboot but nothing else is working. I had accidentally pulled on the black cable that was attached to the slotted tabs and now it has a very teeny tiny hairline tear on the cable right on the taptic engine. Would replacing the force touch sensor fix the unresponsiveness issue OR do you think its because of the tiny tear?
Sorry, I’m afraid it’s the tear.
I have a question…after replacing the battery should I replace the force touch sensor because it seems okay for me. Thank you!
If it wasn’t damaged in the screen removal, it may work just fine. It may not. I’d get a new one anyway. I like to replace the battery, Force Touch sensor and screen all at the same time.
TopTuto, well explained and described
The only thing that I’m still not 100% clear on is whether or not I HAVE to replace the force touch sensor if the only damaged part is the screen? The sensor itself appears to be completely intact, to the point that you would never even notice that it’s there; I just thought it was part of the frame. Sadly the screen isn’t even damaged, it just popped off bc of the battery swelling, then in a careless moment the ribbon cable was torn. What could have been a $10 fix quickly escalated to an $80 fix.
Habe heute bei meiner iWatch Series 1 den Akku und den Force Touch Sensor Klebedichtung getauscht. Dank der Anleitung super easy. Vielen Dank
It sounds like a Force Touch Gasket issue to me. You’ll need to replace the FTG and be careful to avoid stretching the cables attached to the screen. F the display works ok it should be fine.
Thanks for the detailed pics and instruction. First Fixit on an apple watch. Just the 2 hour time. Great fun. Did not have replace FTG. Will of course keep it on hand if needed.
I’ve been through this twice now, sadly with the result that my Watch appears not to have survived. Leaving this here for posterity in the hopes it may help folks’ future repairs:
1) The adhesive on the Force Touch Gasket is not sufficient to hold the watch closed! If you are replacing your FTG and you follow this guide to the letter, you will be one of the dozens of people reporting that their screens pop off shortly after the repair. You must follow the adhesive replacement guide for this model too!
2) There are multiple possible permutations of how the adhesive strips should be used, and it’s especially confusing that the force touch gasket ships with two adhesive strips - the implication being that you should use both. No guide shows two being used. I’ve never gotten a solid answer on this. After trying it with no strips and then using both, I’ve come to the conclusion that you’re probably just supposed to use one, and the other is there as a backup. So it’s case > gasket > adhesive strip > screen.
I got the battery and force-touch sensor replacement kit. I put everything together and was about to put the screen back into place when I looked over and saw that I had two double-sided sticky gaskets with the Tesa name on them. They’re not mentioned in these instructions anywhere. So I took it all apart, placed the first gasket into the watch’s back channel, placed the force-touch sensor on top of that, and then placed the other gasket on top of those. Was this the correct way to do it? The watch is working but I think the glass screen is sitting a little higher than normal.
After replacing the battery, the watch will not charge. The screen shows a charger cable with a green lightning bolt, but it never charges. Will not turn on. Thoughts?
oh my god that was stressfull... went well tho, thank you ifixit!
-seth 16yd:)
I followed the instructions and i managed to install the screen properly but the Force Touch sensor seal won't seal the screen after one whole using rubber bands. I had to buy an extra Force Touch sensor since the other won't stick anymore.
you should include a tip to use the "adhesive strip" that's comes with the screen as the alternative on step 38, i had no idea what was that form at all and is not mentioned anywhere in your tutorial. now after taking out the new screen I bought from you guys and putting it back, the screen doesn't seem to work anymore smh.
Can these same steps be applied to the series 8 to replace damaged sensors?