주요 콘텐츠로 건너뛰기

Aquaris M5 Earpiece Speaker Replacement

필요한 것

  1. Aquaris M5 Earpiece Speaker Replacement, Back Cover: 1 단계, 이미지 1/2 Aquaris M5 Earpiece Speaker Replacement, Back Cover: 1 단계, 이미지 2/2
    • Insert the tip of an iFixit opening tool between the back cover and the mid frame of the phone.

    • Between the 2 SIM card slots is a good place to start.

    • Slide the opening tool to the bottom of the phone, to snap out the plastic clips, connecting the back cover and mid frame.

  2. Aquaris M5 Earpiece Speaker Replacement: 2 단계, 이미지 1/2 Aquaris M5 Earpiece Speaker Replacement: 2 단계, 이미지 2/2
    • Slide the opening tool back to the top of the phone, to disconnect all the clips on the edge.

    • Slide around the corner and along the top edge, to also disconnect these clips.

  3. Aquaris M5 Earpiece Speaker Replacement: 3 단계, 이미지 1/3 Aquaris M5 Earpiece Speaker Replacement: 3 단계, 이미지 2/3 Aquaris M5 Earpiece Speaker Replacement: 3 단계, 이미지 3/3
    • Be careful not to bend the back cover too hard to prevent some of the clips breaking.

    • Grab the back cover by the loosened edge.

    • Gently bend and twist the flexible back cover a bit to disconnect the remaining clips.

    • Take off the back cover.

  4. Aquaris M5 Earpiece Speaker Replacement, Battery: 4 단계, 이미지 1/1
    • Damaging the liquid indicator sticker, on the middle most screw, will void the warranty of the phone.

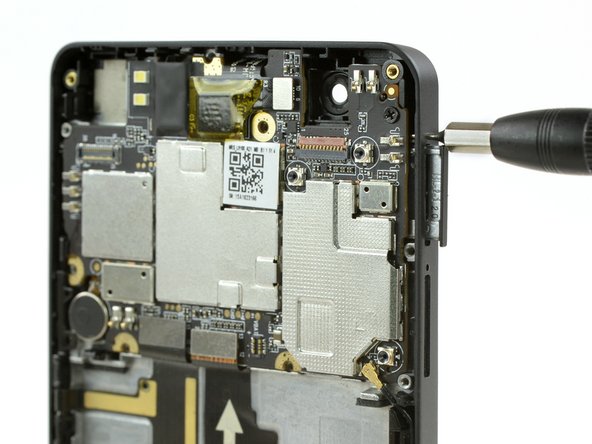
    • Unscrew the ten black 4mm Phillips #00 Screws from the mainboard shield.

    • Unscrew the golden 3.4mm Phillips #00 screw on the middle-right side of the mainboard shield.

  5. Aquaris M5 Earpiece Speaker Replacement: 5 단계, 이미지 1/3 Aquaris M5 Earpiece Speaker Replacement: 5 단계, 이미지 2/3 Aquaris M5 Earpiece Speaker Replacement: 5 단계, 이미지 3/3
    • Insert the flat side of a spudger between the mainboard shield and the frame of the phone.

    • Twist the spudger to lift up the mainboard shield.

    • Remove the mainboard shield from the phone.

  6. Aquaris M5 Earpiece Speaker Replacement: 6 단계, 이미지 1/2 Aquaris M5 Earpiece Speaker Replacement: 6 단계, 이미지 2/2
    • Use a spudger to disconnect the battery's flex cable from the mainboard.

    • Pull of the sticker on the bottom side of the battery.

    • Grab the sticker and lift it up to take the battery out of the phone.

  7. Aquaris M5 Earpiece Speaker Replacement, Front Camera: 7 단계, 이미지 1/3 Aquaris M5 Earpiece Speaker Replacement, Front Camera: 7 단계, 이미지 2/3 Aquaris M5 Earpiece Speaker Replacement, Front Camera: 7 단계, 이미지 3/3
    • FPC Connectors can break easily, be very careful.

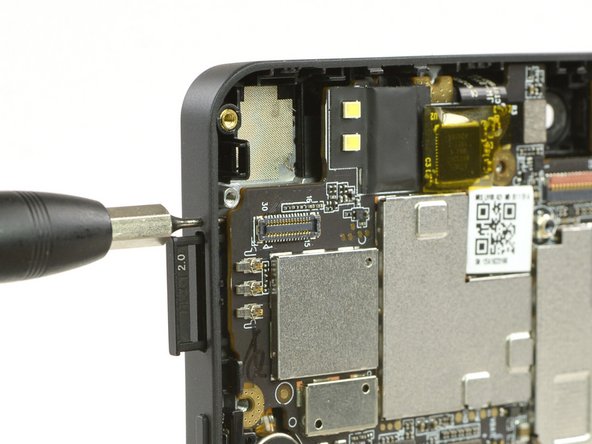
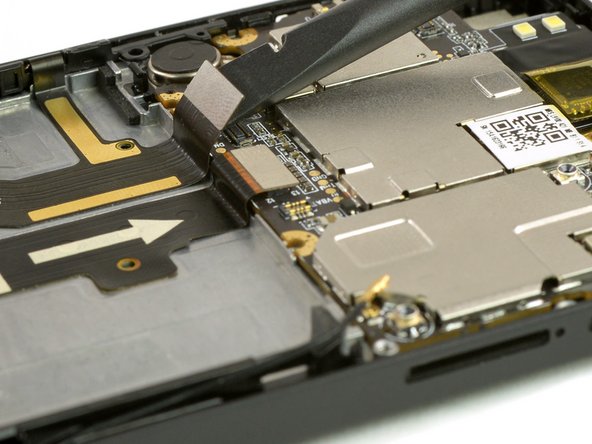
    • Use an opening tool or your finger nail to open the FPC connector.

    • Disconnect the FPC connector cable.

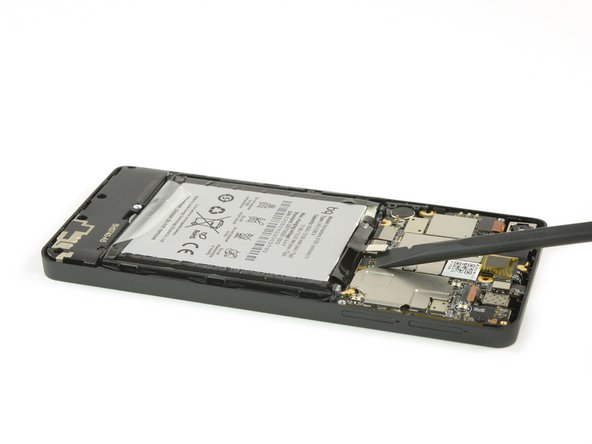
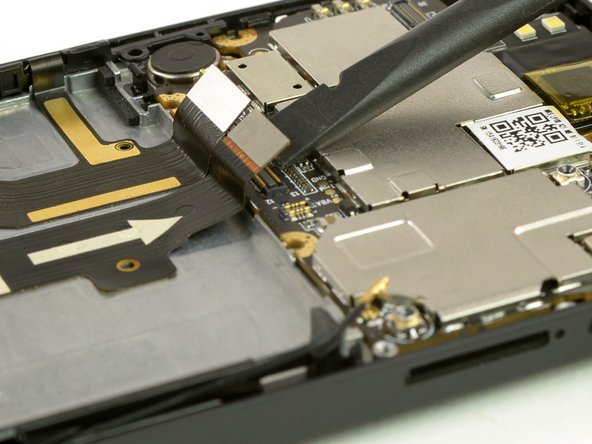
    • Use the tip of a spudger to leverage the camera out of its housing.

    • Remove the front camera.

  8. Aquaris M5 Earpiece Speaker Replacement, Rear Camera: 8 단계, 이미지 1/2 Aquaris M5 Earpiece Speaker Replacement, Rear Camera: 8 단계, 이미지 2/2
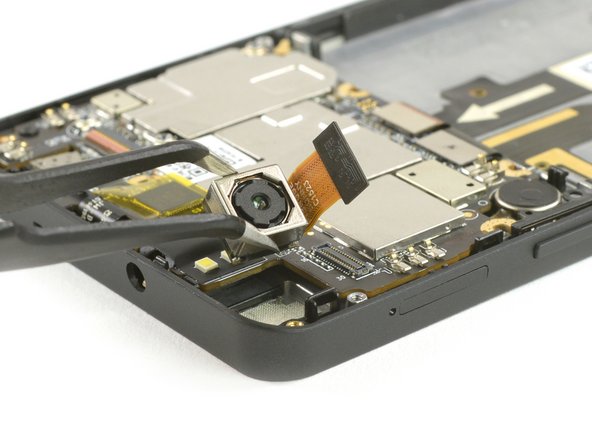
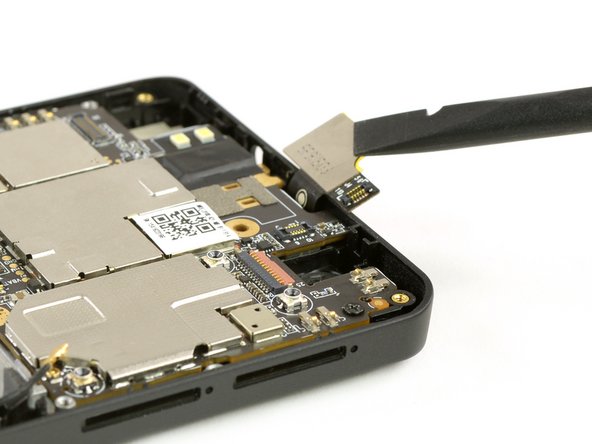
    • Use the flat side of a spudger to disconnect the camera's flex cable.

    • Use Tweezers to grab the camera and lift it out of the phone.

  9. Aquaris M5 Earpiece Speaker Replacement, Mainboard: 9 단계, 이미지 1/3 Aquaris M5 Earpiece Speaker Replacement, Mainboard: 9 단계, 이미지 2/3 Aquaris M5 Earpiece Speaker Replacement, Mainboard: 9 단계, 이미지 3/3
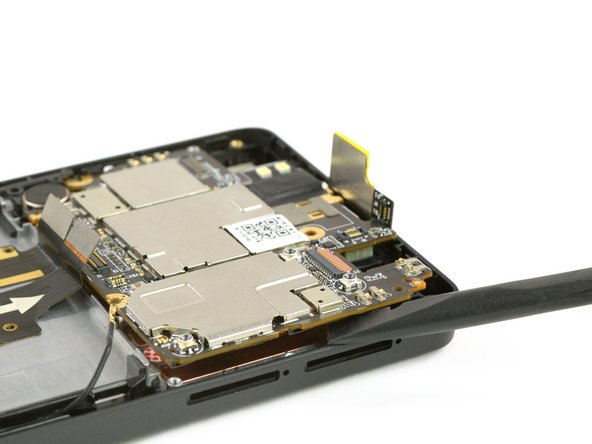
    • Use a SIM card eject tool, to eject the two SIM card slots on one side.

    • Use a SIM card eject tool, to eject the micro SD card slot on the other side.

  10. Aquaris M5 Earpiece Speaker Replacement: 10 단계, 이미지 1/3 Aquaris M5 Earpiece Speaker Replacement: 10 단계, 이미지 2/3 Aquaris M5 Earpiece Speaker Replacement: 10 단계, 이미지 3/3
    • Use tweezers to unplug the antenna cable in the bottom right of the mainboard.

    • Use a spudger to disconnect the two flex cables at the bottom of the mainboard.

  11. Aquaris M5 Earpiece Speaker Replacement: 11 단계, 이미지 1/2 Aquaris M5 Earpiece Speaker Replacement: 11 단계, 이미지 2/2
    • Use the flat end of a spudger to disconnect the flex cable at the top of your the mainboard.

    • Bend the cable a bit over the edge, so it won't block the mainboard later, when you are taking it out.

  12. Aquaris M5 Earpiece Speaker Replacement: 12 단계, 이미지 1/1
    • Take out the 4mm Phillips #00 screw, holding the mainboard to the frame.

  13. Aquaris M5 Earpiece Speaker Replacement: 13 단계, 이미지 1/3 Aquaris M5 Earpiece Speaker Replacement: 13 단계, 이미지 2/3 Aquaris M5 Earpiece Speaker Replacement: 13 단계, 이미지 3/3
    • Insert the flat end of a spudger between the mainboard and the mid frame.

    • The best spot is on the right side next to the two SIM card slots.

    • Use the spudger to lever the mainboard.

    • Take the mainboard out of the phone.

  14. Aquaris M5 Earpiece Speaker Replacement, Earpiece Speaker: 14 단계, 이미지 1/2 Aquaris M5 Earpiece Speaker Replacement, Earpiece Speaker: 14 단계, 이미지 2/2
    • Use tweezers to grab the earpiece speaker, located at the top of the phone.

    • Pull it up, to take it out of the phone.

    • The earpiece is held in place with mild adhesive.

결론

To reassemble your device, follow these instructions in reverse order.

다른 3명이 해당 안내서를 완성하였습니다.

Theo Mat

회원 가입일: 11/12/17

12,782 평판

안내서 14개 작성하였습니다

댓글 0개

댓글 쓰기

조회 통계:

24 시간 전: 0

7일 전: 1

30일 전: 5

전체 시간: 453