주요 콘텐츠로 건너뛰기

Aquaris M5 Vibration Unit Replacement

필요한 것

  1. Aquaris M5 Vibration Unit Replacement, Back Cover: 1 단계, 이미지 1/2 Aquaris M5 Vibration Unit Replacement, Back Cover: 1 단계, 이미지 2/2
    • Insert the tip of an iFixit opening tool between the back cover and the mid frame of the phone.

    • Between the 2 SIM card slots is a good place to start.

    • Slide the opening tool to the bottom of the phone, to snap out the plastic clips, connecting the back cover and mid frame.

  2. Aquaris M5 Vibration Unit Replacement: 2 단계, 이미지 1/2 Aquaris M5 Vibration Unit Replacement: 2 단계, 이미지 2/2
    • Slide the opening tool back to the top of the phone, to disconnect all the clips on the edge.

    • Slide around the corner and along the top edge, to also disconnect these clips.

  3. Aquaris M5 Vibration Unit Replacement: 3 단계, 이미지 1/3 Aquaris M5 Vibration Unit Replacement: 3 단계, 이미지 2/3 Aquaris M5 Vibration Unit Replacement: 3 단계, 이미지 3/3
    • Be careful not to bend the back cover too hard to prevent some of the clips breaking.

    • Grab the back cover by the loosened edge.

    • Gently bend and twist the flexible back cover a bit to disconnect the remaining clips.

    • Take off the back cover.

  4. Aquaris M5 Vibration Unit Replacement, Battery: 4 단계, 이미지 1/1
    • Damaging the liquid indicator sticker, on the middle most screw, will void the warranty of the phone.

    • Unscrew the ten black 4mm Phillips #00 Screws from the mainboard shield.

    • Unscrew the golden 3.4mm Phillips #00 screw on the middle-right side of the mainboard shield.

  5. Aquaris M5 Vibration Unit Replacement: 5 단계, 이미지 1/3 Aquaris M5 Vibration Unit Replacement: 5 단계, 이미지 2/3 Aquaris M5 Vibration Unit Replacement: 5 단계, 이미지 3/3
    • Insert the flat side of a spudger between the mainboard shield and the frame of the phone.

    • Twist the spudger to lift up the mainboard shield.

    • Remove the mainboard shield from the phone.

  6. Aquaris M5 Vibration Unit Replacement: 6 단계, 이미지 1/2 Aquaris M5 Vibration Unit Replacement: 6 단계, 이미지 2/2
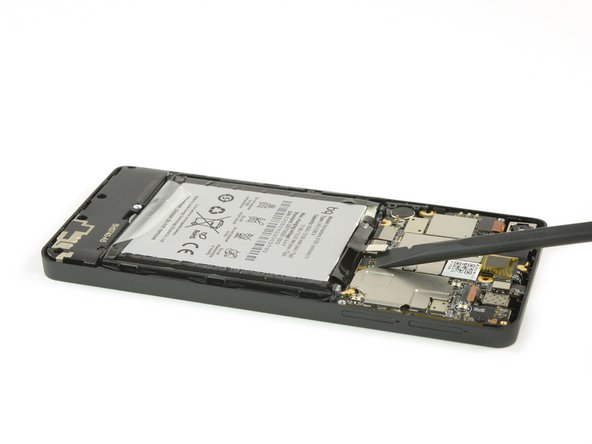
    • Use a spudger to disconnect the battery's flex cable from the mainboard.

    • Pull of the sticker on the bottom side of the battery.

    • Grab the sticker and lift it up to take the battery out of the phone.

  7. Aquaris M5 Vibration Unit Replacement, Front Camera: 7 단계, 이미지 1/3 Aquaris M5 Vibration Unit Replacement, Front Camera: 7 단계, 이미지 2/3 Aquaris M5 Vibration Unit Replacement, Front Camera: 7 단계, 이미지 3/3
    • FPC Connectors can break easily, be very careful.

    • Use an opening tool or your finger nail to open the FPC connector.

    • Disconnect the FPC connector cable.

    • Use the tip of a spudger to leverage the camera out of its housing.

    • Remove the front camera.

  8. Aquaris M5 Vibration Unit Replacement, Rear Camera: 8 단계, 이미지 1/2 Aquaris M5 Vibration Unit Replacement, Rear Camera: 8 단계, 이미지 2/2
    이 단계에 사용된 도구:
    Tweezers
    $4.99
    구매
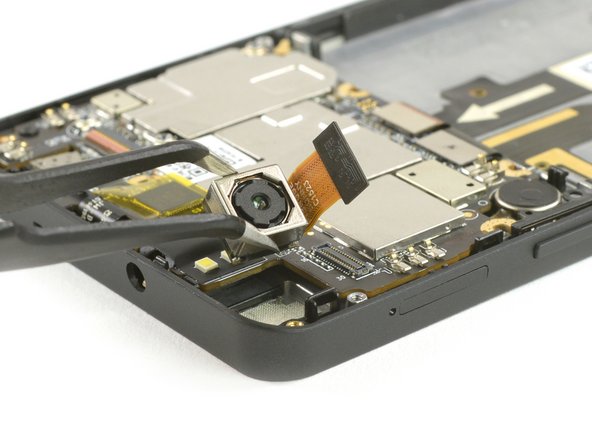
    • Use the flat side of a spudger to disconnect the camera's flex cable.

    • Use Tweezers to grab the camera and lift it out of the phone.

  9. Aquaris M5 Vibration Unit Replacement, Mainboard: 9 단계, 이미지 1/3 Aquaris M5 Vibration Unit Replacement, Mainboard: 9 단계, 이미지 2/3 Aquaris M5 Vibration Unit Replacement, Mainboard: 9 단계, 이미지 3/3
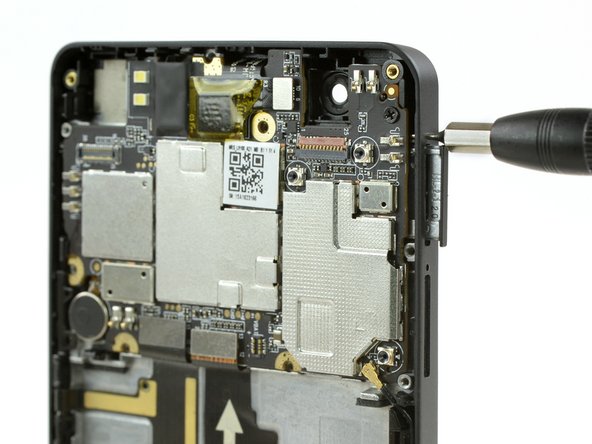
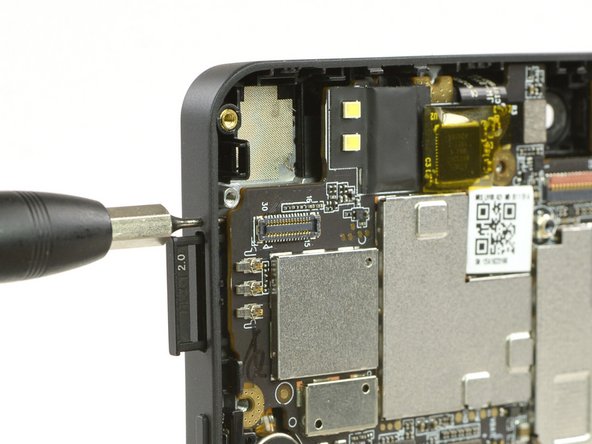
    • Use a SIM card eject tool, to eject the two SIM card slots on one side.

    • Use a SIM card eject tool, to eject the micro SD card slot on the other side.

  10. Aquaris M5 Vibration Unit Replacement: 10 단계, 이미지 1/3 Aquaris M5 Vibration Unit Replacement: 10 단계, 이미지 2/3 Aquaris M5 Vibration Unit Replacement: 10 단계, 이미지 3/3
    이 단계에 사용된 도구:
    Tweezers
    $4.99
    구매
    • Use tweezers to unplug the antenna cable in the bottom right of the mainboard.

    • Use a spudger to disconnect the two flex cables at the bottom of the mainboard.

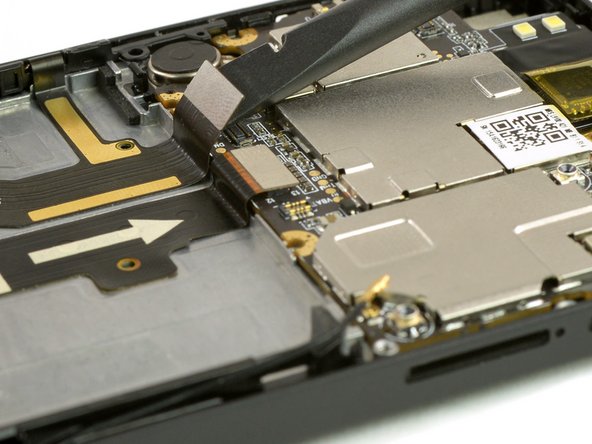
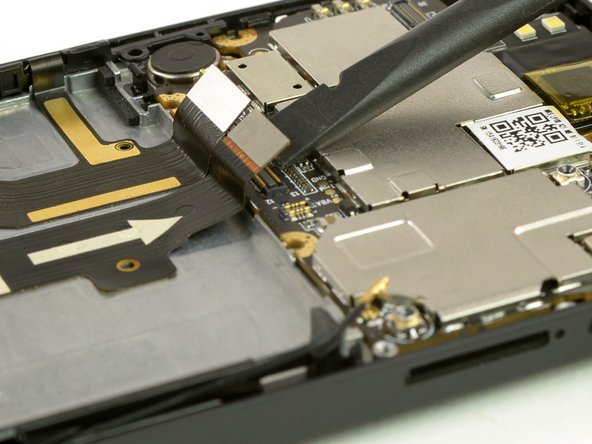
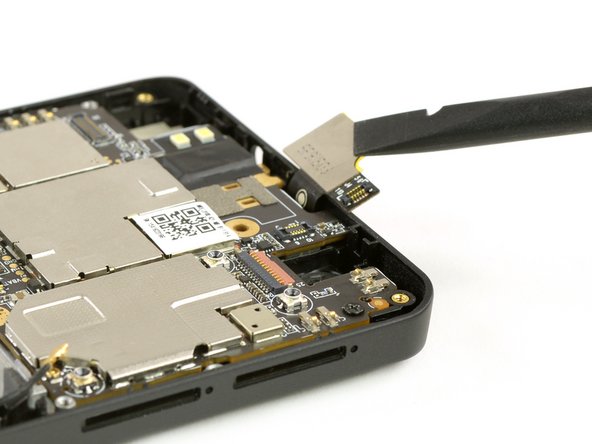
  11. Aquaris M5 Vibration Unit Replacement: 11 단계, 이미지 1/2 Aquaris M5 Vibration Unit Replacement: 11 단계, 이미지 2/2
    • Use the flat end of a spudger to disconnect the flex cable at the top of your the mainboard.

    • Bend the cable a bit over the edge, so it won't block the mainboard later, when you are taking it out.

  12. Aquaris M5 Vibration Unit Replacement: 12 단계, 이미지 1/1
    • Take out the 4mm Phillips #00 screw, holding the mainboard to the frame.

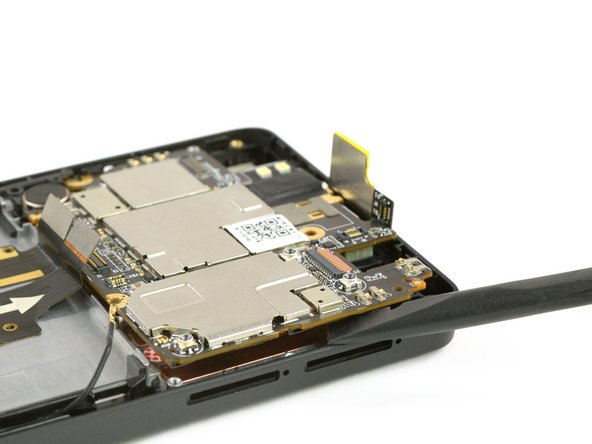
  13. Aquaris M5 Vibration Unit Replacement: 13 단계, 이미지 1/3 Aquaris M5 Vibration Unit Replacement: 13 단계, 이미지 2/3 Aquaris M5 Vibration Unit Replacement: 13 단계, 이미지 3/3
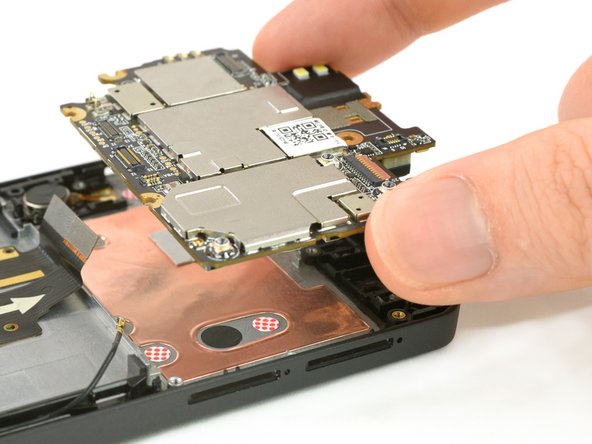
    • Insert the flat end of a spudger between the mainboard and the mid frame.

    • The best spot is on the right side next to the two SIM card slots.

    • Use the spudger to lever the mainboard.

    • Take the mainboard out of the phone.

  14. Aquaris M5 Vibration Unit Replacement, Vibration Unit: 14 단계, 이미지 1/2 Aquaris M5 Vibration Unit Replacement, Vibration Unit: 14 단계, 이미지 2/2
    이 단계에 사용된 도구:
    Tweezers
    $4.99
    구매
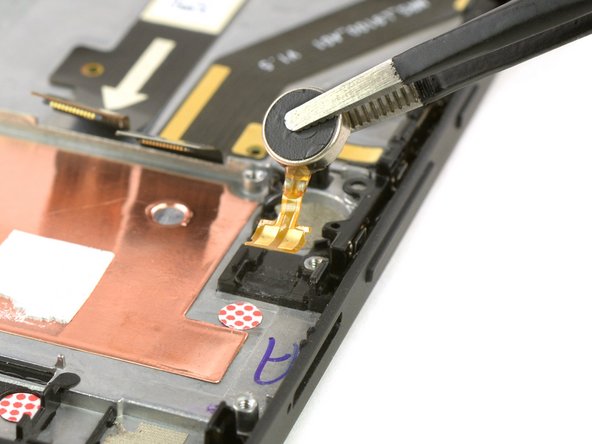
    • Insert the tip of a spudger underneath the vibration unit to loosen it from the adhesive.

    • Use tweezers to grab the vibration unit and take it out of the phone.

결론

To reassemble your device, follow these instructions in reverse order.

다른 2명이 해당 안내서를 완성하였습니다.

Theo Mat

회원 가입일: 11/12/17

12,790 평판

안내서 14개 작성하였습니다

댓글 0개

댓글 쓰기

조회 통계:

24 시간 전: 0

7일 전: 2

30일 전: 6

전체 시간: 328