주요 콘텐츠로 건너뛰기

Archos Jukebox Recorder 20 Hard Drive Replacement

필요한 것

  1. Archos Jukebox Recorder 20 Hard Drive  Replacement, Battery: 1 단계, 이미지 1/1
    • Remove the plastic cover over the batteries on both sides of the device.

  2. Archos Jukebox Recorder 20 Hard Drive  Replacement: 2 단계, 이미지 1/1
    • Remove the batteries (may require a plastic opening tool or spudger to pop the batteries out).

  3. Archos Jukebox Recorder 20 Hard Drive  Replacement, Hard Drive: 3 단계, 이미지 1/2 Archos Jukebox Recorder 20 Hard Drive  Replacement, Hard Drive: 3 단계, 이미지 2/2
    • Use the T10 Torx Screwdriver to remove the 2 torx screws on each side of the device.

    • Two on each side for a total of four.

  4. Archos Jukebox Recorder 20 Hard Drive  Replacement: 4 단계, 이미지 1/2 Archos Jukebox Recorder 20 Hard Drive  Replacement: 4 단계, 이미지 2/2
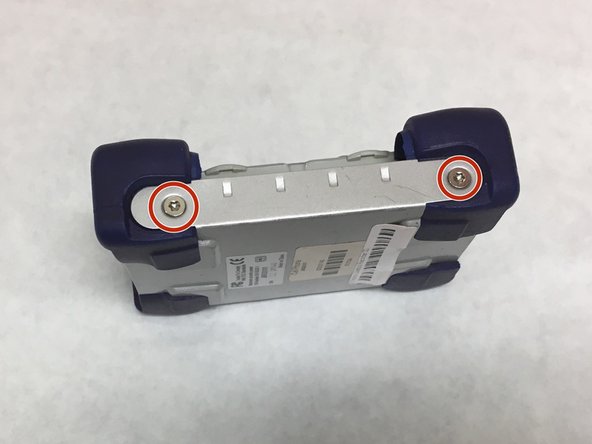
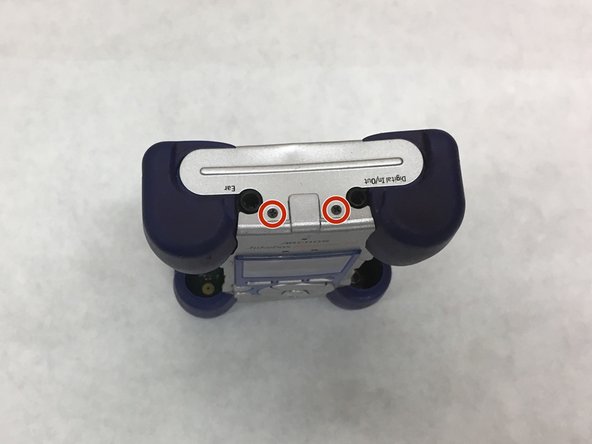
    • Remove the 2 screws on the top and the 2 screws on the bottom of the device using a Phillips #0 screwdriver.

  5. Archos Jukebox Recorder 20 Hard Drive  Replacement: 5 단계, 이미지 1/1
    • Remove the outer metal casing of the device by popping it off with a plastic opening tool.

  6. Archos Jukebox Recorder 20 Hard Drive  Replacement: 6 단계, 이미지 1/1
    • Remove the rubber bumpers on all four corners of the device.

  7. Archos Jukebox Recorder 20 Hard Drive  Replacement: 7 단계, 이미지 1/2 Archos Jukebox Recorder 20 Hard Drive  Replacement: 7 단계, 이미지 2/2
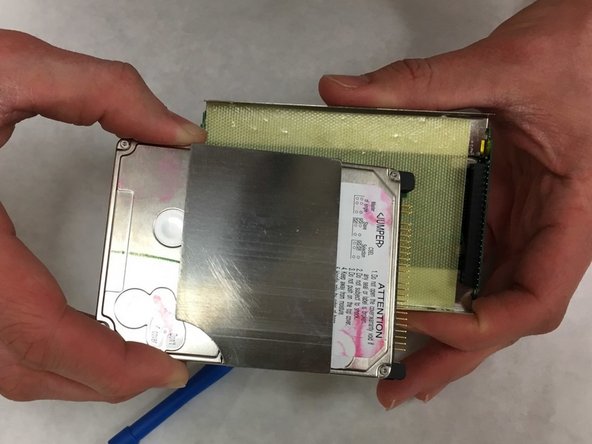
    • Lift the hard drive out of its casing with the help of a plastic opening tool and slide it out. This will disconnect the pins connecting the drive to the rest of the device.

결론

To reassemble your device, follow these instructions in reverse order.

다른 2명이 해당 안내서를 완성하였습니다.

Aidan Patterson

회원 가입일: 01/08/18

354 평판

안내서 2개 작성하였습니다

IUPUI, Team S1-G4, Freund Spring 2018 IUPUI, Team S1-G4, Freund Spring 2018 회원

IUPUI-FREUND-S18S1G4

3 회원들

안내서 2개 작성하였습니다

댓글 0개

댓글 쓰기

조회 통계:

24 시간 전: 3

7일 전: 8

30일 전: 20

전체 시간: 1,310