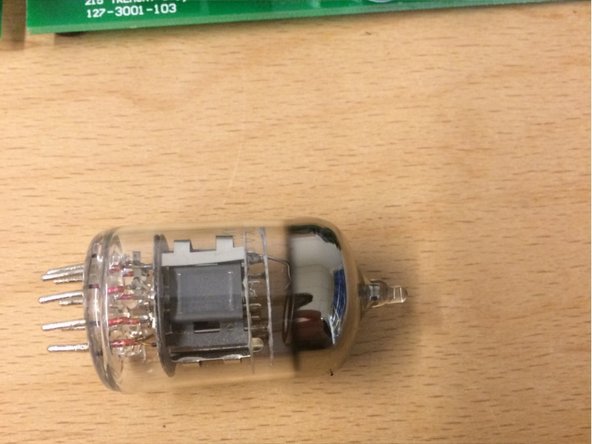
주요 콘텐츠로 건너뛰기

Art Tube MP AMP 12 AX7A Tube Replacement

필요한 것

  1. Art Tube MP AMP 12 AX7A Tube Replacement, 12 AX7A Tube: 1 단계, 이미지 1/2 Art Tube MP AMP 12 AX7A Tube Replacement, 12 AX7A Tube: 1 단계, 이미지 2/2
    • Loosen the 4 screws sideways the device, using a PH1

  2. Art Tube MP AMP 12 AX7A Tube Replacement: 2 단계, 이미지 1/3 Art Tube MP AMP 12 AX7A Tube Replacement: 2 단계, 이미지 2/3 Art Tube MP AMP 12 AX7A Tube Replacement: 2 단계, 이미지 3/3
    • Use the Smart Wrench to loosen the two In- and Output controllers. Attach the Smart Wrench below the controller.

    • Be careful not to damage the surface.

    • Now you can lift up the top of the device, and the mainboard appears.

  3. Art Tube MP AMP 12 AX7A Tube Replacement: 3 단계, 이미지 1/1
    • Use the Smart Wrench again to loosen the cinch ports on the backside.

    • Attention! Do not lose the washers located at the in- and outside. Two pieces each.

  4. Art Tube MP AMP 12 AX7A Tube Replacement: 4 단계, 이미지 1/3 Art Tube MP AMP 12 AX7A Tube Replacement: 4 단계, 이미지 2/3 Art Tube MP AMP 12 AX7A Tube Replacement: 4 단계, 이미지 3/3
    • Use the PH 1 to unscrew 2 screws on the motherboard.

    • Now you can take the board out completely

    • Attention: There are again 2 washers.

  5. Art Tube MP AMP 12 AX7A Tube Replacement: 5 단계, 이미지 1/3 Art Tube MP AMP 12 AX7A Tube Replacement: 5 단계, 이미지 2/3 Art Tube MP AMP 12 AX7A Tube Replacement: 5 단계, 이미지 3/3
    • Carefully bend the tube up to get a better view

    • Remove the tube with a cloth from the socket, a metal spudger can help

    • Insert the new tube

    • Use cloth so that no residues accumulate on the surface.

  6. Art Tube MP AMP 12 AX7A Tube Replacement: 6 단계, 이미지 1/3 Art Tube MP AMP 12 AX7A Tube Replacement: 6 단계, 이미지 2/3 Art Tube MP AMP 12 AX7A Tube Replacement: 6 단계, 이미지 3/3
    • Finally just reassemble all parts.

    • Be careful to tighten all the screws and ports, otherwise internal vibrations could cause damage to your device.

    • First put the cinch ports in to get the mainboard back in place.

결론

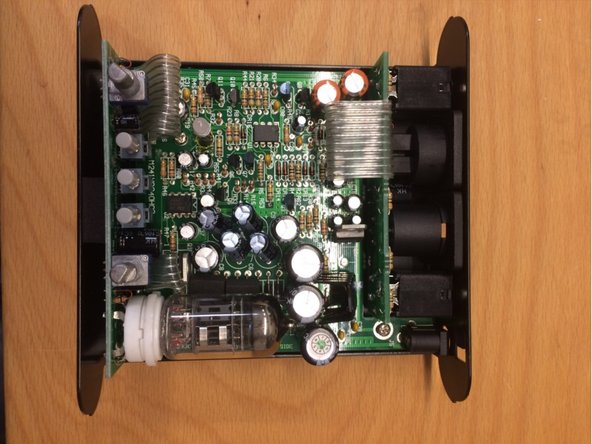
Congratulations you did it :)

다른 3명이 해당 안내서를 완성하였습니다.

다음 번역가들에게 특별히 감사 드립니다:

de en

100%

이 번역자 분들은 저희가 세상을 수리하는데 동참해 주시는 분입니다! 기여하시겠습니까?
번역 시작하기 ›

Alex Krug

회원 가입일: 12/23/16

38,185 평판

안내서 1개 작성함

댓글 3개

Only replace the fuse? Is that the only part that usually breaks?

Raoul B. - 답글

A tube replacement for this device is not necessarily meant for broken tubes. Most people do it for altering the sound. There is still a modification manual on the web for changing most of the parts like resistors, capacitors and ICs for higher quality.

Holger Klos - 답글

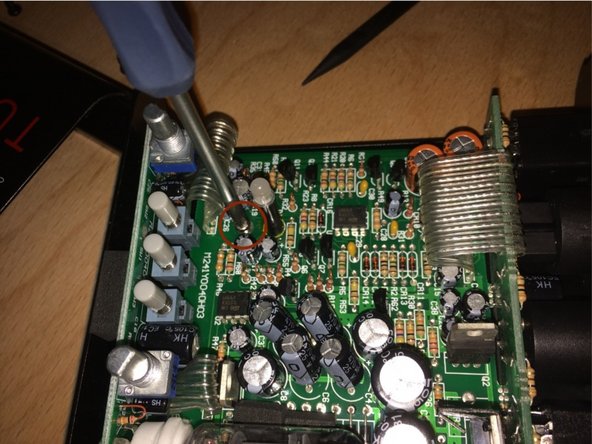
I didn’t find it necessary to remove the motherboard to replace the tube. The card where the tube socket is located is connected to the main board with two cables. That board may be lifted clear of the chassis just by extending those cables.

Greg Baker - 답글

댓글 쓰기

조회 통계:

24 시간 전: 1

7일 전: 13

30일 전: 47

전체 시간: 2,894